Affiliate Disclosure: If you buy something through some of the links on this post, you won’t pay any extra, but we’ll get a small commission. This helps us keep things running. Thanks for your support!
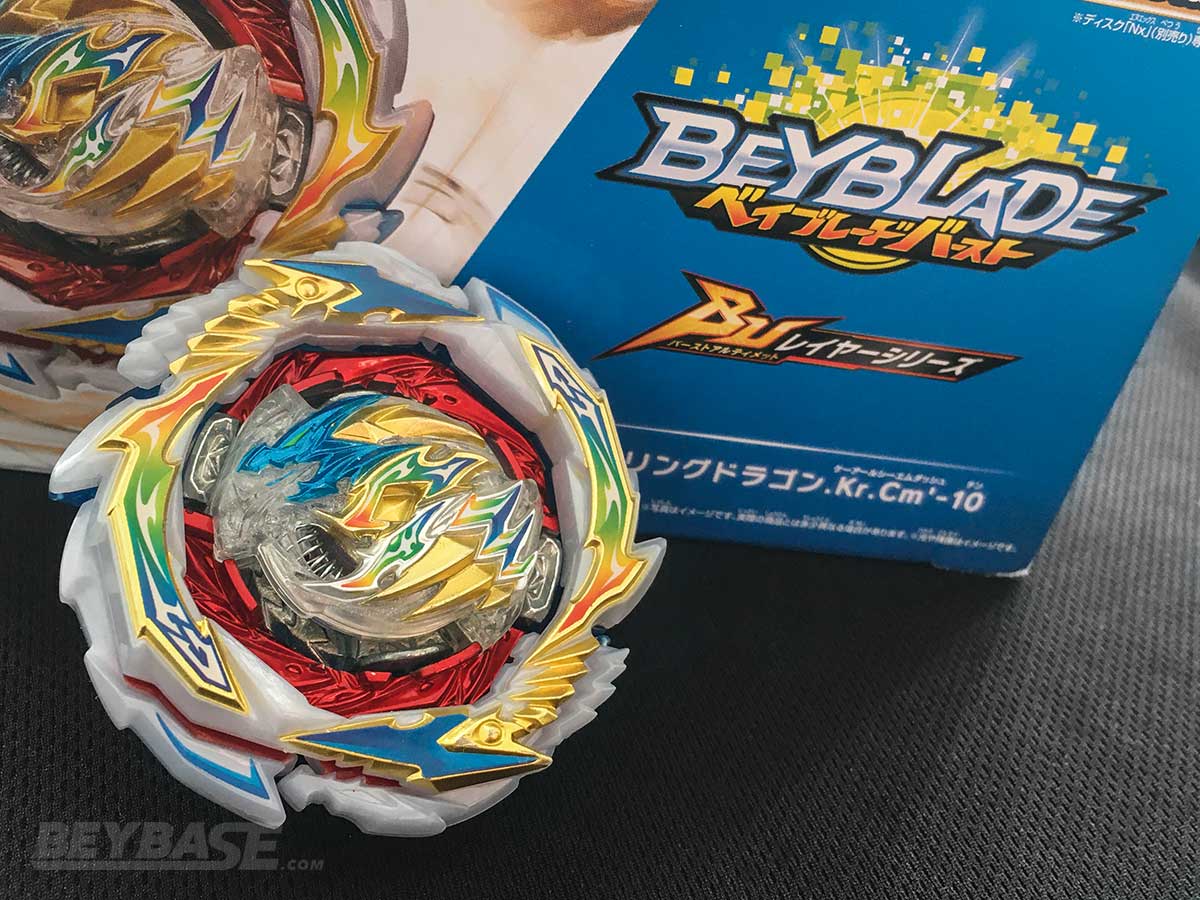
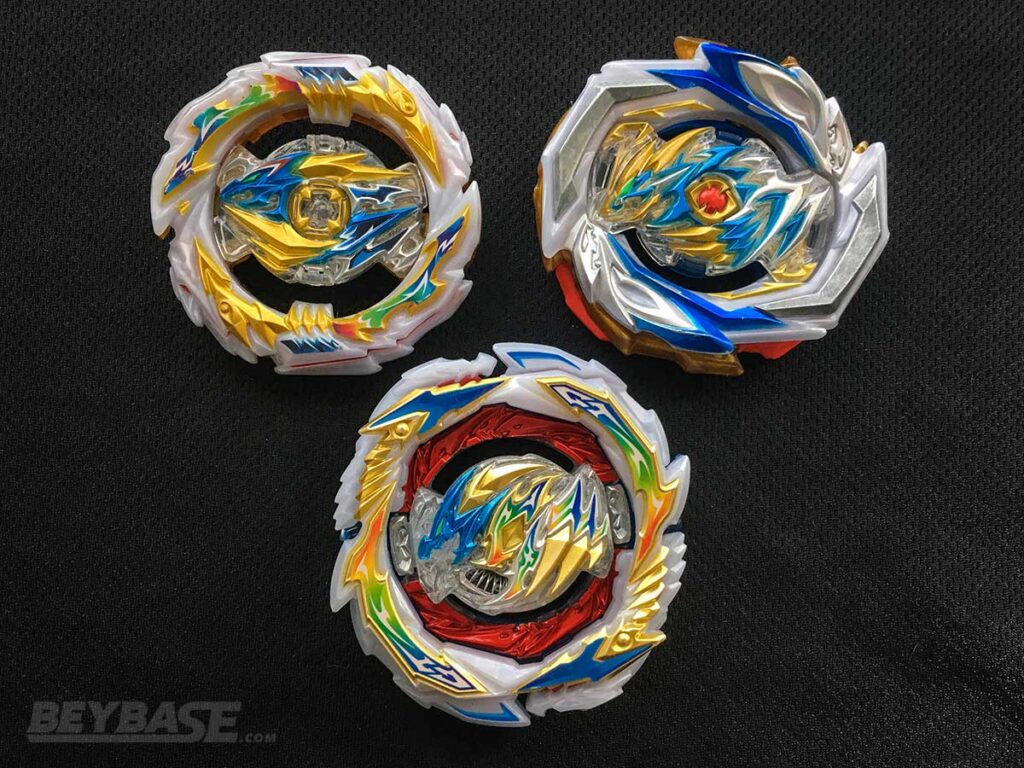
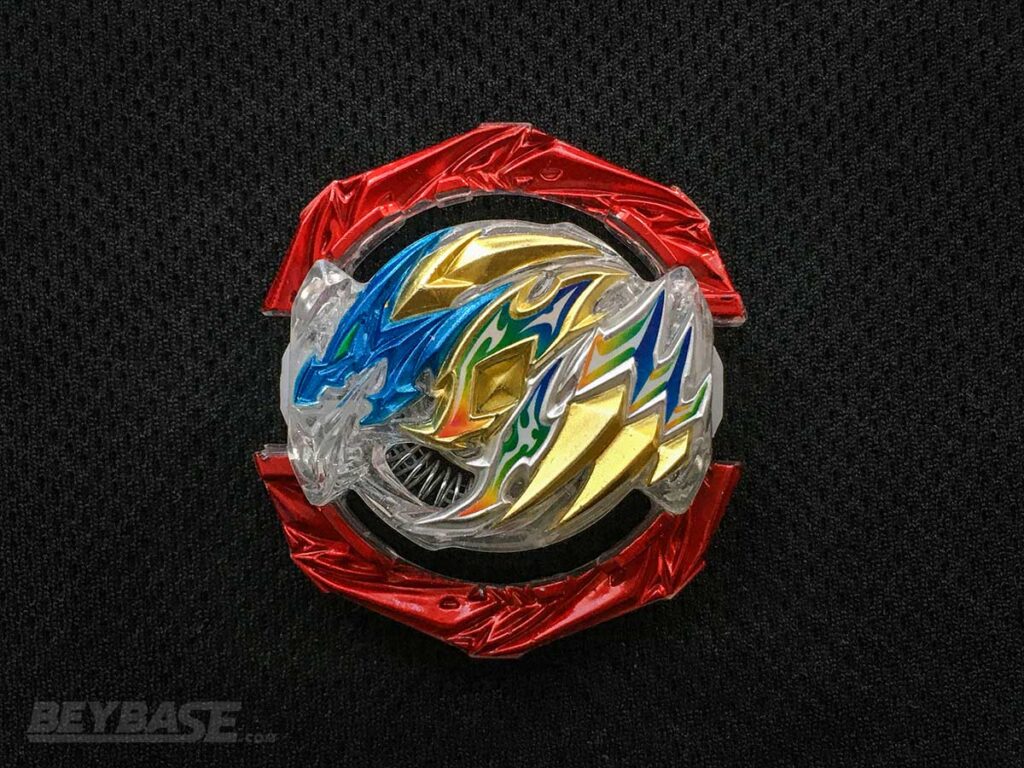
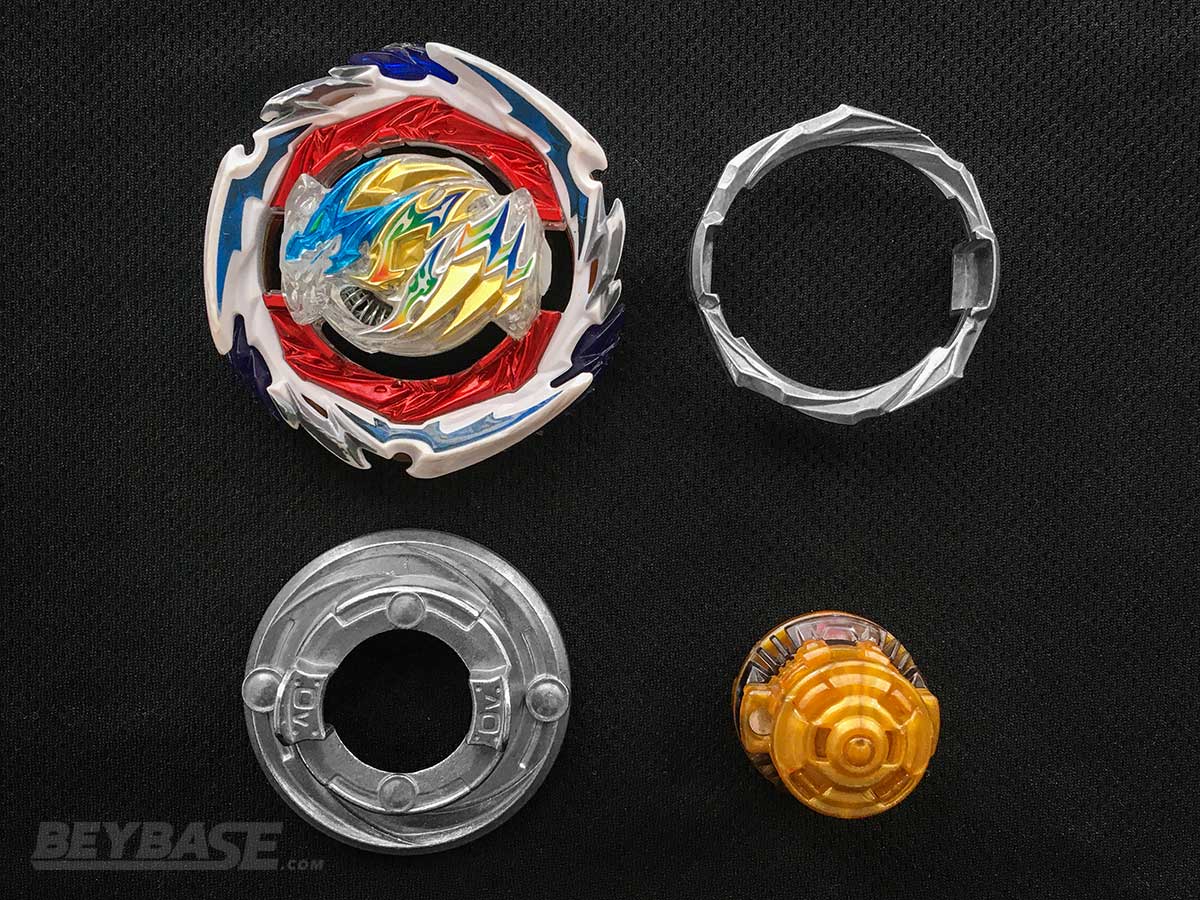
While Beyblade Burst Dynamite Battle proper didn’t include Dragon, Beyblade Burst BU has rectified this. Dragon has been brought back in the form of Gatling Dragon Karma Charge Metal’-10!
In this article, we review every major part of Gatling Dragon, letting you know what we think, where it fits in the competitive meta, and what combos you can make with each part.
The Dragon line is easily one of the most interesting and diverse in Burst, not marked by a clearly defined design style or niche, while also being a consistent line through GT and Sparking.
For those with some competitive knowledge the previous two releases, Imperial Dragon and Tempest Dragon were highly competitive Beyblades.
Our Imperial Dragon review was the first ever published on BeyBase and it highlighted the attack power of that Layer. The latter even saw some use in DB, being one of the few disadvantageous stamina matchups for the Vanish Blade. It was even named Tempest Solomon (MCC) Wheel Xtend+ 1S the third best Beyblade Burst combo of 2021 on our list published around the mid-point of that year after dominating the tournament scene since release in 2020.
Following two excellent Dragon releases back-to-back, and sharing a similar design as the top tier Tempest Ring, Gatling Dragon Karma Metal Charge’-10 has a lot to live up to.
Read on below to find out how its parts perform.
Product Details
- Brand: TAKARA-TOMY
- Product Code: B-199
- Product Contents:
- Gatling Dragon Karma Charge Metal’-10
- System: Dynamite Battle Layer System
- Series: Beyblade Burst – Burst Ultimate
Part Weights
- Gatling BU Blade: 16.11g
- Dragon DB Core: 7.77g
- Karma Disk (3 Star): 29.10g
- Charge Metal Dash Driver: 16.26g
- 10 Armor: 13.29g
Additional Notes:
- All matches in this article were done in the B-09 Burst Standard Stadium using two Bladers.
- All matches in this article saw the Gatling BU Blade set to Slash Mode at the beginning.
- The results of each match that ended with an outspin were ruled based on the WBO’s June 2022 spinning definition update.
- Stamina matches saw both combos switch out Discs and Drivers at the half-way point to account for Star discrepancy and Driver wear.
- This article was written in collaboration with WBO user Dan.
- Kerbeus DB Core benchmark testing done by Blader Kei with one blader.
- Finally, if you buy something through some of the links on this post, you won’t pay any extra, but I’ll get a small commission. This helps me keep things running. Thanks for your support!
Where to Buy B-199 Gatling Dragon Karma Charge Metal’-10

Heads up: If you buy something through some of the links on this post, you won’t pay any extra, but I’ll get a small commission. This helps me keep things running. Thanks for your support!
Gatling BU Blade Review
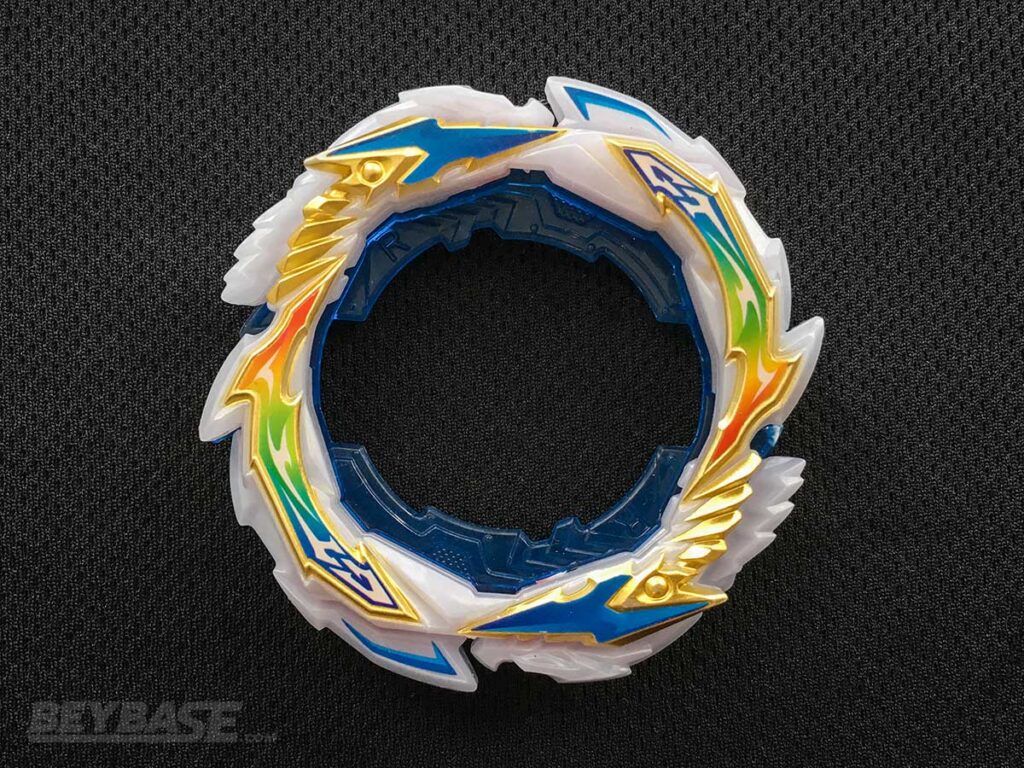
The Gatling BU Blade seems to take inspiration from both of its predecessors, Imperial Dragon and Tempest Dragon. From Imperial it inherits its size and shape in one of its modes, and from Tempest it inherits its overall design with weight primarily focussed around the perimeter as well as moving components.
Gatling BU Blade Modes
The Gatling BU Blade features two modes: Slash Mode and Continuous Slash Mode.
Slash Mode is the design that has a more circular look to it, with the dragon heads at either side of the blade in a downward position.
Continuous Slash Mode is the more elliptical shape that has the two dragon heads pointed outwards, along with two major contact points being free to move back and forth a little bit.
The mode change is spurred on by making contact with your opponent, and it should be noted that the official ruling upon release is that before every battle the locking mechanisms at both ends of the Blade that push the dragon heads up are meant to be reset before the next match begins.
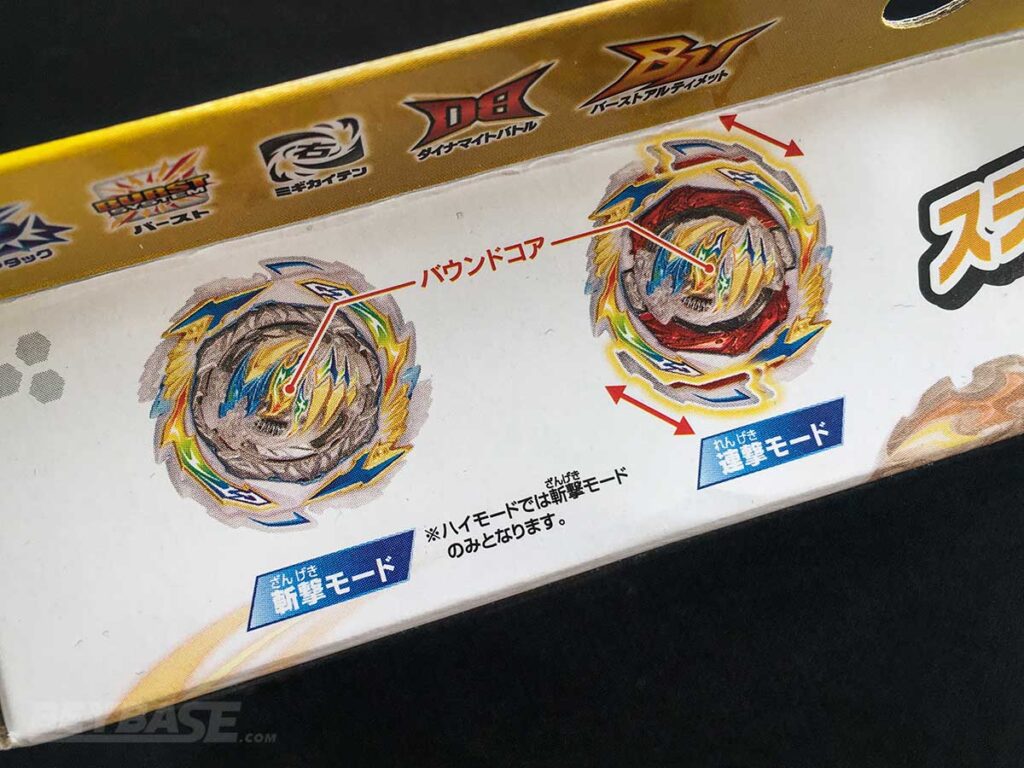
Essentially, you must always start the battle in Slash mode. In practice we found no serious difference between starting in Continuous Slash Mode over the manufacturer desired Slash Mode start.
Results did not vary greatly whether we started in one mode over the other in informal testing.
Is the Gatling BU Blade Good for Stamina Type Beyblades?
As previously mentioned, the Tempest Ring was notable for its incredible Stamina performance in the previous generation, so it makes sense for us to start there with Gatling BU Blade.
First we began with same-spin Stamina matches as these tend to be the most varied in the current meta, there are many different flavours of right-spin Stamina you could come across in a competitive setting.
We put Gatling BU Blade against in order of competitive viability, with Devil/Dynamite Blade of course at the top.
Gatling Perseus Over (2 Stars) High Xtend+’-10 vs. Devil Belial 2 Over (2 Stars) Bearing’-3
- GtπR.Ov.HXt+’-10 wins: 0 wins
- DBL2.Ov.Br’-3 wins: 5 wins (5 OS)
- Gatling Win Percentage: 0%
- Gatling set to Slash Mode before every match
We started off with Gatling from above on the High Xtend Plus Dash Driver to see if it would be able to destabilize Devil Blade on Bearing Driver, since that can be a serious weakness for this combo and the Bearing Driver in particular.
Gatling BU Blade tends to sit high compared to other DB and BU Blades, but unfortunately despite this technically advantageous setup against a Bearing-based combo, Gatling BU Blade was simply unable to win. After 5 heavily favoured matches for Devil Blade, we called it.
Gatling Perseus Over (2 Stars) Bearing-10 vs. Devil Belial 2 Over (2 Stars) Bearing-3
- GtπR.Ov.Br-10 wins: 0 wins
- DBL2.Ov.Br-3 wins: 5 wins (5 OS)
- Gatling Win Percentage: 0%
- Gatling set to Slash Mode before every match
After that display we tried to put the Gatling BU Blade at the same level as Devil Blade to see if this would make for a significant change in performance. Unfortunately this wasn’t the case, and Gatling BU Blade actually lost even more convincingly under these circumstances.
Gatling Perseus Over (2 Stars) Bearing-10 vs. Astral Belial 2 Over (2 Stars) Bearing-0
- GtπR.Ov.Br-10 wins: 4 wins (4 OS)
- ABL2.Ov.Br-3 wins: 6 wins (6 OS)
- Gatling Win Percentage: 40%
- Gatling set to Slash Mode before every match
Seeing as how the Gatling BU Blade could not compare to the Devil Blade in terms of same-spin stamina, we took things a bit easier on it and put it against the Astral Blade next. The Devil Blade is an incredible Blade for Stamina in general, so this isn’t unheard of.
In this matchup Gatling BU Blade performed much better. Despite what the results may lead you to believe, it could hold its own against Astral Blade in the same-spin. There was a slight edge in Astral’s favour, but this is mostly because it is a bit more compact and this is a considerably recoil-y matchup.
Astral Blade can take hits slightly better and destabilize the Gatling BU Blade, allowing it to spin just a bit longer in some instances, but this isn’t consistent, as you can see since Gatling BU Blade won almost half of the time.
Competing with the Astral Blade is a good sign, and points towards Gatling BU Blade being more “middle of the road” rather than “not good” at same-spin matchups.
Gatling Perseus Over (2 Stars) Bearing-10 vs. Prominence Valkyrie Over (2 Stars) Bearing-0
- GtπR.Ov.Br-10 wins: 5 wins (5 OS)
- PVL2.Ov.Br’-3 wins: 0 wins
- Gatling Win Percentage: 100%
- Gatling set to Slash Mode before every match
To be thorough, and confirm the above notion, we tested the Gatling BU Blade against Prominence, which has notoriously bad matchups in same-spin. Fortunately the Gatling BU Blade did really well here.
Because of its somewhat aggressive shape it was able to knock off Prominence Blade’s Armor quite early, and while this did sometimes lead to Prominence Blade being able to get under Gatling BU Blade, it was not nearly enough to take it down and secure victory.
Overall it seems that the Gatling BU Blade has mediocre same-spin Stamina, beating the likes of Prominence Blade and faring well against Astral Blade, but it has no hope against Devil/Dynamite Blade.
For good measure we did one setup of opposite spin to see how well Gatling BU Blade does when facing an opponent in the opposite direction:
Gatling Perseus Over (2 Stars) Bearing-10 vs. Vanish (A4 Mold) Longinus Over (2 Stars) Bearing-0
- GtπR.Ov.Br-10 wins: 3 wins (3 OS)
- VL.Ov.Br’-3 wins: 3 wins (3 OS)
- Gatling Win Percentage: 50%
- 4 Draws
- Gatling set to Slash Mode before every match
Gatling BU Blade did quite well in our opinion. The scoreline is 50-50, but you must also consider that even with the newly enacted WBO spinning definition clarification we saw 4 draws – where both combos stopped moving entirely at the same time.
The Gatling BU Blade seems to make for a competent opposite-spin Blade, likely due to having such a huge size and OWD in a matchup where it can equalize spin until the very end and keep its disk-like shape spinning on and on.
Unfortunately these fairly good results are hampered by the fact that its same-spin is really more middling.
How Is the Gatling BU Blade for Attack Type Beyblade Combos?
Since the Gatling BU Blade didn’t completely sell us on pure Stamina usage, we tried putting it in the exact opposite situation: becoming an attacker. Because of its sheer weight and size, we think the Gatling BU Blade is afforded the luxury of being able to alternate between the two typings better than most other Blades.
Gatling BU Blade Attack Type Testing
Gatling Perseus Nexus (S Gear) Xtreme’-10 vs. Vanish (A4 Mold) Longinus Giga High Xtend+’-0
- GtπR.Nx(S).X’-10 wins: 6 wins (6 KO)
- VBH.Ov.Br-3 wins: 4 wins (3 OS)
- Gatling Win Percentage: 60%
- Shadow X’ Driver Worn
- Gatling set to Slash Mode before every match
Putting it up against the traditional giant of DB’s defensive Blades, Vanish Blade, led to very interesting results. As it turns out, the Gatling BU Blade loves to make quick work of Vanish Blade – not an easy feat.
The battle was usually done within the first two hits, as the longer it went on the less steam Gatling BU Blade had to deliver finishing blows. We also tested it without the use of Nexus (S Gear) out of curiosity:
Gatling Perseus Over Xtreme’-10 vs. Vanish (A4 Mold) Longinus Giga High Xtend+’-0
- GtπR.Ov.X’-10 wins: 7 wins (7 KO)
- VBH.Ov.Br-3 wins: 3 wins (3 OS)
- Gatling Win Percentage: 70%
- Shadow X’ Driver Worn
- Gatling set to Slash Mode before every match
Results were essentially the same. Gatling BU Blade just seems to do well against the Vanish Blade, pushing it around easily and landing decisive blows in the first two hits.
Besting Vanish Blade is not a minor accomplishment, it is a Blade that has led to the death of previous generations’ Attack types options – and the near irrelevance of the Rage SK Ring.
After this we tested it against same-spin Stamina combos:
Gatling Perseus Over Xtreme’-10 vs. Devil (F Gear, L Gear) Belial 2 (Red) Over (2 Stars) High Xtend+’-3
- GtπR.Ov.X’-10 wins: 3 wins (3 KO)
- DBL2.Ov.HXt+’-3 wins: 7 wins (7 OS)
- Gatling Win Percentage: 30%
- Shadow X’ Driver Worn
- Gatling set to Slash Mode before every match
This was really awful, plain and simple. Gatling BU Blade could not bully Devil Blade nearly enough. Its low-recoil shape made it near impossible for Gatling BU Blade to produce consistent knock-outs, even with Devil Blade on High Xtend Plus Dash.
Gatling Perseus Over Xtreme’-10 vs. Devil (F Gear, L Gear) Belial 2 (Red) Over (2 Stars) Bearing’-3
- GtπR.Ov.X’-10 wins: 3 wins (3 KO)
- DBL2.Ov.Br’-3 wins: 7 wins (7 OS)
- Gatling Win Percentage: 30%
- Shadow X’ Driver Worn
- Gatling set to Slash Mode before every match
The same was true for Devil on Bearing Dash. Gatling BU Blade could not hope to best Devil Blade with any consistency. Unfortunately, for all its gusto against Vanish Blade, Gatling BU Blade once again doesn’t perform in same-spin.
Is the Gatling BU Blade Good for Defense Type Beyblades?
Because of its incredible weight and size, it is only natural we check Gatling BU Blade’s defensive prowess. While it may be recoil-prone, it is a 16 gram BU Blade with noticeable OWD, which are two qualities to take seriously.
We tried it on the classic Zone’+Z Driver (Takara) setup that gives Attack types such a headache on the Vanish Blade to see if Gatling BU Blade could reproduce.
Gatling Perseus Over Zone’+Z’-10 vs. Rage Diabolos Xtreme’ 3A
- GtπR.Ov.Zn’+Z-10 wins: 13 wins (10 KO, 3 OS)
- RDb.X’.3A wins: 7 wins (7 KO)
- Gatling Win Percentage: 65%
- Worn Zone’, Shadow X’ Worn
- Gatling set to Slash Mode before every match
Against Rage Ring the Gatling BU Blade’s weight was simply too much to handle. While Rage Ring was able to defeat Gatling BU Blade a few times, it was an uphill battle.
Unfortunately for Gatling BU Blade, the Rage Ring is far from our only Attack option now. Against Guilty Blade we got the following results:
Gatling Perseus Over Zone’+Z’-10 vs. Guilty Longinus Giga Xtreme’-2
- GtBL2.Ov.Zn’+Z-10 wins: 3 wins (2 OS, 1 KO)
- GLN.Gg.X’-2 wins: 7 wins (7 KO)
- Gatling Win Percentage: 30%
- Worn Zone’, Shadow X’ Worn
- Gatling set to Slash Mode before every match
It was almost no contest, Guilty Blade was freely able to knock Gatling BU Blade around.
Because of the general weight of DB Blades the Zone’+Z Driver is a bit of a sitting duck.
With that in mind we completely skipped right-spin Defense testing on Zone’+Z and went with something a bit more Gatling BU Blade’s speed in hopes of something more promising.
From the Mobius Driver to the Universe Driver and Metal Destroy Driver, we did indeed come up with something we found worked best against Attack types combos. We’ll discuss it in the next section.
Is the Gatling BU Blade Good on Aggressive Plastic Drivers?
If you’ve been around for the GT era, or have played the new Burst GT Format, you’ll know that Imperial Layer Base is an absolute menace on plastic tips like Destroy Dash Driver (in fact, Imperial on Destroy’ was the recommended combo in our Imperial Dragon review). It can beat things into submission. We wanted to see if Gatling could do the same.
While Gatling BU Blade didn’t perform nearly as well on Metal Destroy (or many other Drivers) in informal testing, unable to knock around same-spin Stamina opponents or outlast opposite spin Stamina opponents, the Rise Driver gives it the necessary speed and LAD to at least make combatting other attack types an option.
Here is our testing on Gatling BU Blade as a dedicated anti-Attack oriented tornado staller on the Rise Driver:
Gatling Belial 2 (Red) Over Rise-10 vs. Guilty Longinus Giga Xtreme’-2
- GtBL2.Ov.Rs-10 wins: 10 wins (8 KO, 2 OS)
- GLN.Gg.X’-2 wins: 9 wins (9 KO)
- Gatling Win Percentage: 53%
- Awakened Rise, Shadow X’ Worn
- 1 Draw
- Gatling set to Slash Mode before every match
With Gatling BU Blade circling the stadium’s tornado ridge there is little hope for Guilty Blade to merely flower pattern itself out of problems like it normally would. Instead, this battle comes down to which combo can stall and propel the other one into a pocket.
Gatling BU Blade has an advantage not many other blades have: incredible weight. Guilty Blade is used to throwing Blades around like ragdolls, but at high speeds it has a harder time pulling that off against Gatling BU Blade. They’re in the same weight class.
If you compare these results on Rise Driver to Zone’+Z Driver, it is like night and day. Gatling BU blade can legitimately hold its own, and Guilty Blade does not have a free victory on its hands.
Because Gatling BU Blade is on the Rise Driver it also means that more often than not it will be able to outspin Guilty Blade on Xtreme Dash if neither gets knocked out.
Outspin victory isn’t a sure-fire result since the matchup is volatile and the Guilty Blade can deplete Gatling BU Blade’s spin with enough hits, but it is definitely in Gatling BU Blade’s favour.
Gatling Belial 2 (Red) Over Rise-10 vs. Ultimate Perseus Nexus (S Gear) Xtreme’-9
- GtBL2.Ov.Rs-10 wins: 15 wins (11 KO, 4 OS)
- UπR.Nx(S).X’-9 wins: 5 wins (5 KO)
- Gatling Win Percentage: 75%
- Awakened Rise, Shadow X’ Worn
- Gatling set to Slash Mode before every match
Against the Ultimate Blade, Gatling BU Blade proved to be a bit too much. Gatling BU Blade was very much able to bully Ultimate Blade out of the stadium or outright out-spin it without any worry.
Ultimate Blade does have a shot at victory, as it did win a few times, but it is definitely a tough spot to be in as the Attacker here.
Gatling Belial 2 (Red) Over Rise-10 vs. Savior Belial 2 (Black) Giga Xtreme’-7
- GtBL2.Ov.Rs-10 wins: 11 wins (9 KO, 2 OS)
- SBL2.Gg.X’-7 wins: 8 wins (8 KO)
- Gatling Win Percentage: 58%
- Awakened Rise, Shadow X’ Worn
- 1 Draw
- Gatling set to Slash Mode before every match
Surely to come as a surprise to some, the Savior Blade still has some key advantages over the Ultimate Blade! One such advantage is its incredibly high Smash Attack and all-or-nothing style.
While the Gatling BU Blade certainly has the advantage in this scenario, we seriously had to watch out for very late-game knock-outs coming from Savior Blade.
A not so insignificant amount of Savior Blade’s wins came not from the ridge stalling ending in its favour, but actually towards the center of the stadium when both combos were winding down.
It was able to land incredibly powerful blows that could send Gatling BU Blade into the pocket from far away, even at low RPM.
In the end this is still favoured towards Gatling BU Blade, but this is also something to consider in the matchup. Don’t think it’s in the bag because neither combo was knocked out while riding the ridge together and you’re both at the center.
The Verdict
Gatling BU Blade does quite well in opposite-spin and on aggressive anti-attack oriented combos, but has average same-spin stamina and poor raw defense.
Best Gatling BU Blade Combo: Gatling Belial 2 Over Rise-0
How to build GtBL2.Ov.Rs-0
-
Gatling BU Blade
-
Belial 2 DB Core (1 of the following)
- B-191 Overdrive Special Starter Set – Dangerous Belial Almight-2
- B-197 Divine Belial Nexus Adventure-3
-
Over Disk (1 of the following)
-
Rise Driver (1 of the following)
- B-139 Wizard Fafnir Ratchet Rise Sen
- B-173 Random Booster Vol. 22 04: Ace Dragon Wheel Rise Gen
- B-181 Random Booster Vol. 25 02: Cyclone Ragnaruk Nexus Rise-2
-
0 Armor (1 of the following)
- B-188 Astral Spriggan Customize Set – Astral Spriggan Over Quattro-0
- B-195 Prominence Valkyrie Over Atomic Dash-0
Champions aren’t born overnight. In my latest article, I break down how my pursuit of knowledge, adaptability, and reproducibility compounded into victory at a 256-player G2 tournament.
Sponsored: Order the newest Beyblades at malloftoys.com!
Heads up: If you buy something through Mall of Toys, you won’t pay any extra, but I’ll get a small commission. This helps me keep things running. Thanks for your support!
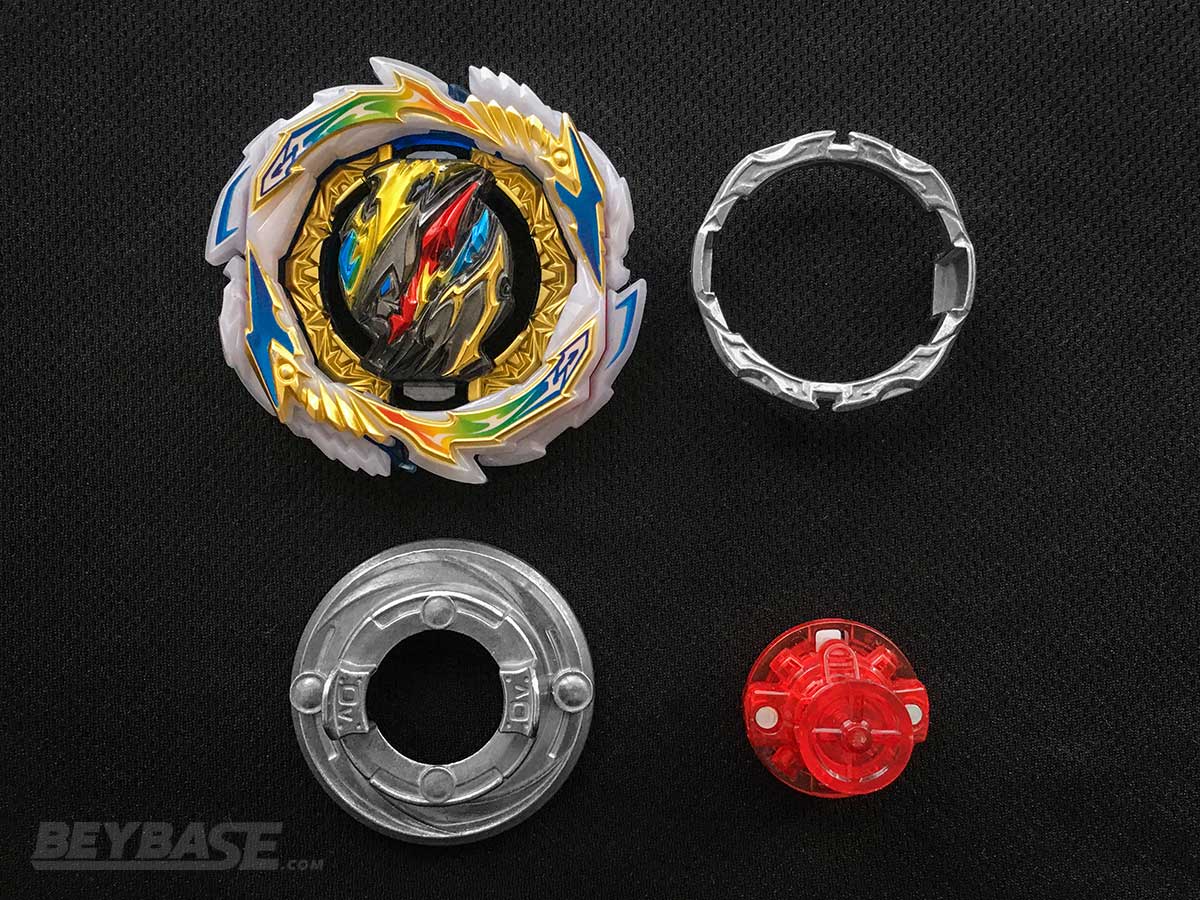
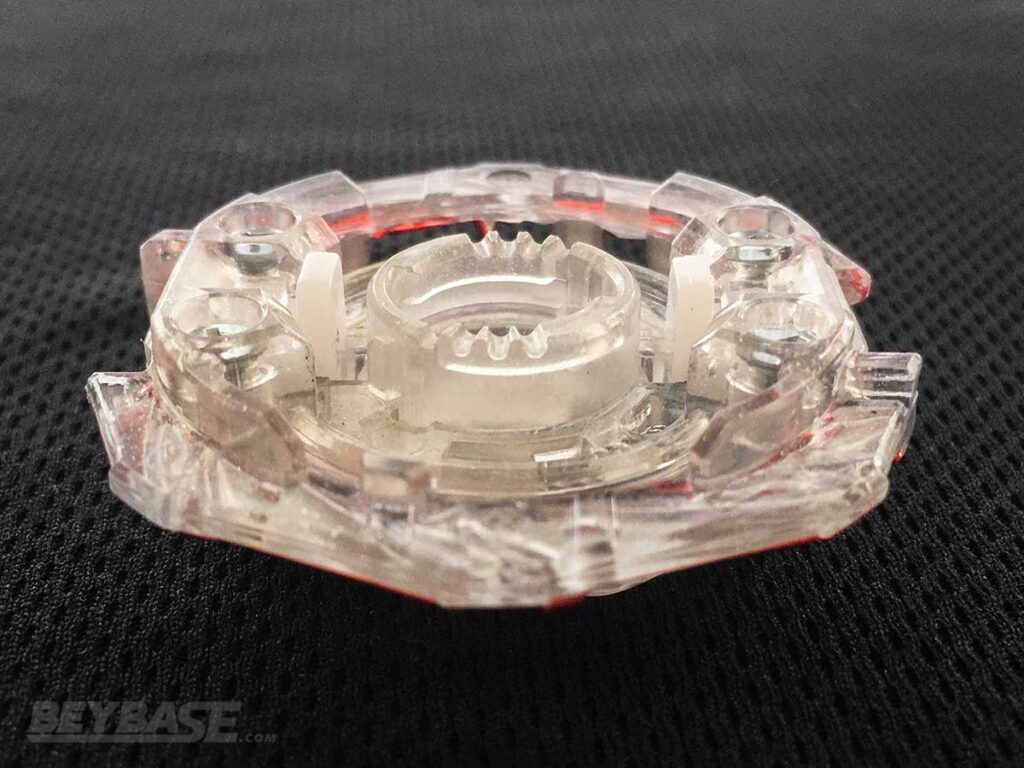
Dragon DB Core Review
Next up is the Dragon DB Core. This Core depicts the blue and yellow Dragon we have come to expect from the line, and features three middling teeth of equal size. Its weight is nearing the 8g mark, which is something we have come to expect from the average DB Core now.
How Is B-199’s Dragon DB Core Different From Others?
Unlike many other DB Cores, though, Dragon DB Core brings back the built-in spring and bound gimmick seen in the original Valkyrie DB Core! Separating itself even further, this time it features an extra tooth (3 teeth versus Valkyrie DB Core’s 2) as well as a noticeably tighter spring.
You may be aware that the original release of the Valkyrie DB Core (B-187 Savior Valkyrie Shot-7) had a weaker spring than later re-releases like B-194 RB Vol. 27’s Dynamite Valkyrie Over Just-6 or B-195’s Prominence Valkyrie Over Atomic Dash-0.
The Dragon DB Core features a slightly tighter spring mechanism than even B-194 and B-195’s Valkyrie DB Core. This makes it the tightest spring gimmick DB Core thus far.
Is the Dragon DB Core Good for Same Spin Stamina?
If you recall, before the release of the likes of Belial 2 it was often noted that the most optimal DB Core for right-spin Stamina combos was the Valkyrie 1 DB Core.
This of course changed drastically when Belial 2 DB Core provided comparable or superior Stamina to Valkyrie 1 DB Core while also being incredibly resilient in terms of Burst Resistance thanks to its extending Burst Stopper. We discovered this during our DB Core stamina tests conducted for our Prominence Phoenix review.
The latter was only made more important and reliable with the re-release of Belial 2 DB Core in B-197’s Divine Belial Adventure-3. The B-197 version of Belial 2 DB Core features a much tighter Burst Stopper, doubling down on Burst Resistance.
With that in mind, could it be possible that the bound gimmick makes its return to the forefront of right-spin Stamina in the form of the Dragon DB Core? Here is our testing:
Devil (F Gear) Dragon Over (2 Stars) Revolve-3 vs. Devil (F Gear) Valkyrie Over (2 Stars) Revolve-3
- D(F)DR.Ov.R-3 wins: 10 wins (10 OS)
- D(F)VL.Ov.R-3 wins: 0 wins (0 OS)
- Dragon Win Percentage: 100%
- Parts switched at half-way point
Compared to Valkyrie 1 DB Core, the Dragon DB Core stood out. It remained incredibly stable where Valkyrie 1 DB Core would falter, lose balance sooner, and inevitably lose.
We did much more testing informally to confirm it wasn’t a result of part variation later on. Dragon DB Core comes out on top without fail for us.
Devil (F Gear) Dragon Over (2 Stars) Revolve-3 vs. Devil (F Gear) Belial 2 (Red) Over (2 Stars) Revolve-3
- D(F)DR.Ov.R-3 wins: 10 wins (7 OS)
- D(F)BL2.Ov.R-3 wins: 0 wins (3 OS)
- Dragon Win Percentage: 100%
At this point we started the switch between Dynamite and Devil informally to try and see if there were any minute differences at play, and still the results still held up – we then went back to verify the Valkyrie 1 DB Core results too. The Dragon DB Core somehow has the ability to remain stable and upright for longer against Belial 2 DB Core as well.
It should be noted that the battle against Belial 2 DB Core tended to be a lot closer than with Valkyrie DB Core, which really didn’t seem to hold a candle to Dragon DB Core right at the end.
In matches against the red Belial 2 DB Core it didn’t feel like as much of a wash-out because the matches came down to the wire a bit more frequently, but it cannot be ignored that the Dragon DB Core simply performs best.
Lastly we have testing against the Kerbeus DB Core, and while it tended to perform worse than the Belial 2 DB Core in our testing of it in the B-198 Chain Kerbeus Review, we thought it would be worthwhile to be complete in our benchmarking of the Dragon DB Core.
Dynamite (F Gear) Dragon Giga Revolve-3 vs. Dynamite (F Gear) Kerbeus (Green) Giga Revolve-3
- DDR.Gg.R-3: 8 wins (8 OS)
- DKB.Gg.R-3: 2 wins (2 OS)
- Dragon Win Percentage: 80%
It should be noted that these tests may make it seem like the Kerbeus DB Core performs better than the Belial 2 DB Core, but they were done under different conditions with different parts.
What we can gather from this information, just like the rest that is compiled here, is that in general you can expect the Dragon DB Core to perform quite well against all other right-spin DB Cores, with the level of its advantage varying depending on part wear, combo composition, and individual part discrepancies.
This leaves you with a very interesting question, very much similar to the situation among left-spin DB Cores: do you go for raw Stamina (Dragon/Longinus DB Core) or added Burst Resistance (Belial 2/Bahamut DB Core)?
Competitive Bladers will always seek to change DB Cores out depending on the opponent and combos they expect to face.
The Verdict
Dragon DB Core is a top-tier right-spin stamina DB Core that should be used in scenarios where Burst risk is low.
Best Dragon DB Core Combo: Dynamite (F Gear) Dragon Over High Xtend+’-3
How to build D(F)DR.Ov.HXt+’-3
-
Dynamite Blade (1 of the following)
- B-180 Dynamite Belial Nexus Venture-2
- B-194 Random Booster Vol. 27 02: Dynamite Valkyrie Over Just-6
- B-198 Random Booster Vol. 29 04: Dynamite Kerbeus Legacy Moment-9
-
F Gear (1 of the following)
-
Dragon DB Core
-
Over Disk (1 of the following)
-
High Xtend+’ Driver
-
3 Armor
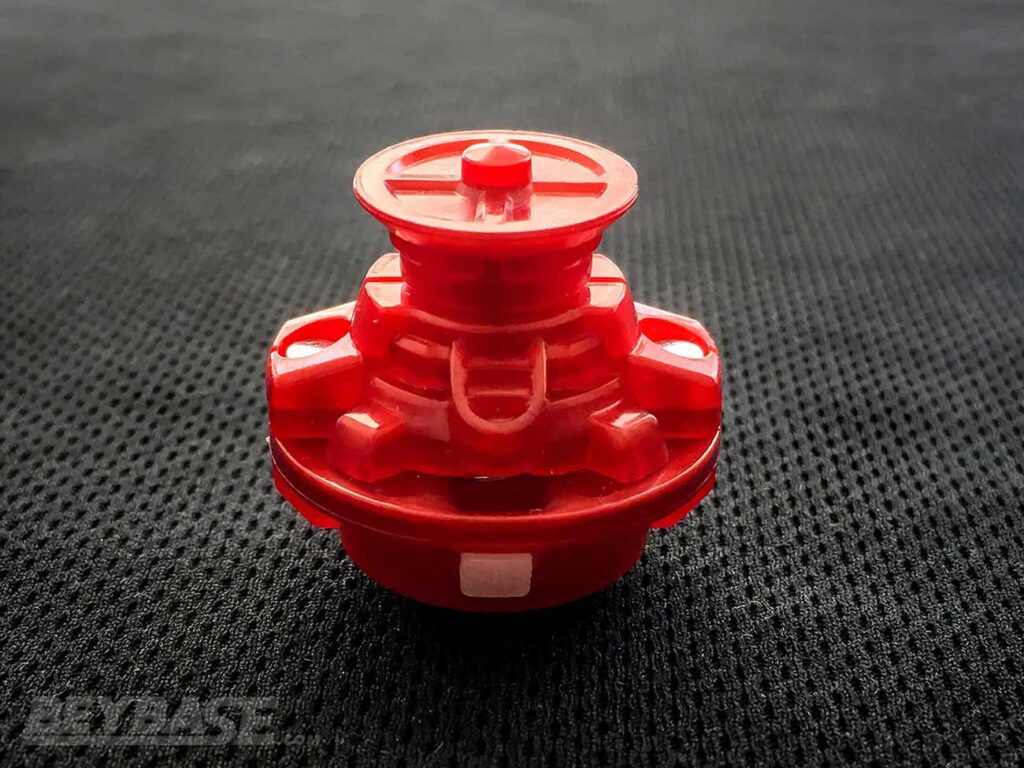
Charge Metal Dash Driver Review

The penultimate “new” part from B-199 is the Charge Metal Dash Driver. Unsurprisingly the latest Dragon features a variation of the Charge Driver. Charge Metal Dash Driver has increased burst resistance thanks to the gold spring we have grown accustomed to on Dash Drivers.
The Charge Metal Dash Driver is one of the heavier Driver options that exist, weighing roughly 16 grams on its own. It features a thin metal Hole Flat tip with a wide base just above it that can lend itself to some amount of prowess in opposite-spin matchups.
The reality is that the Charge Metal Dash Driver lacks the speed to be useful for most Attack Beyblades and it lacks sufficient raw stamina or opposite-spin capabilities to be used as a pure Stamina type Driver.
Having said that, Charge Metal Dash Driver can complement the Guilty Blade quite well.
Because it is highly controllable yet can pattern aggressively, it is possible to launch the Guilty combo fairly hard without fear of self-knockout and getting the required momentum to produce large hits. In this sense, it’s similar to the High Charge Dash Driver we paired with Rage in our B-196 review.
Charge Metal’ Driver Attack Type Testing
To highlight this we have done a few tests to show how feasible it is to use the Charge Metal Dash Driver:
Guilty Longinus Over (1 Star) Charge Metal’-2 vs. Vanish Bahamut Over (2 Stars) Bearing’-3
- GLN.Ov.CM’-2 wins: 7 wins (5 KO, 2 OS)
- VBH.Ov.Br’-3 wins: 3 wins (3 OS)
- Charge Metal Dash Win Percentage: 70%
For this set of tests we launched in an aggressive flower pattern resulting in many knockouts. But this isn’t the only way for you to succeed with Guilty Blade on Charge Metal Dash against Vanish Blade.
Next we tried to tornado stall, and we were quite surprised with how effective this was despite putting no effort in to try and make any early contact:
Guilty Longinus Over (2 Stars) Charge Metal’-2 vs. Vanish Bahamut Over (2 Stars) Bearing’-3
- GLN.Ov.CM’-2 wins: 5 wins (3 OS, 2KO)
- VBH.Ov.Br’-3 wins: 5 wins
- Charge Metal Dash Win Percentage: 50%
The Guilty Blade made up for Charge Metal Dash’s inferior stamina by beating the life out of what stamina remained in the Vanish Blade combo and narrowly winning quite often, and in some cases scoring very late-game knockouts through sheer Smash Attack power.
This goes to show how seemingly unusual combos can create just as unusual results even without much effort.
Charge Metal Dash isn’t without faults, though. You cannot simply tornado stall and win every matchup, for example:
Guilty Longinus Over (2 Stars) Charge Metal’-2 vs. Devil Belial 2 (Red) Over (2 Stars) Bearing’-3
- GLN.Ov.CM’-2 wins: 0 wins
- DBL2.Ov.Br’-3 wins: 10 wins (10 OS)
- Charge Metal Dash Win Percentage: 0%
In this matchup Charge Metal Dash cannot outlast Bearing Dash in opposite spin as it can equalize for longer. Bearing Dash takes the win consistently under these circumstances.
We also wanted to see what happens when you launch aggressively and with precision, though, because the Guilty Blade is known for throwing things out of the stadium provided it has enough speed.
Guilty Longinus Over (2 Stars) Charge Metal’-2 vs. Devil Belial 2 (Red) Over (2 Stars) Bearing’-3
- GLN.Ov.CM’-2 wins: 6 wins (6 KO)
- DBL2.Ov.Br’-3 wins: 4 wins (4 OS)
- Charge Metal Dash Win Percentage: 60%
Here we see that Guilty Blade on Charge Metal Dash isn’t completely hopeless in opposite spin, provided you launch correctly are able to secure knockouts.
While this is easier said than done on Charge Metal Dash, especially compared to using a typical choice like the Xtreme Dash Driver, it is more than possible!
The Verdict
The Charge Metal Dash Driver has its place in niche attack combos, despite lacking meaningful endurance for same-spin matchups and LAD for opposite-spin matchups.
Sponsored: Order the newest Beyblades at malloftoys.com!
Heads up: If you buy something through Mall of Toys, you won’t pay any extra, but I’ll get a small commission. This helps me keep things running. Thanks for your support!
D-Gear Accessory Review
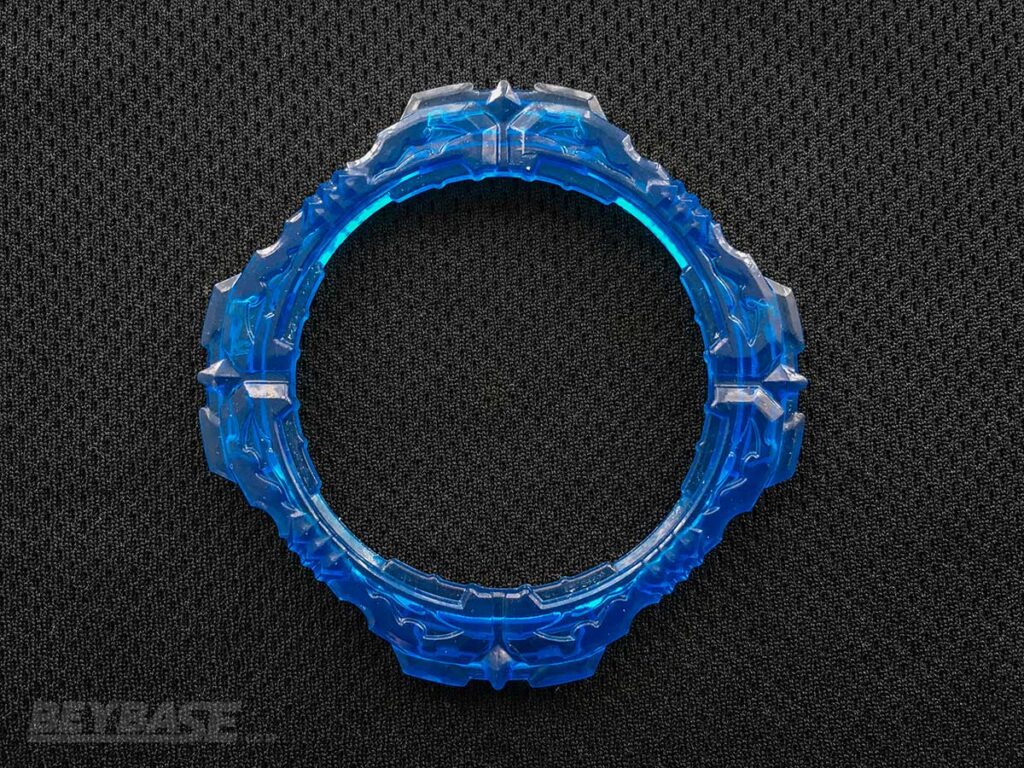
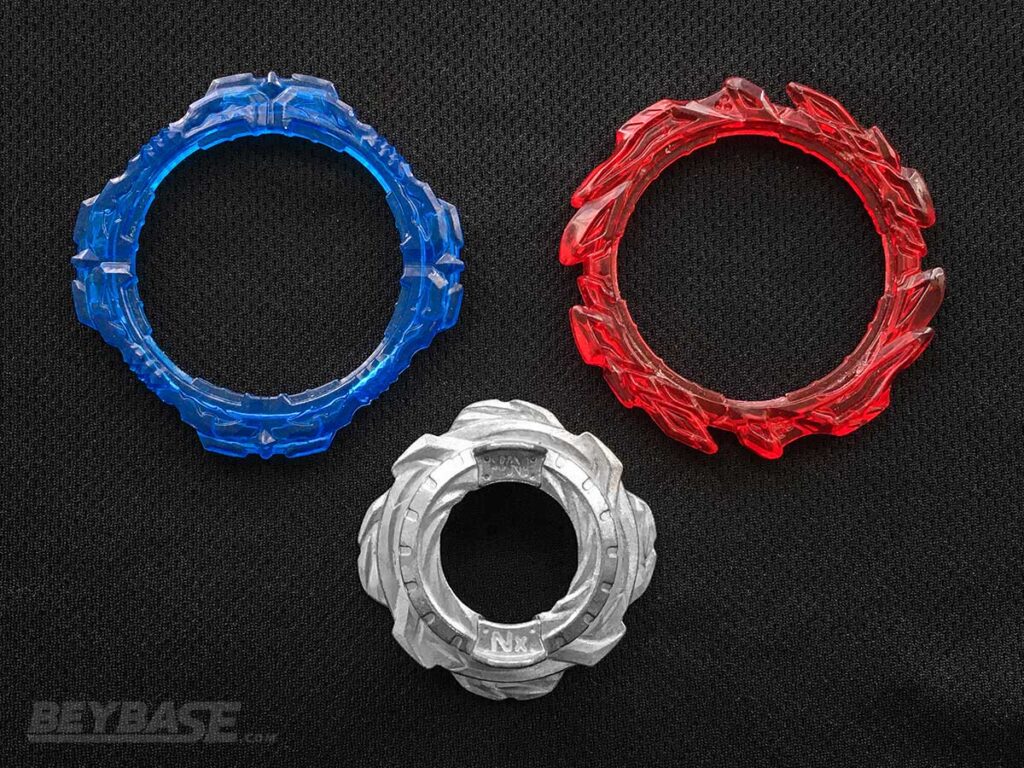
The last new piece of the B-199 release is a gear, the D Gear (Dragon Gear), made for the Nexus Disk, very much like the S Gear that came with B-188’s release.
This gear is a blue cross-shaped piece of plastic that fits into the notches of the Nexus Disk just like S Gear.
Unlike S Gear, though, the manufacturer specifically mentions that D-Gear’s fixed mode is not intended to be legal for use in competition. The reasons for that may vary, but we tested both modes to make sure, since it is just as intended by design as S Gear’s fixed mode is.
D-Gear Testing
For our first set of tests we decided to compare D Gear both fixed and loose to S Gear:
Devil Belial 2 Nexus (D Gear, Fixed) Revolve-3 vs. Devil Belial 2 Nexus (S Gear, Fixed) Revolve-3
- DBL2.Nx(D).R-3 wins: 7 wins (7 OS)
- DBL2.Nx(S).R-3 wins: 2 wins (2 OS)
- 1 Draw
- D-Gear (Fixed) Win Percentage: 78%
Devil Belial 2 Nexus (D Gear, Loose) Revolve-3 vs. Devil Belial 2 Nexus (S Gear, Fixed) Revolve-3
- DBL2.Nx(D).R-3 wins: 7 wins (7 OS)
- DBL2.Nx(S).R-3 wins: 3 wins (3 OS)
- D-Gear (Loose) Win Percentage: 70%
Devil Belial 2 Nexus (D Gear, Loose) Revolve-3 vs. Devil Belial 2 Nexus (S Gear, Loose) Revolve-3
- DBL2.Nx(D).R-3 wins: 5 wins (5 OS)
- DBL2.Nx(S).R-3: 5 wins (5 OS)
- D-Gear (Loose) Win Percentage: 50%
It is evident that D Gear is at the very least comparable to, if not a touch better than, S Gear in terms of raw stamina on these setups. The D Gear tends to be a bit more stable than S Gear and slightly less recoil prone.
Our last Stamina scenario was determining its opposite-spin LAD capabilities on tall Drivers. As mentioned earlier Nexus Disk and S Gear are staples on the Mobius Driver, excelling at opposite-spin matchups.
Naturally, we decided to see whether or not Nexus Disk with D Gear can outperform or keep up with the Over Disk in high-LAD matches on Mobius Driver in the same way the S-Gear would.
Devil (F Gear) Dragon Nexus (D Gear, Loose) Mobius-3 vs. Vanish Longinus Over Mobius-0
- DDR.Nx(D).Mb-3 wins: 4 wins (4 OS)
- VLN.Ov.Mb-0 wins: 2 wins (2 OS)
- 4 Draws
- D-Gear (Loose) Win Percentage: 67%
Here we see that Nexus with D Gear is quite capable of producing positive results against Over Disk just like it does with the S-Gear.
While it does perform similarly, D Gear does suffer from slightly less recoil and doesn’t extend quite as far out so it may be preferred over S Gear depending on what Blade is being used.
In general it is a bit hard to say D Gear is definitely better, since in Stamina matchups you’ll most likely encounter loose S Gear on a tall Driver like Mobius, where a lot more comes into play than one Gear can mediate.
At worst, D Gear is just as good as S Gear is on the Nexus Disk for Stamina combos.
Now we turned our attention towards D Gears usage on Attack type combos. Nexus with S Gear has been a staple on the Ultimate Blade for quite a while, giving it extra knockout potential and weight. Does D Gear perform as well?
Ultimate Perseus Nexus (D Gear, Loose) Xtreme’-9 vs.Vanish Longinus Over Bearing’-0
- UπR.Nx(D).X’-9 wins: 6 wins (6 KO)
- VLN.Ov.Br’-0 wins: 4 wins (4 OS)
- D-Gear (Loose) Win Percentage: 60%
- Xtreme’ slightly worn
It certainly seems like it does perform similarly to S Gear, but something to note is that D Gear is much less likely to scrape the stadium on the Xtreme Dash Driver than S Gear is. A big problem S Gear can have is its width, making it sometimes scrape at very inopportune times on low Drivers.
D Gear does not have this issue nearly as much, so despite performing similarly to S Gear, D Gear is likely the preferred option for this setup.
The Verdict
The D Gear is an exceptional accessory that is preferred over S Gear on Attack type combos since it scrapes less, and a suitable alternative on tall Drivers.
Should You Buy the B-199 Gatling Dragon Karma Charge Metal’-10?
B-199 Gatling Dragon Karma Charge Metal’-10 is a Beyblade we would only recommend to hardcore competitive Bladers.
You should consider picking up B-199 Gatling Dragon Karma Charge Metal Dash-10 if you want a decently flexible BU Blade in Gatling, an excellent right-spin Stamina DB Core in Dragon, a spare Karma Disk, to experiment with the heavy Charge Metal Dash Driver, or an S-Gear alternative.
It isn’t technically a must-buy, but it bolsters your collection and possible combo options a fair bit! The Dragon DB Core and D Gear, if anything from B-199, could make the difference in a competitive setting where the tiniest edge matters.
Parts Summary
Gatling BU Blade
The Gatling BU Blade is unique in the fact that it does well as a legitimate Attack type in opposite spin matchups, fares well in opposite spin Stamina, and also makes aggressive tornado-stalling Drivers a bit more viable.
With that said, its same spin performance leaves a lot to be desired, meaning it cannot be a Blade you can use blindly on a pure Stamina setup. It has very specific matchups and setups it can perform well in, but it is not a safe or sure-fire choice.
Dragon DB Core
The Dragon DB Core will likely be the star of the show for this release, as it seems from our testing to be among the best right spin Stamina DB Cores available, if not the definitive best option from a pure endurance perspective.
It certainly can be bursted by many relevant Attack types, so much like the Longinus and Bahamut DB Cores, you must make a decision whether you want to go all in on endurance with Dragon DB Core or use the Belial 2 DB Core for the Burst Stopper.
Karma Disk
Karma Disk is still very much a filler attack-oriented Disk, which has only become even more irrelevant thanks to the Fortress Disk. This is not particularly special for B-199, since it has been re-released many times.
Charge Metal Dash Driver
The Charge Metal Dash Driver is, as mentioned earlier, a bit niche. It seems to be a jack-of-all-trades, master of none. It doesn’t have the speed or grip for most Attack Blades, but Guilty Blade can work with it. It lacks required endurance and LAD capabilities to even put it up for consideration as a pure Stamina Driver.
D Gear
Finally the D Gear is a great pickup if you’re a big fan of using S-Gear on your Attack type combos, as this is a direct improvement thanks to its ability to scrape less frequently. If you enjoy using Mobius and other tall Drivers the D Gear works as a great substitute, and in some situations it may be preferred (for example S Gear on Roar but D Gear on Devil).
Final Score: 7/10Where to Buy B-199 Gatling Dragon Karma Charge Metal’-10
Heads up: If you buy something through some of the links on this post, you won’t pay any extra, but I’ll get a small commission. This helps me keep things running. Thanks for your support!
What Do You Think of B-199 Gatling Dragon Karma Charge Metal’-10? Comment Below!
If you’re thinking of picking up the B-199 Gatling Dragon Karma Charge Metal’-10 or already have, comment below as we’d love to hear about your thoughts and testing experiences with it!
Or become a BeyBase HQ member to get early article access and behind-the-scenes updates. Thank you!
4 thoughts on “Find Out Why Dragon is the Best Right-Spin DB Core for Your Beyblade Burst Stamina Combos (B-199 Gatling Dragon Review)”
Comments are closed.
Related Posts
Beyblade X Custom Line (CX) Buyer’s Guide: Expert Players Review the Best Products for All Skill Levels and Budgets
Beyblade X Buyer’s Guide: Discover the Best Products, Strongest Combos, and How to Play
So Dragon core outspins Belial II in stamina which is something I’ll give a benefit of the doubt. As for the D gear, do you plan on making its fixed mode legal for WBO tournaments? Anyways, thanks for the review and testing results Kei!
I’d have to talk to the team about that. In general, I would say that unless stated otherwise in our rules, we follow the rules given by Takara-Tomy.
Thanks for reading!
Kei, please please do B-201 review. There are potentially some good competitive parts there in Illegal and 4 armor. Your expert review is appreciated!
Working on it! Stay tuned. Need to get B-200 out first. 🙂