Affiliate Disclosure: If you buy something through some of the links on this post, you won’t pay any extra, but we’ll get a small commission. This helps us keep things running. Thanks for your support!
Toronto’s First Beyblade Tournament in Seven Months – BE A HIRO
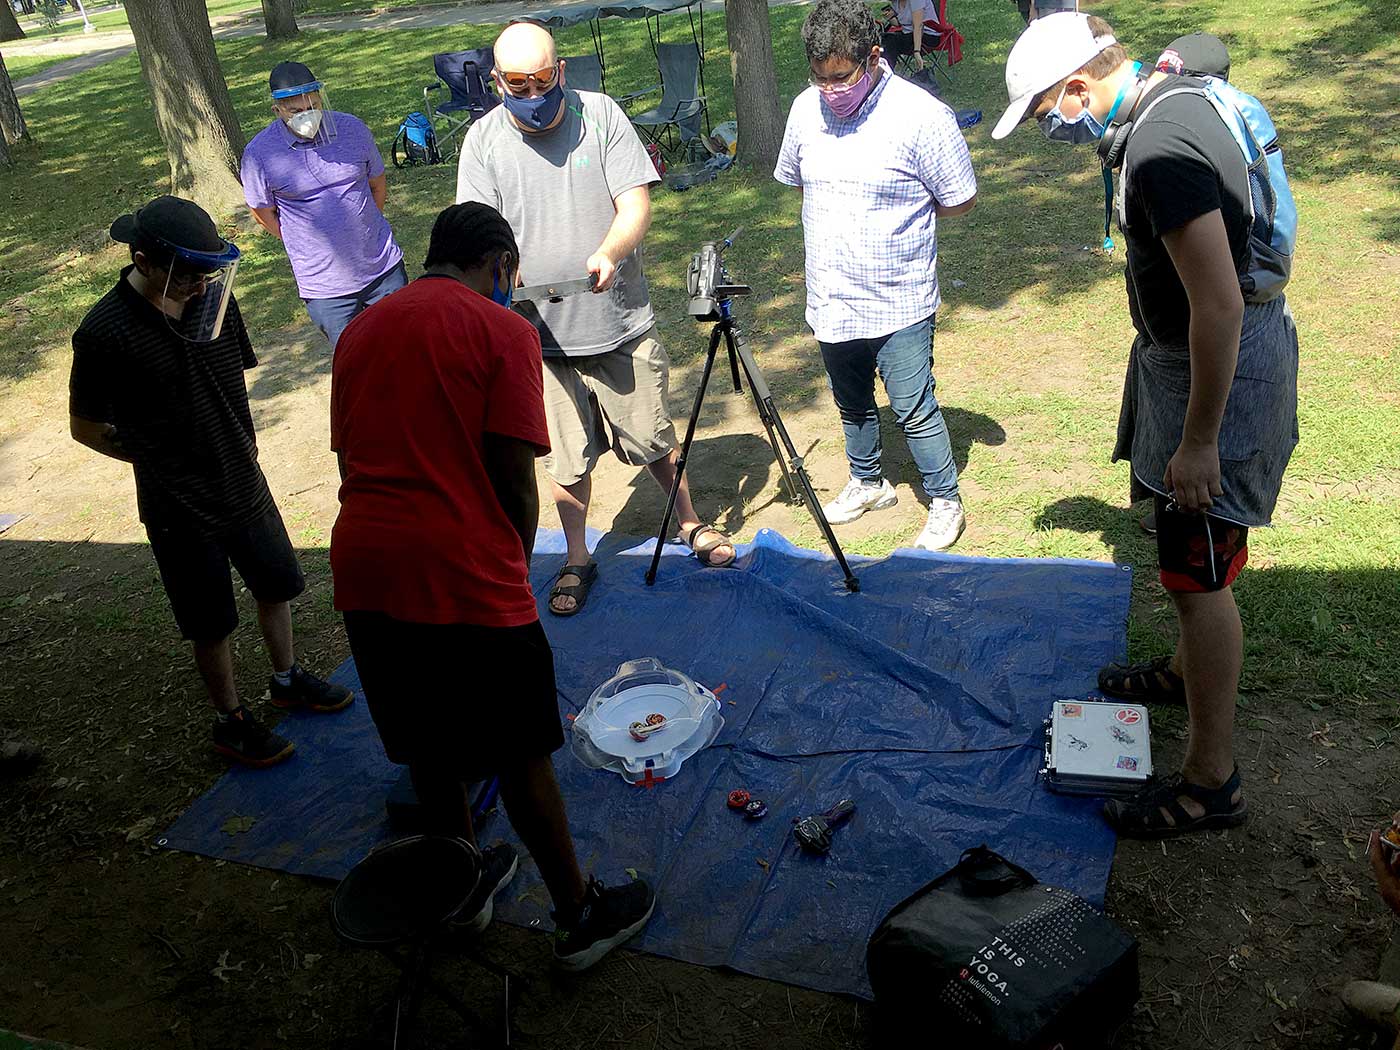
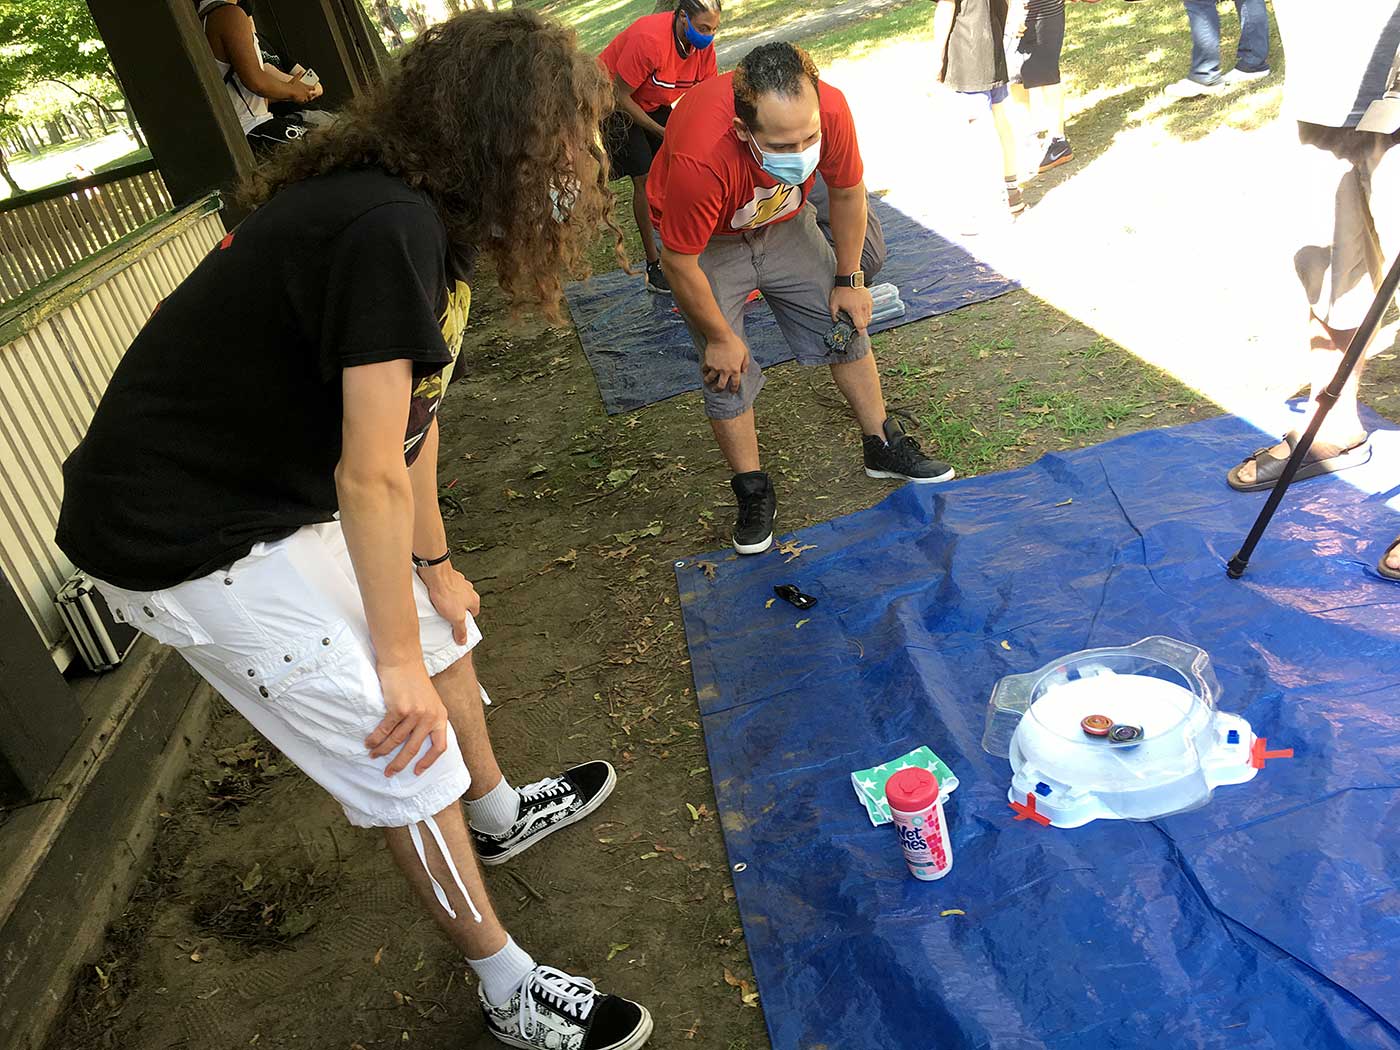
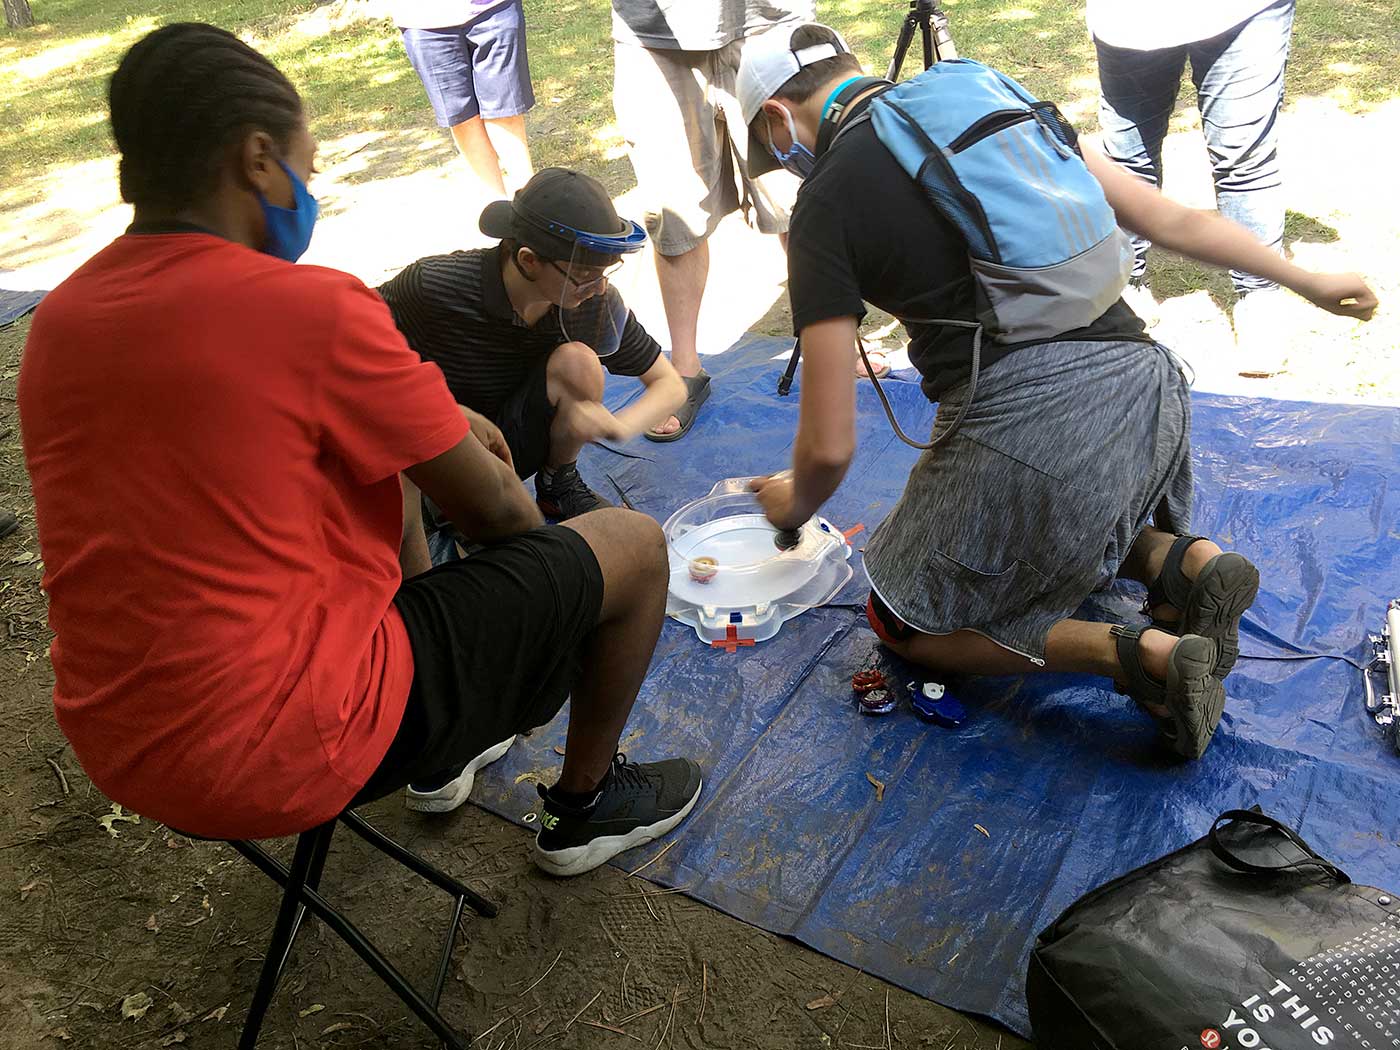
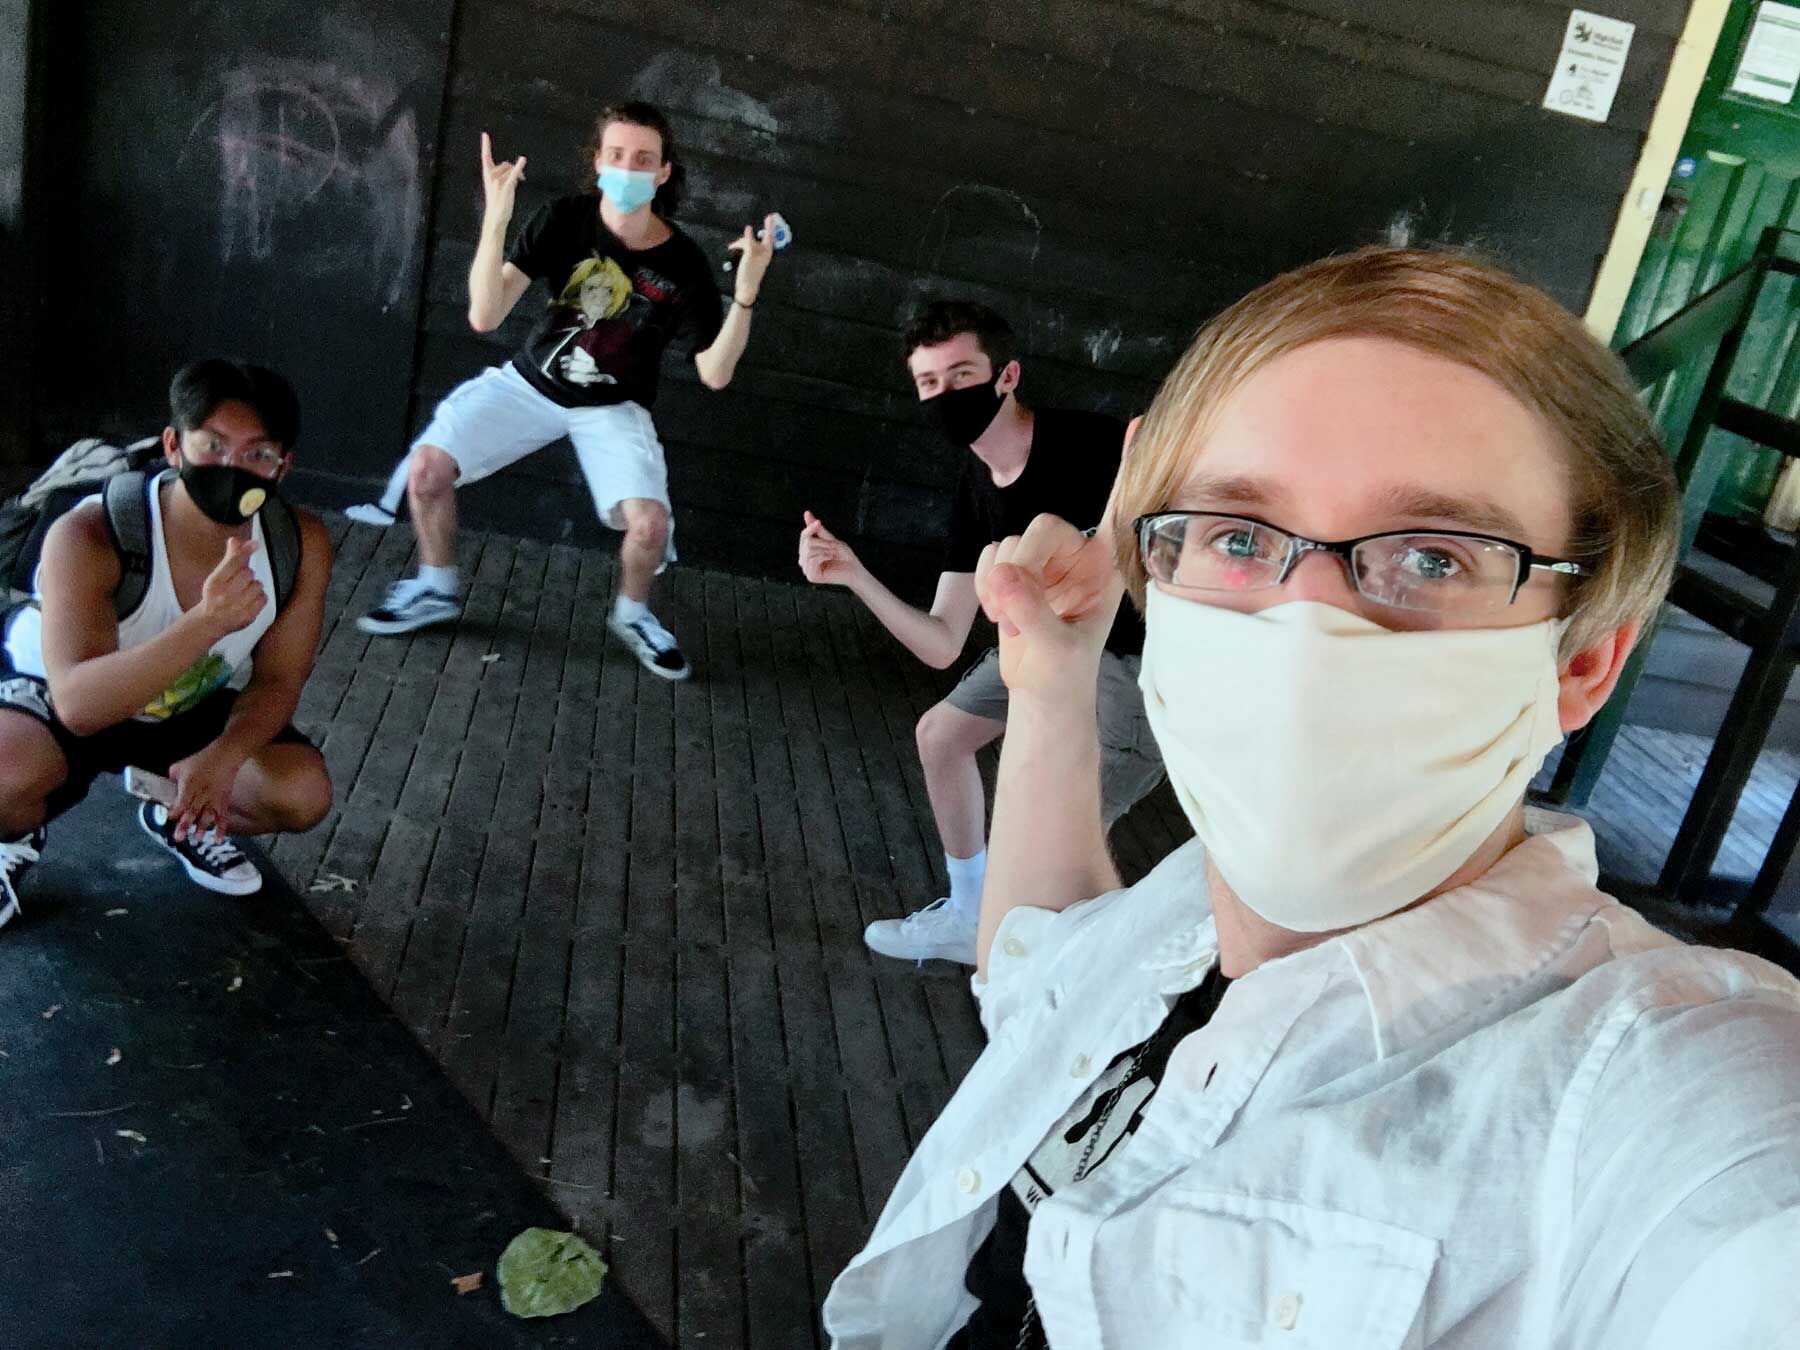
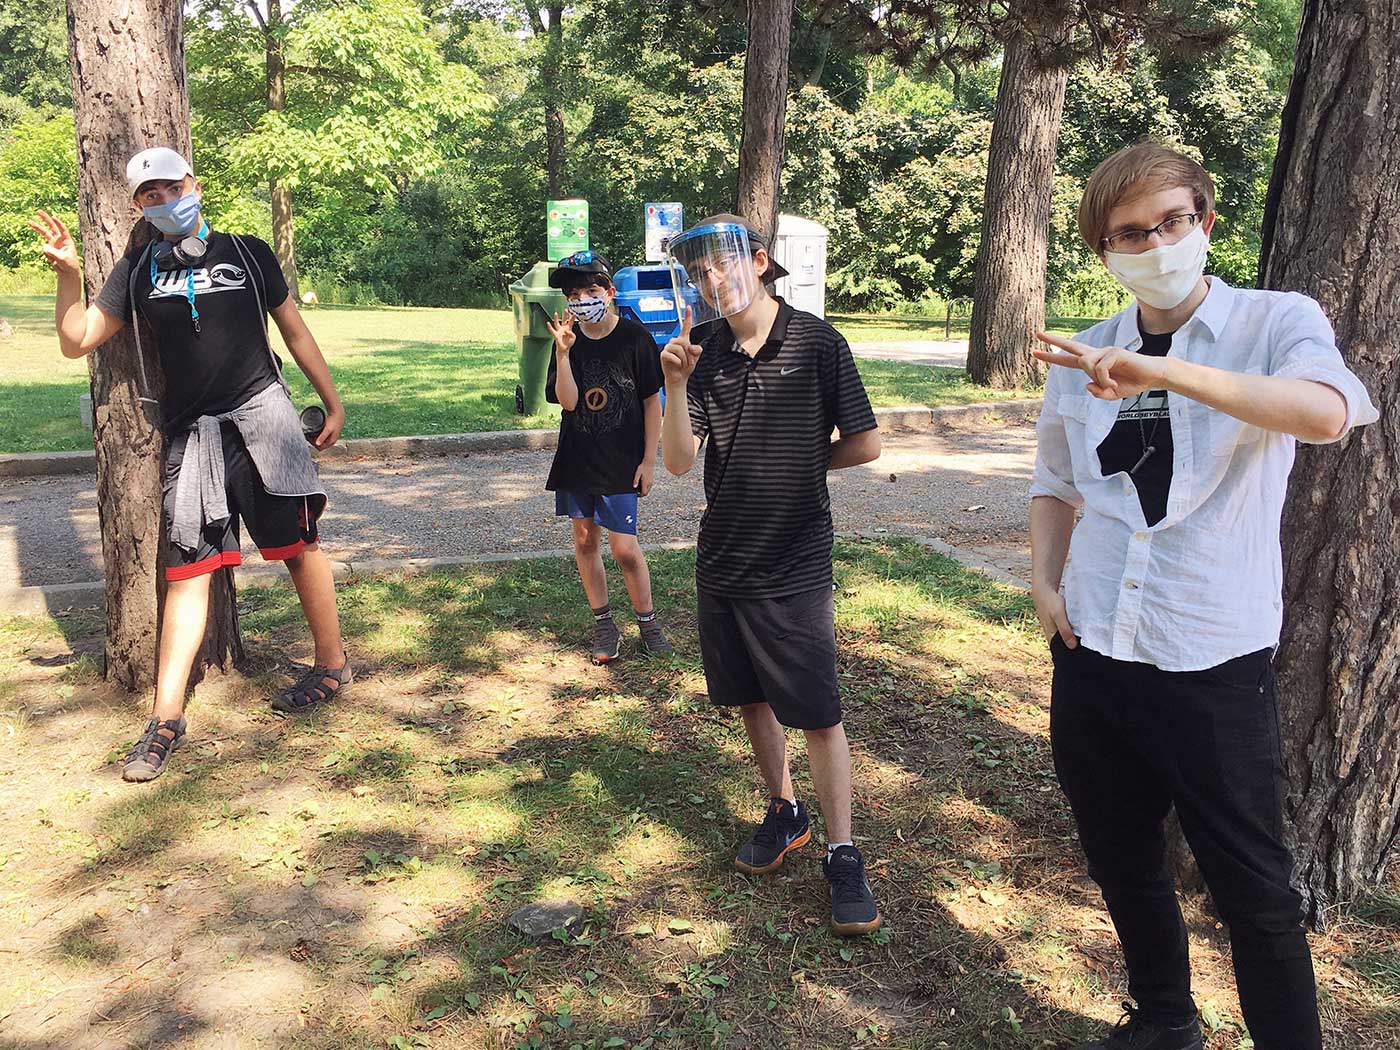
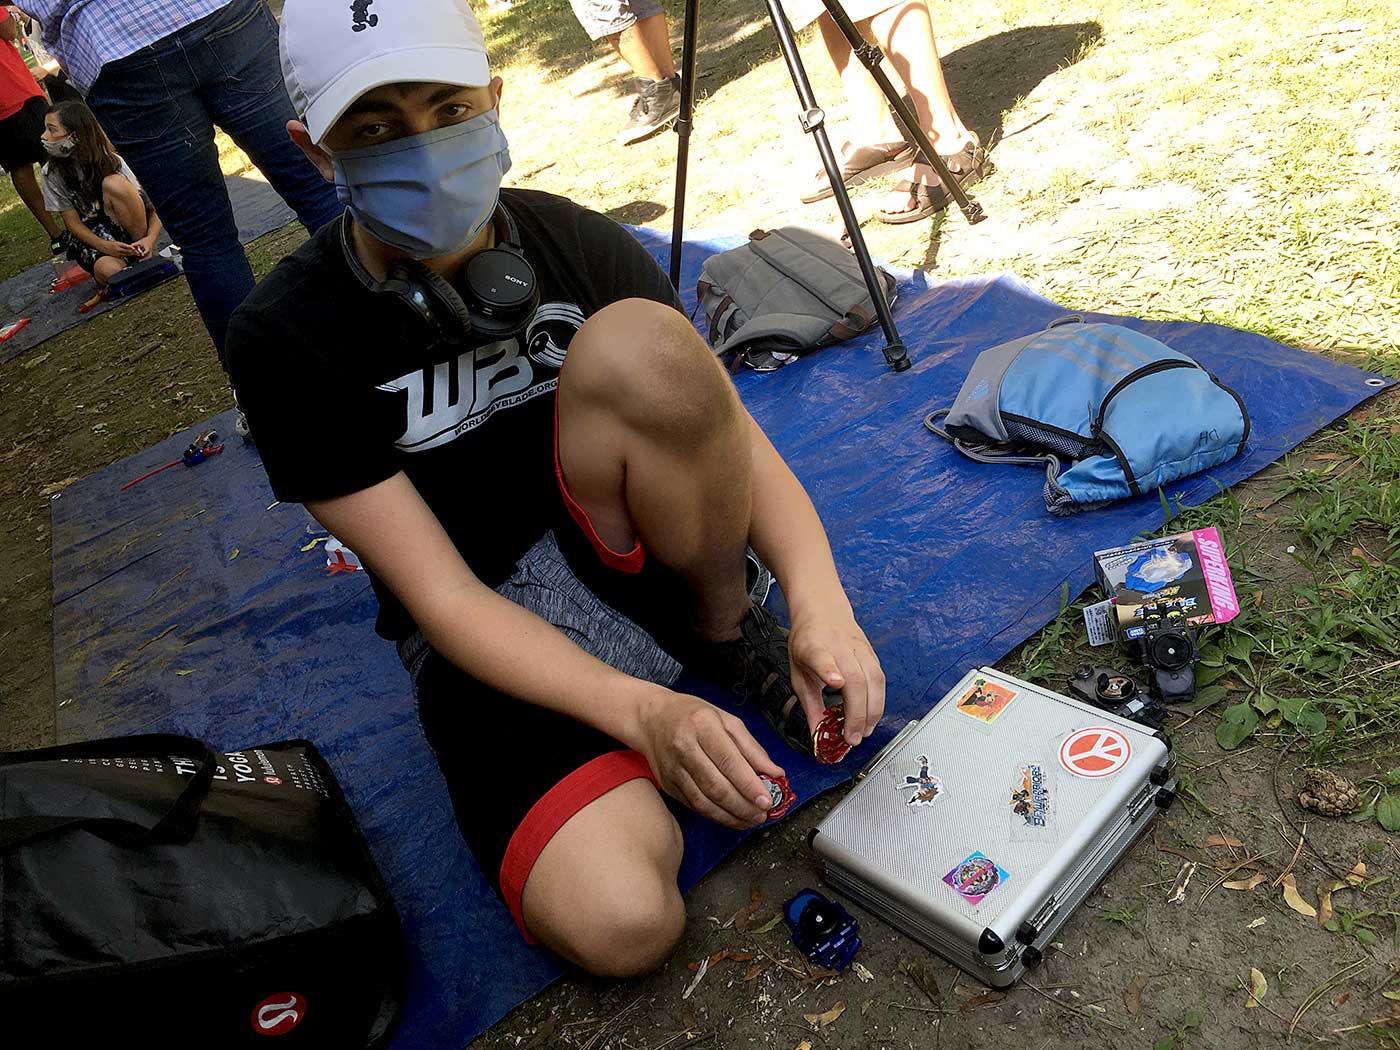
On August 22nd, 2020 the Toronto community gathered for BE A HIRO at High Park, our first Beyblade tournament since BEYBLADE SHOGATSU 2020 in January!
This was the longest stretch without a tournament in Toronto since 2008 between BEYBLADE’S NOT DEAD! and High Park Throwdown.
In fact, it was personally my first WBO tournament since December’s Papabey’s Winter Solstice Classic! I had left for Japan afterwards and eventually played my last tournament until this one in February.
Tournament Details
- Date: August 22nd, 2020
- Location: High Park – Toronto, ON
- Format: WBO Burst Format – Unranked (Rulebook)
- WBO Event Page
- Challonge Bracket – First Stage
- Challonge Bracket – Final Stage
What you will learn in this Beyblade tournament report:
- How this tournament was planned with consideration for the pandemic.
- How I prepared for my first WBO tournament in 8 months.
- What Beyblade parts and combinations were successful.
- How strong Beyblade Burst Sparking parts were.
- How this tournament was managed, what went well, and what could be improved.
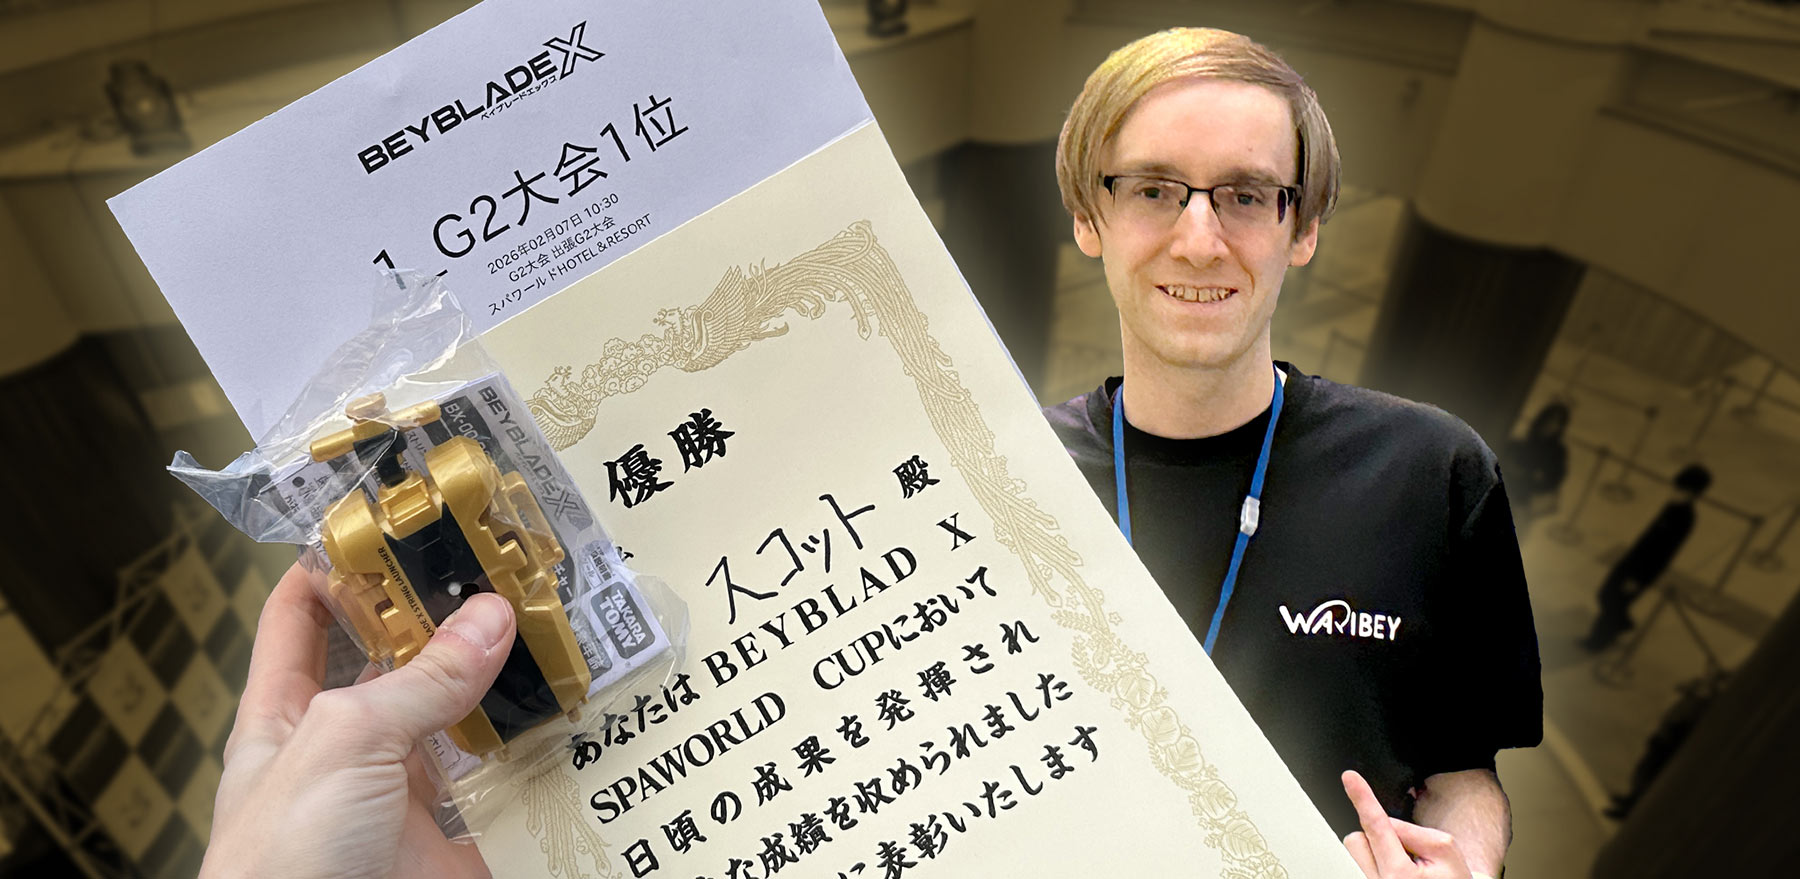
Champions aren’t born overnight. In my latest article, I break down how my pursuit of knowledge, adaptability, and reproducibility compounded into victory at a 256-player G2 tournament.
Sponsored: Order the newest Beyblades at malloftoys.com!
Heads up: If you buy something through Mall of Toys, you won’t pay any extra, but I’ll get a small commission. This helps me keep things running. Thanks for your support!
Beyblade Tournament Planning & Preparation
The Advent of Beyblade Burst Sparking & COVID-19
Since our last event Beyblade Burst’s fifth season–Beyblade Burst Sparking–was released and powerful parts such as Rage 3A, Wheel, and Brave 2A were unleashed into the metagame.
But until now, their impact could not be fully understood outside of sporadic events in areas around the world where COVID-19’s impact was not as dramatic.
So needless to say, the level of excitement and anticipation among the community was palpable in the lead up to this one!
However, this anticipation was certainly mixed with trepidation over the past several months due to the severe impact that COVID-19 has had around the world.
Adhering to and Exceeding the WBO’s COVID-19 Requirements
With the advent of COVID-19, at the World Beyblade Organization we were forced to quickly implement a range of new requirements for attending events and requirements for proposals made by Organizers to help ensure the safety of everyone in attendance:
Overview of WBO Event Requirements During COVID-19
- Coronavirus Disease (COVID-19): Requirements for Attending Tournaments
- Coronavirus disease (COVID-19) Update – New Organizer Event Proposal Requirements
In terms of the requirements for attendees, the basic summary is as follows:
- Feeling unwell? Stay at home.
- Wear a Mask or Face Covering
- Thumbs Up Instead of Handshakes
- Do Not Lend or Play with Others Equipment
- During Beyblade Inspection, Disassemble Beyblades for Judges
- Do Not Bring More Than 1 Person With You
- Maintain Physical Distancing (2 meters/6 feet apart)
- After each Match Judges Must Disinfect Stadium
- Only Bladers Registered Before the Tournament Day may Participate
- Eliminated from the tournament? You must leave the tournament area.
In addition to these requirements, we also require that events be permitted based on the guidelines set by the local government in the area of each Organizer.
Additional Requirements for BE A HIRO
And for BE A HIRO, I added a few additional requirements:
“Registered? Confirm Parent/Guardian Presence Below: If you have registered above, you must post below to confirm whether you will be attending with a parent or guardian or not. Otherwise, you may be removed from the participant list.
Contact Tracing: During check-in at the event, all participants (and their accompanying guardian or parent if applicable) must provide their full name, phone number, and e-mail for contact tracing purposes in case any participant is later discovered to have contracted COVID-19. Your information will only be used for this purpose if needed and will be deleted 30 days after the event. If you can, please write this information down on a piece of paper and bring it with you.”
The first was so that I could paint a 100% accurate picture ahead of time as to what the total body count at the event would be. In the time of COVID-19, fully understanding this is critical.
With contact tracing, it just seemed like the smart thing to do. If somehow someone did contract the virus, having this information would ensure we could rapidly contact everyone in attendance to get tested.
Pre-Tournament Testing & Research Process
I’ve talked about the importance of preparation in Beyblade in my “Beyblade in Japan 2020” report previously.
With BE A HIRO being my first WBO Beyblade tournament in eight months, this might have never been more true.
Each month that passes brings new releases into the game. The metagame shifts incrementally over time with this, but because of the huge gap between events the shift was much larger than usual.
Keys for Pre-Tournament Preparation
Therefore, it was key from a competitive standpoint even more so than usual that I:
Research Deeply:
Spend the time necessary to research the results and opinions of other players around the world. This was especially important due to the suspension of WBO events to study the results of after the COVID-19 pandemic began.
Test Intensively:
Conduct intensive testing in order to effectively reset my base of knowledge about which combinations are good, bad, and how a variety of different matchups play out. To accomplish this, in the weeks leading up to this event I conducted testing for many, many hours.
Given the uncertainty in the world in the early months of the pandemic I didn’t have the energy or interest in testing new releases as they came out. I even deprioritized receiving new releases quickly because if there are no tournaments … what’s the point?
As a result of all of this, it was a uniquely difficult task to eventually get back into testing for this event given the sheer number of new parts available.
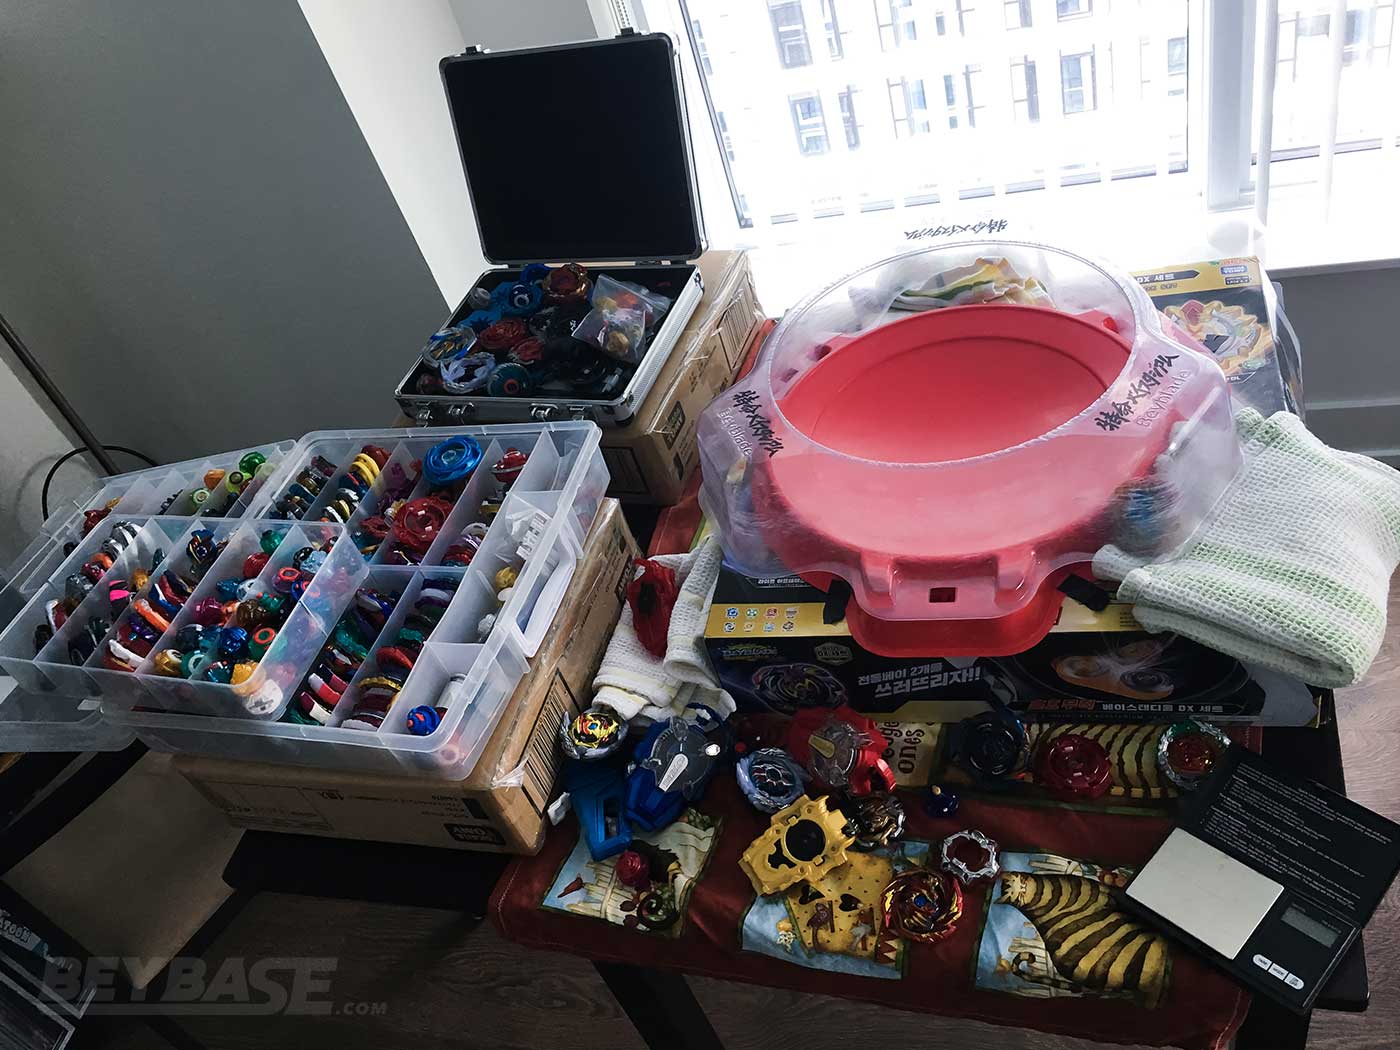
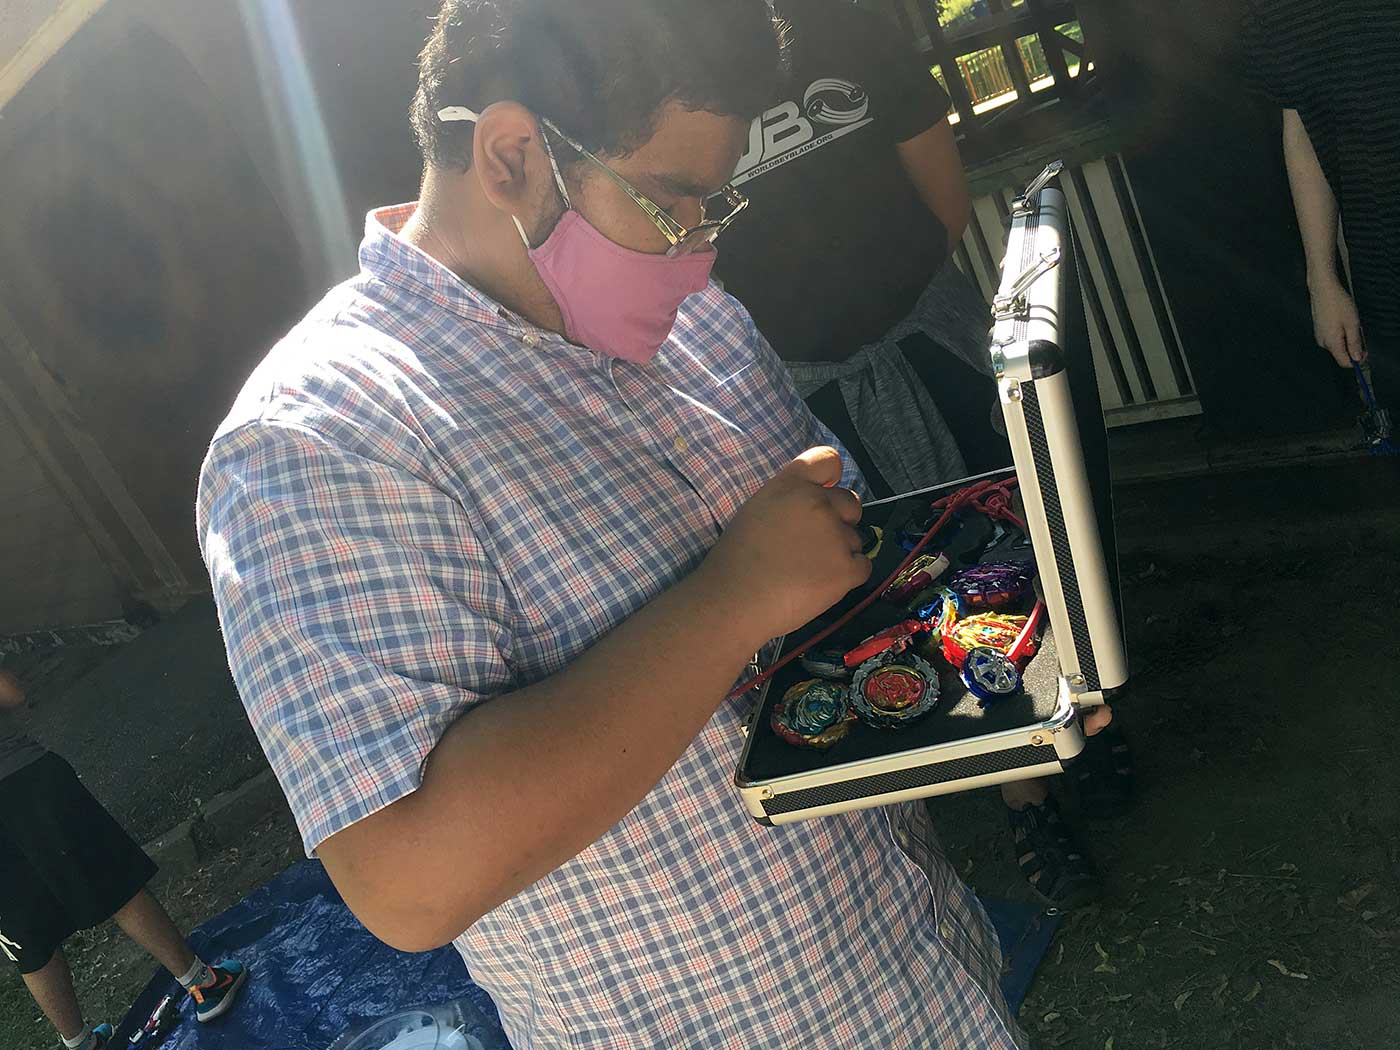
Optimizing My Beyblade Case Layout
Adopting Blue Foam Inserts & Flat Layout
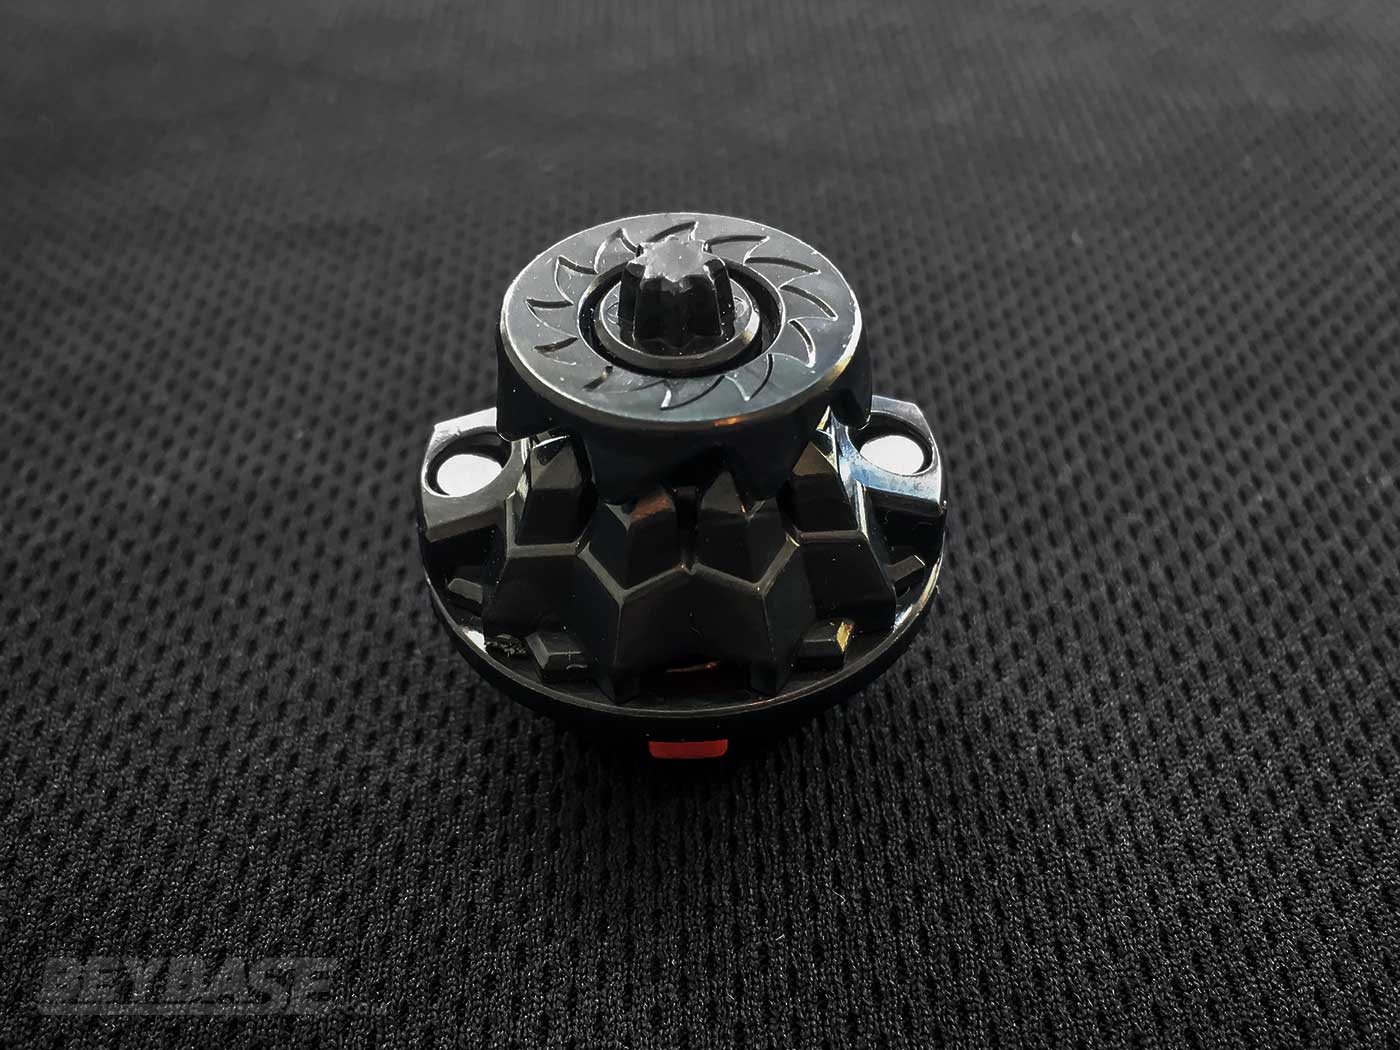
While I was in Japan this year, I received a gift from a member of Wari-Bey: hexagonal blue foam inserts for my Beyblade case!
Just like the ones seen here:
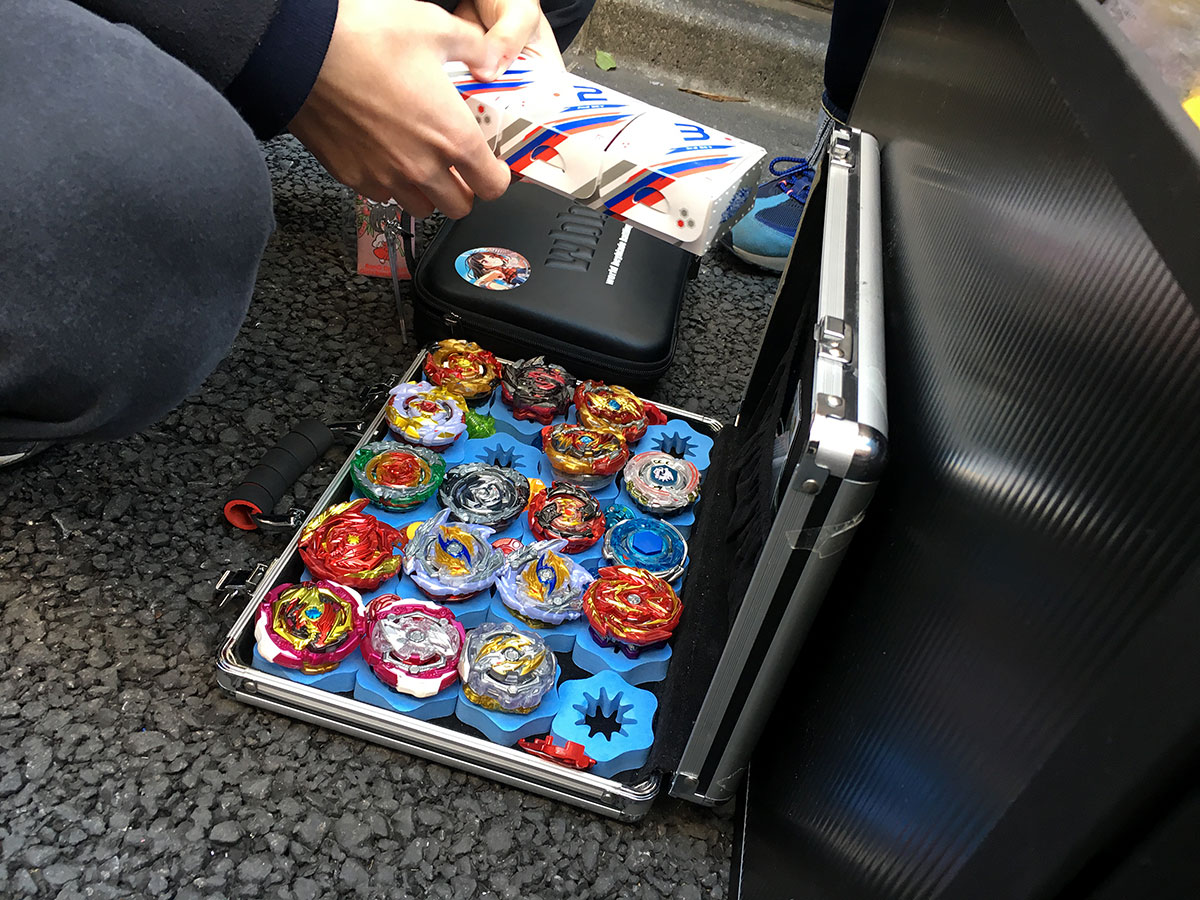
I use a case like this, but up until now had used foam inserts which allowed Beyblades to be stored on their side. This allowed all of the parts to remain in view, unlike the above which only shows the top.
Upon further reflection however, I realized that placing them flat was smarter because it reduces the opportunity for your opponents to see what combos are in your case throughout the course of an event.
So, receiving these hexagonal blue foam inserts inspired me to re-think the layout of my case and in the lead up to BE A HIRO, I updated the layout to something very similar to the above.
Addition of Towel to Cover Contents
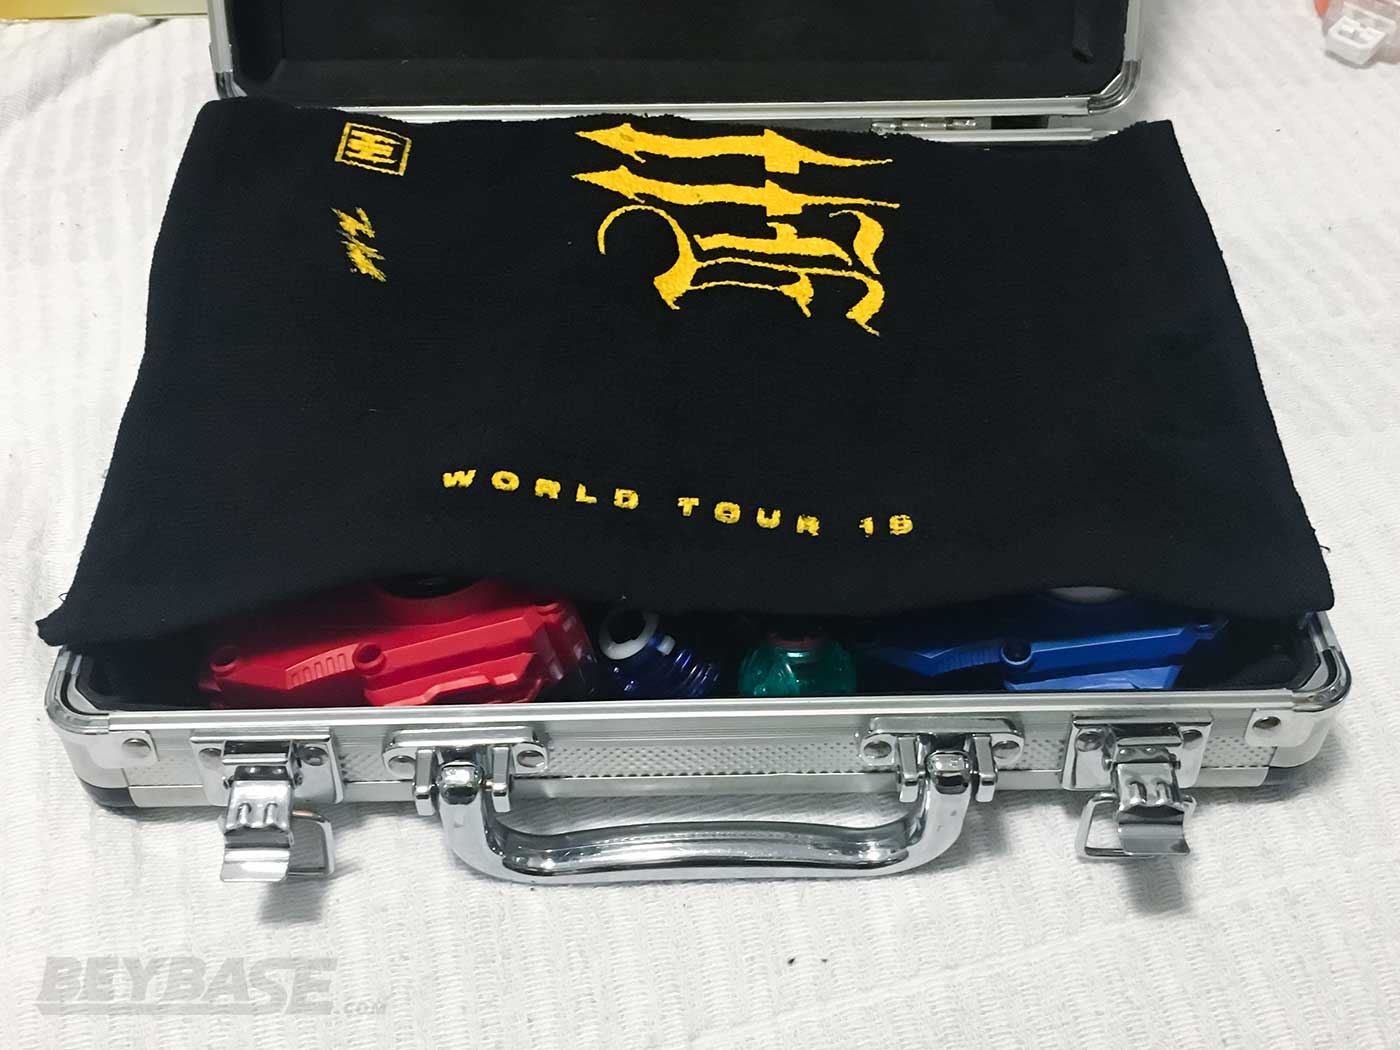
Additionally, I also lined the bottom of my case with a small towel that folded over on top of the Beyblades to increase my control over what I display during events once the case is open.
This also helped to secure the Beyblades from moving around when the case is in transit.
I remember seeing some players use a towel like this while in Japan as well.
Refining My Set of Tournament-Ready Beyblade Combos
As I was working on my revised case layout, the thought also crossed my mind to begin placing a greater emphasis on crafting a defined and refined set of combos before events than I had in the past.
I’ve learned that one of the worst things you can do as a Beyblade player during an event is build a combination on the spot before a match.
Why you shouldn’t build combos on the spot
Lack of Practice
You probably will have not practiced with that combo before the event.
Not Optimized
The combo won’t be optimized (balance, weight, wear etc).
Unnecessary Thinking
The thinking that goes into doing this confuses the overall strategy you should be going into each event with.
By building a set of of defined, optimized, pre-built Beyblade combos before each event based on a particular strategy adapted to whatever the metagame is at that point in time, you can be certain that each combo in your case is the best it can be in terms of balance, weight, and wear and feel confident having spent the time to extensively test with it specifically.
Doing this forces you to ask yourself hard questions and make decisions ahead of time about how you can best handle what you perceive the biggest threats will be.
You might think that throwing everything you own into a bucket and bringing it with you to a tournament is smart because of the flexibility that allows for.
But I believe it ironically reduces your chance of success because you’ll be scrambling before each match to build an effective combo that won’t actually be optimized or as familiar to you as it should be in a competitive tournament.
Players should take preparation more seriously so that they can walk into a tournament with confidence and focus on execution rather than creation.
This can be difficult if you do not have multiple copies of important parts, but the principle should remain in mind.
Players should take preparation more seriously so that they can walk into a tournament with confidence and focus on execution rather than creation.
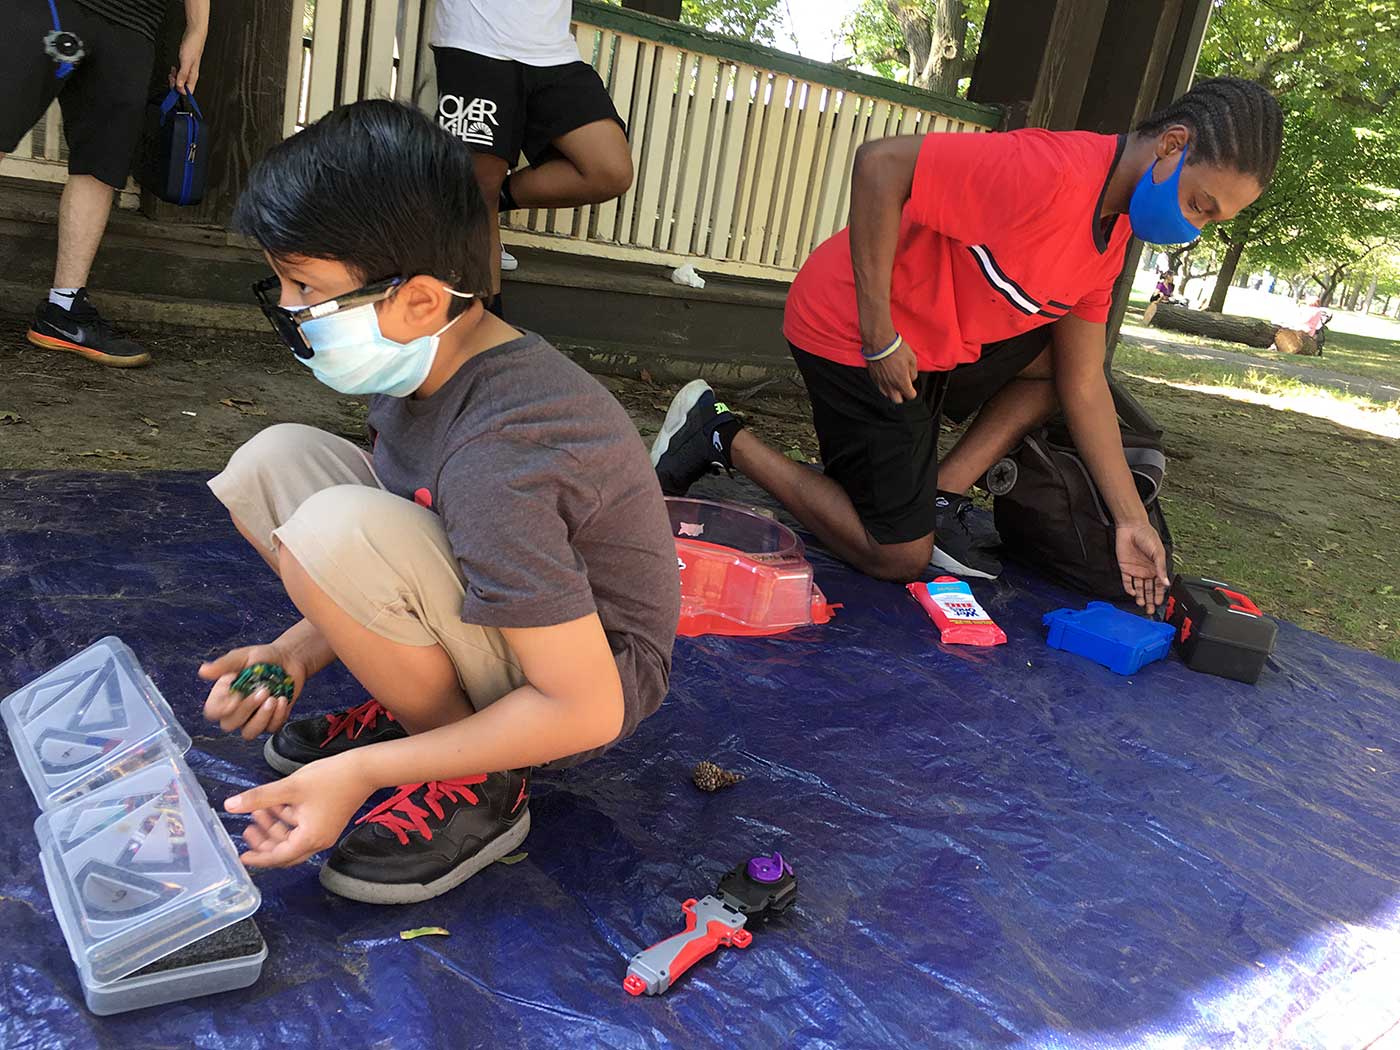
BE A HIRO First Stage Report
BE A HIRO was played with 12 players using the Block Round Robin tournament format.
Players were split into two blocks of six players and played each person in their block once. The top two players from each block advanced to the final stage.
Tournament Participants
Participant List
- Kei (WBO Rank #1)
- Justin TC (WBO Rank #2)
- 1234beyblade (WBO Rank #4)
- BladerBeast (WBO Rank #8)
- Henwooja1 (WBO Rank #9)
- originalzankye (WBO Rank #12)
- MDK Shady (WBO Rank #13)
- Hunter08 (WBO Rank #44)
- NiallI (WBO Rank #171)
- Lrexman (WBO Rank #443)
- Smartsin the6 (WBO Rank #1737)
- LuinorBlader (WBO Rank #1875)
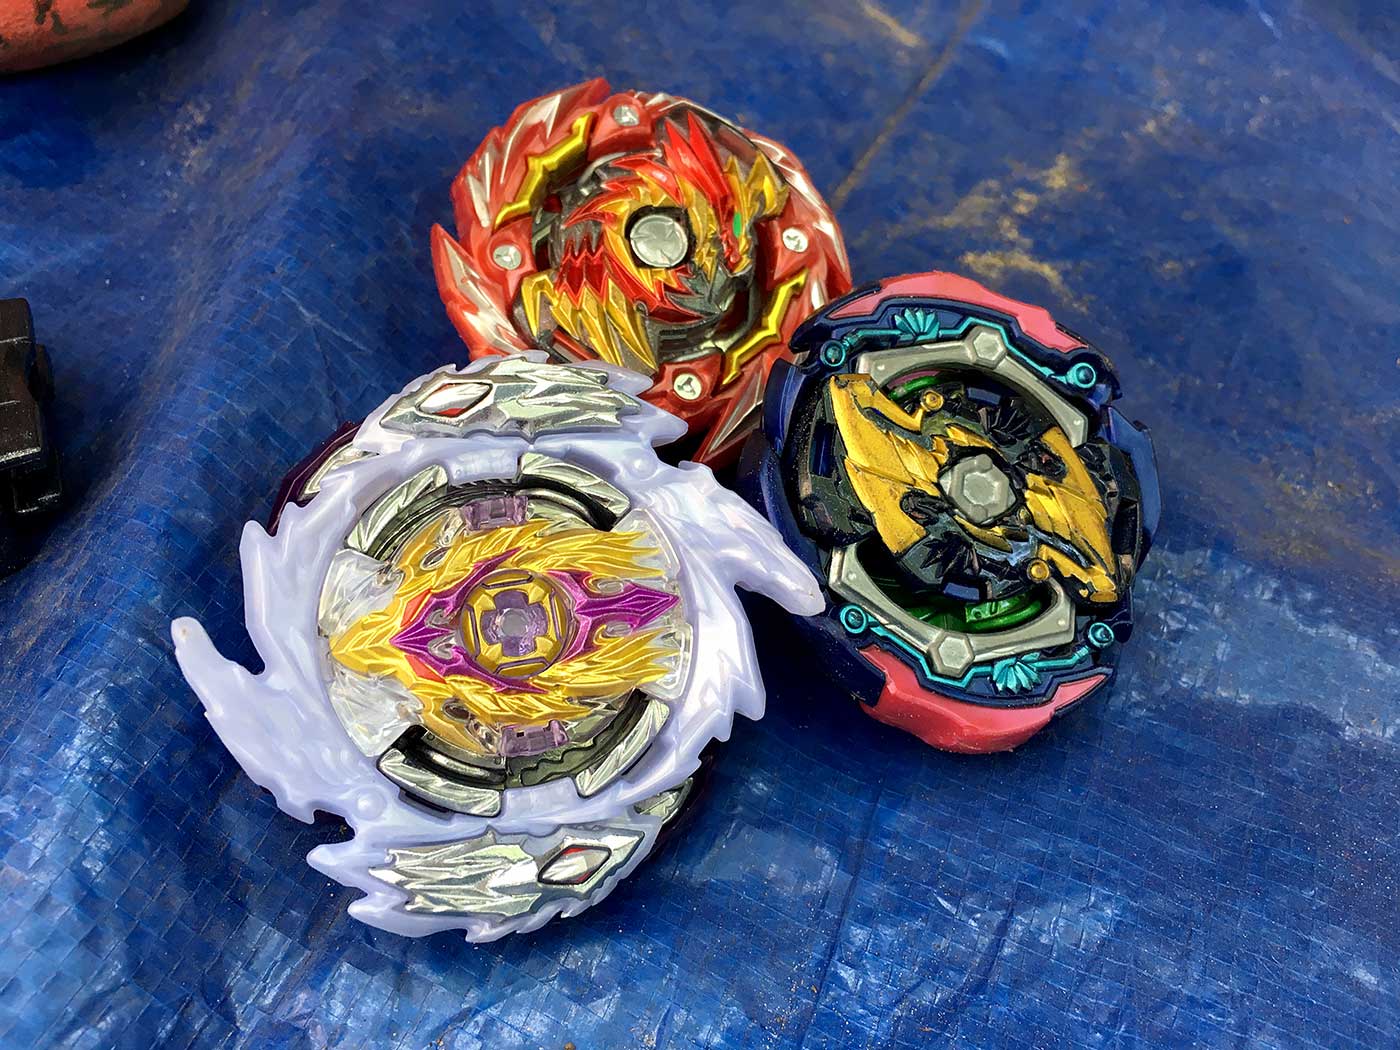
General Observations & Beyblade Part Usage Report
Before I get deeper into what the top five most popular Beyblade parts were during this event below, I’d like to go over some notes of my general observations during the event:
Wheel Disk:
Surprisingly, several players like BladerBeast, Justin TC, and henwooja1 did not have the Wheel Disk, which is one of the most important competitive parts at the moment. It straight up outclasses 0/00/etc Cross for opposite spin battles.
Lack of Perfect Phoenix Layer:
I don’t believe anyone used Perfect Phoenix at all, which was somewhat unsurprising. It is still very much viable in certain situations, but it’s particularly bad against Rage so that’s what kept me away from it personally.
Lack of Judgement Layer Base:
Usage of Judgement is fading. BladerBeast used it during the finals and may have won a round, but ultimately lost. Judgement still has the potential to KO a lot of things, but because most of its competition is becoming heavier, it tends to take the brunt of the recoil now.
Lack of Lord Layer Base:
Usage of Lord is also fading, but I do believe BladerBeast had some success with it on Xt+ in the first stage.
1234beyblade’s Performance:
This was his first tournament since his guest appearance at The Big Bang Bandstand Battle in London, UK back in February where he placed third. 1234beyblade used Rage Longinus Xtreme’ 3A exclusively. It was basically the only Beyblade he brought with him! He went 3-2 and just barely missed out on the finals due to a losing tiebreak with henwooja1.
Justin TC’s Performance:
Justin TC found some success with Brave Lucifer Destroy’ 2A defeating originalzankye’s Tempest Solomon (Metal Chip Core) Mobius 2D. He also lost a close 3-2 battle with it against Lrexman’s Tempest Dragon Xtend Plus 2A.
henwooja1’s Performance:
henwooja1 leaned heavily on Master throughout the first stage as is reflected in his winning combos below.
NiallI’s Performance:
NiallI made use of Mirage Fafnir Mobius 2D and Abyss Diabolos on I believe Charge Metal. I had thought he was using Variant instead Mirage on his Mobius 2D combo and almost lost my match against him with MS.00W.Br because of it! Thankfully 2D and Mobius‘ same spin stamina is abysmal!
MDK Shady’s Performance:
MDK Shady made use of both Brave Satan Xtend Plus 2A and Storm Pegasis on Keep’. I was able to defeat BSt.Xt+ 2A with MB.Vn.Br and he lost against 1234beyblade’s RLn.X’ 3A with Storm Pegasis Keep’.
Smartsin the6’s Performance:
Smartsin the6 used Brave on Ds’ and Prime Apocalypse Sting Wave during the first stage. I actually lost a close match 3-2 against his PA.St.Wv with RHl.Ev’ 3A. Wave is an interesting Driver with decent opposite spin Life After Death and strong same spin performance. I feel like we might see more people try it out in the future.
First Stage – Video Footage
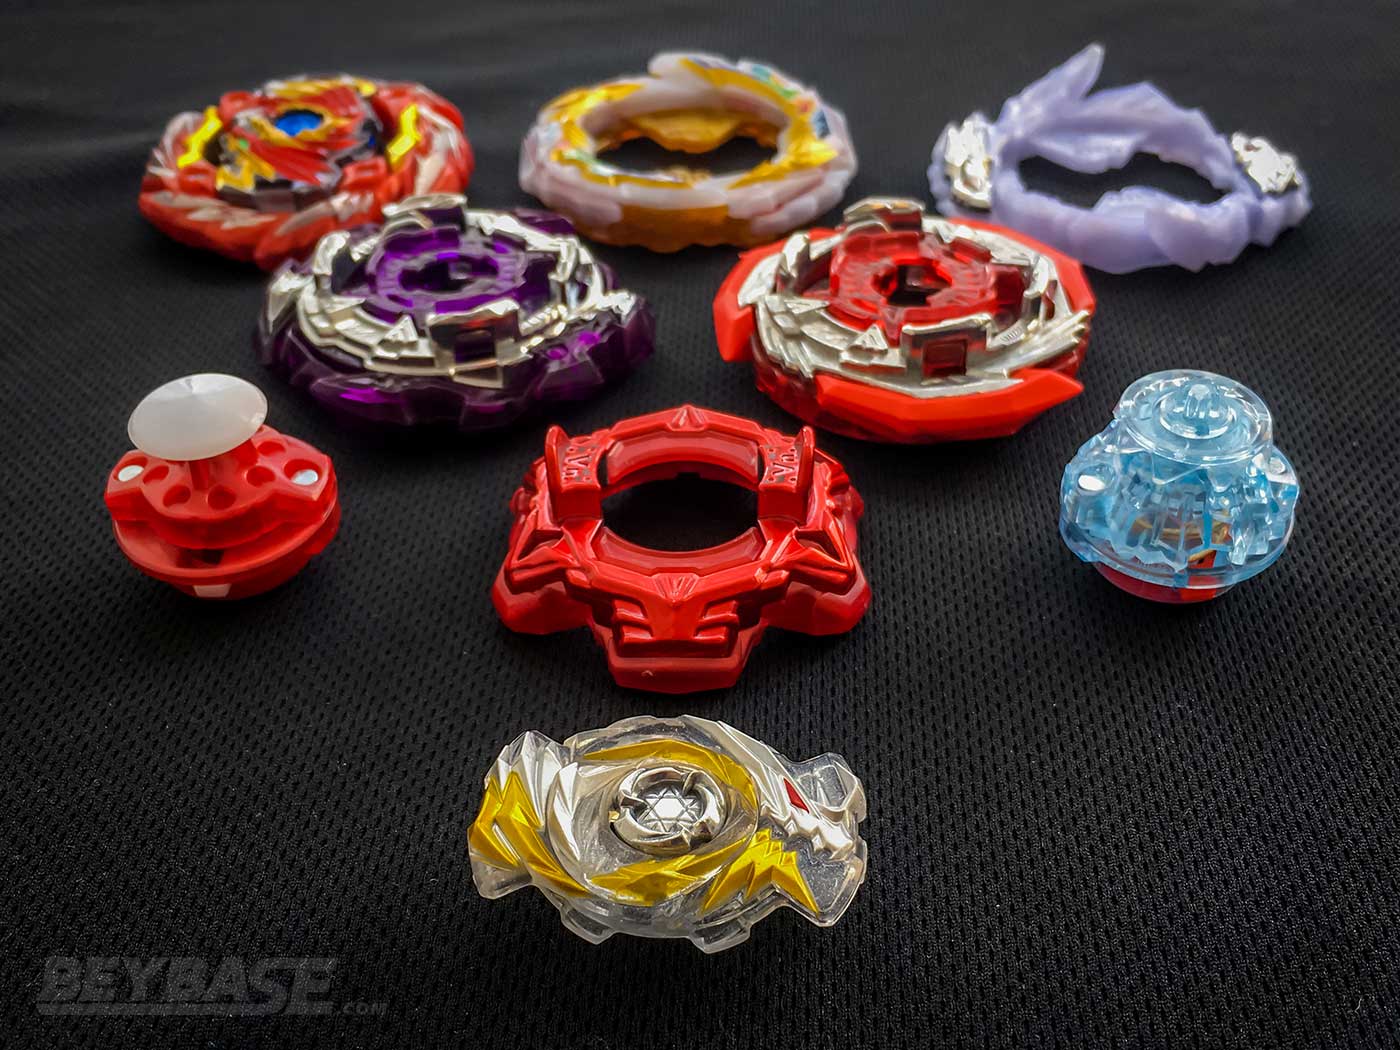
Top 5 Most Popular Beyblade Parts During BE A HIRO
Now that we are a few months into the Beyblade Burst Sparking era, the metagame has begun slowly shifting away from Beyblade Burst GT, which dominated my Top 5 Best Beyblade Burst Combos list a few months ago.
Many of the combos in that list are still usable. But after this tournament it’s becoming clear that Beyblade Burst Sparking is really starting to take over competitive play.
You’ll see this reflected in my list below of the five most popular Beyblade parts during BE A HIRO:
Sponsored: Order the newest Beyblades at malloftoys.com!
Heads up: If you buy something through Mall of Toys, you won’t pay any extra, but I’ll get a small commission. This helps me keep things running. Thanks for your support!
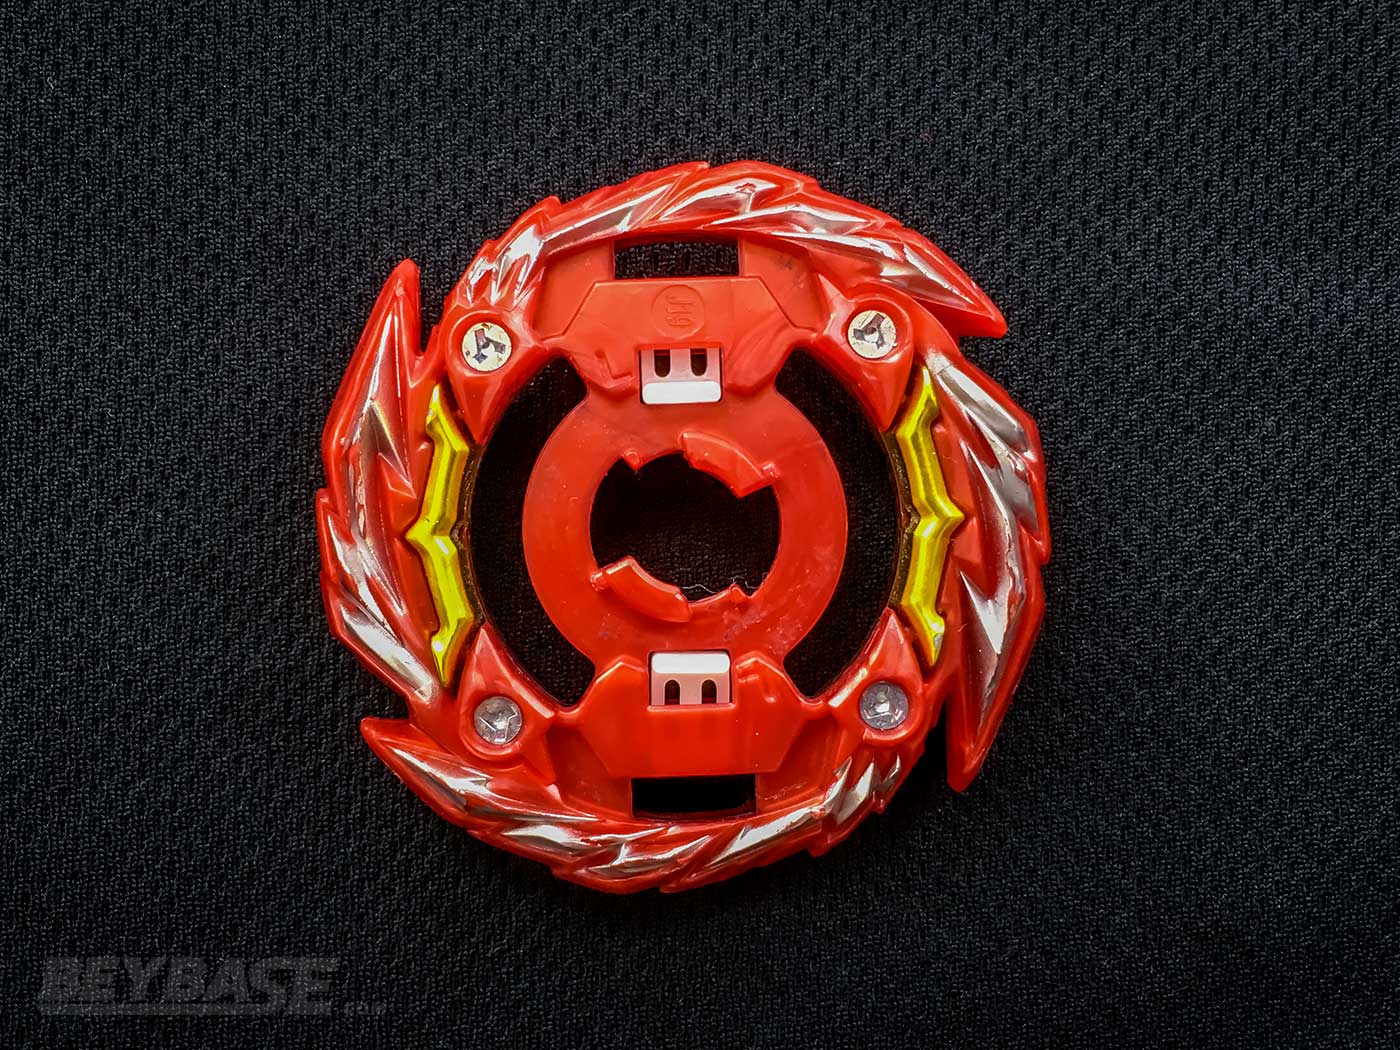
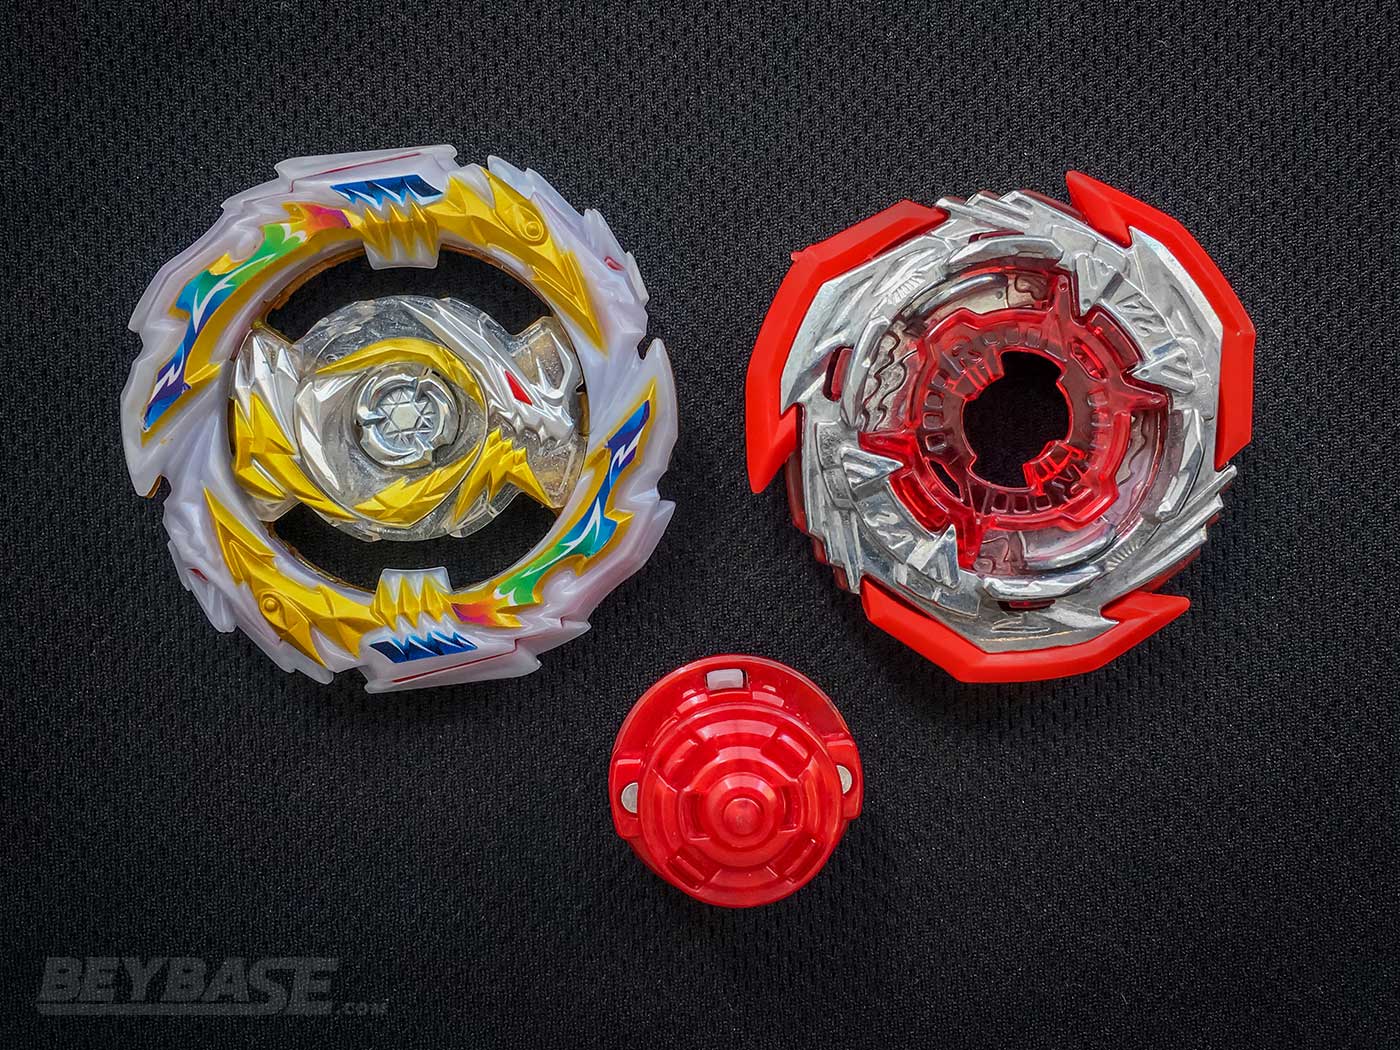
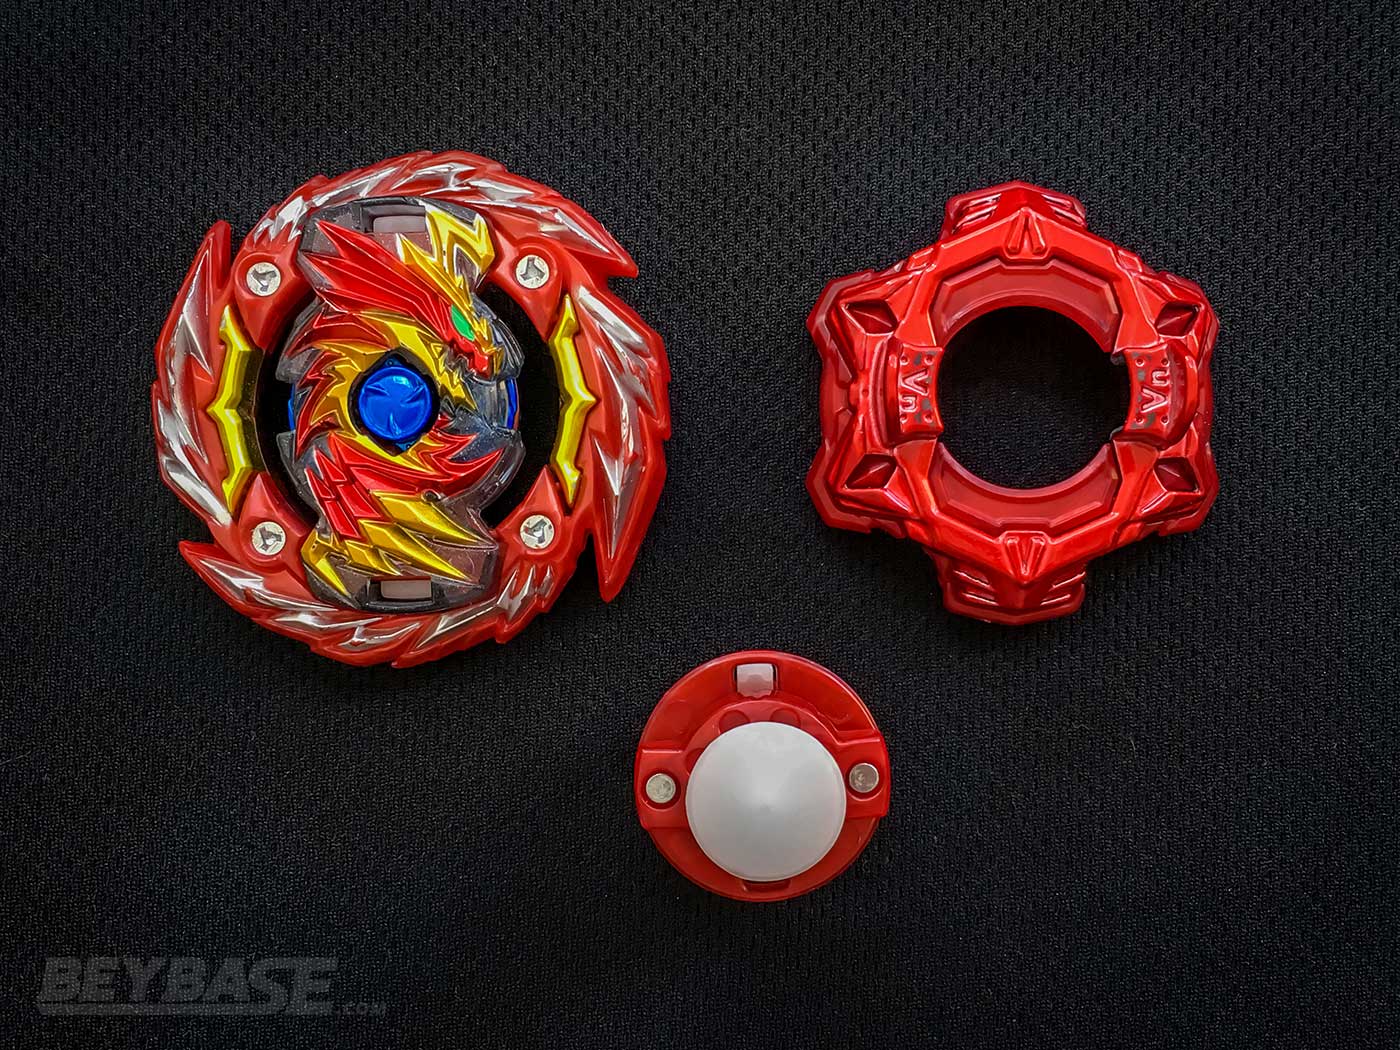
Rage Ring & 3A Chassis – Beyblade Burst Sparking
How was it used?
Rage with 3A was the MVP of the tournament. It was used by all four of the top players on a variety of attack type Drivers including Destroy’, Jolt’, Xtreme’, and Evolution’.
Verdict
Rage with 3A is a powerhouse of an attack type and very little right now can stop it. It’s heavy and it hits hard. It’s a must-have for competitive players.
Where to Buy the Rage Ring & 3A Chassis
Heads up: If you buy something through some of the links on this post, you won’t pay any extra, but I’ll get a small commission. This helps me keep things running. Thanks for your support!
Master Layer Base – Beyblade Burst GT
How was it used?
Master was one of the final releases of Beyblade Burst GT and still has a place in the metagame as of writing.
Multiple players including myself, henwooja1, and BladerBeast used it to great effect in the first stage of the event on Xtend Plus and Bearing to outspin our opposite spin opponents.
It also has strong burst resistance, which is key in a game where burst finishes are worth two points!
Verdict
Master has some really good same spin and opposite spin stamina combined with incredibly good burst and KO resistance. – BE A HIRO 3rd Place Winner henwooja1
Where to Buy the Master Layer Base
Heads up: If you buy something through some of the links on this post, you won’t pay any extra, but I’ll get a small commission. This helps me keep things running. Thanks for your support!
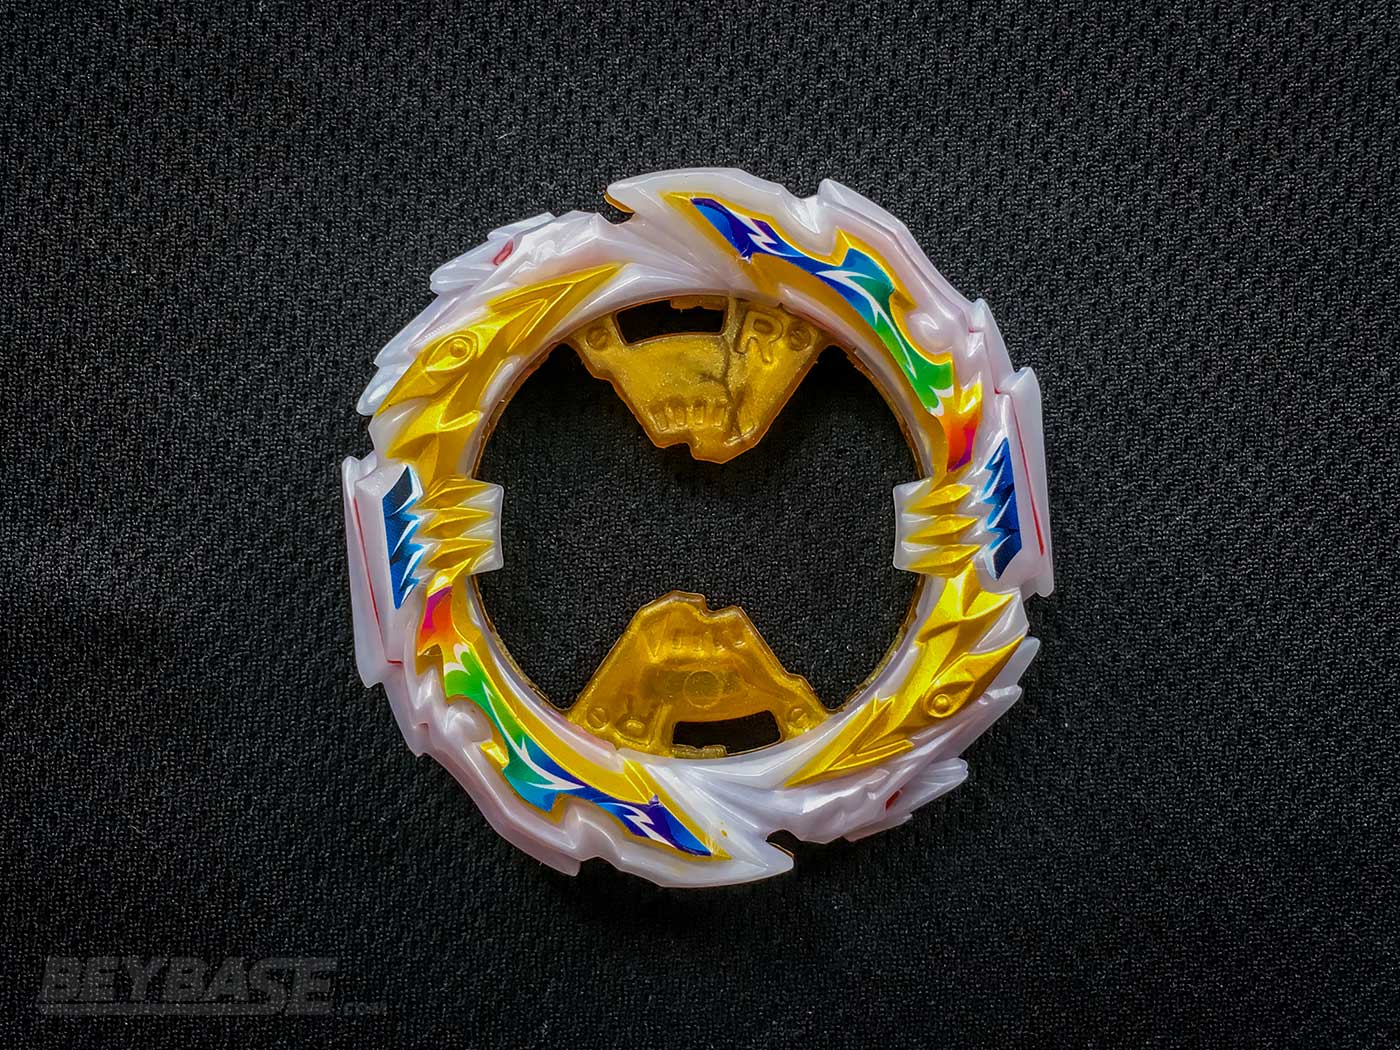
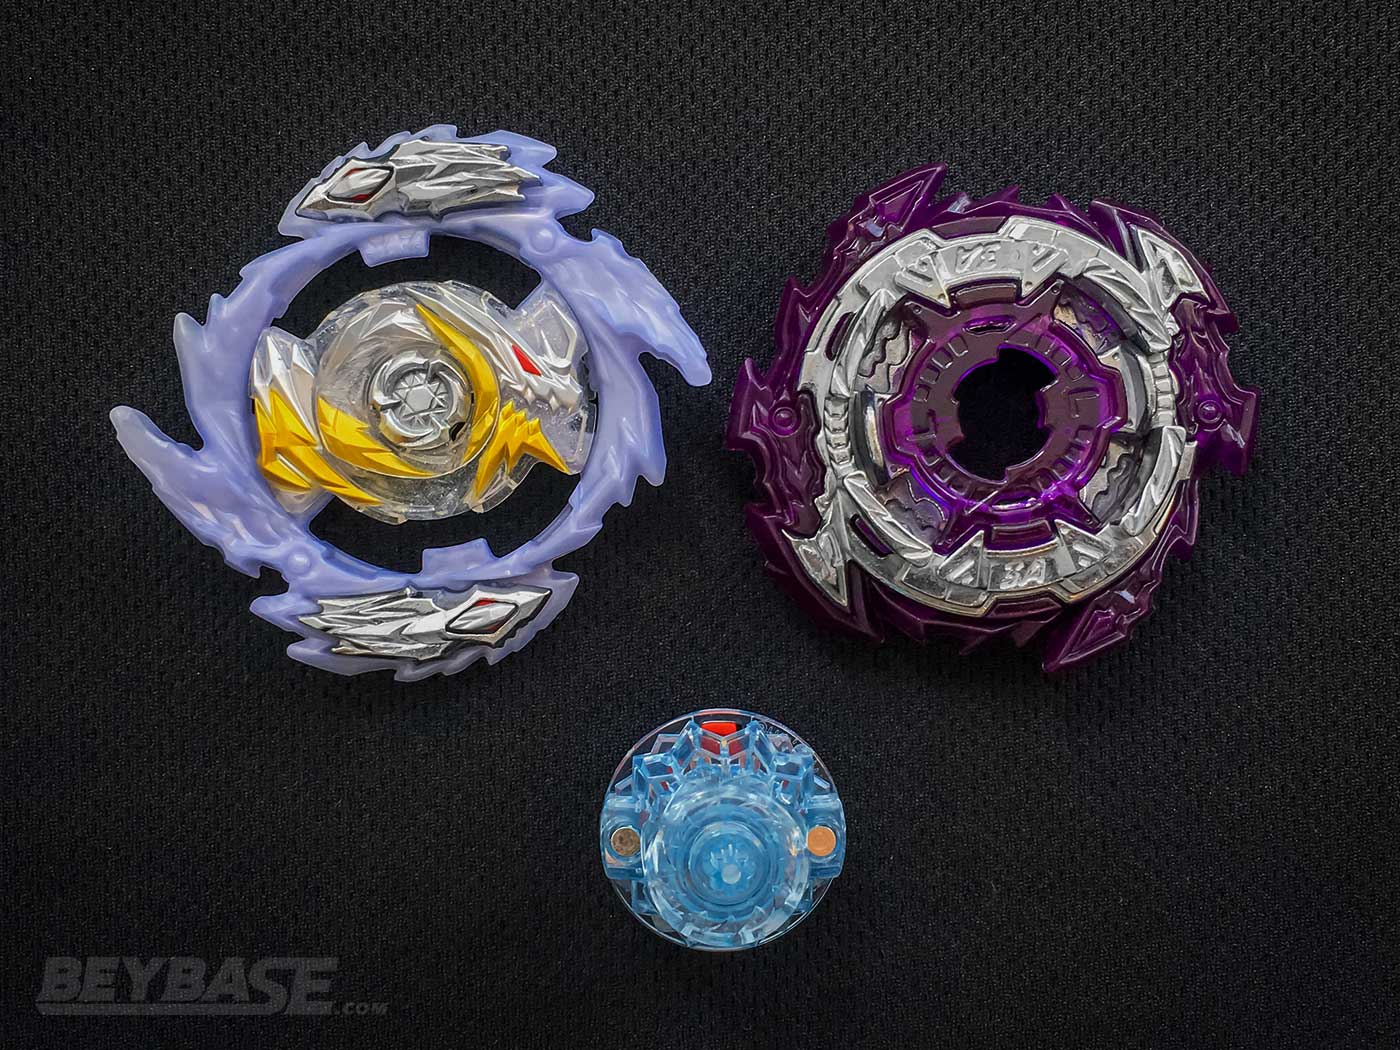
Tempest Ring – Beyblade Burst Sparking
How was it used?
Tempest was just released before this tournament as part of the Triple Booster Set and originalzankye put it to great use throughout the tournament.
He initially played with it on Mobius 2D but later switched to Xtend Plus 2A.
This, in combination with both the rare Metal Chip Core and Solomon Chip allowed him to set himself apart from the entire competition with a rather heavy right-spin stamina set up.
Up until now, Brave Xtend Plus 2A has seen use in some of the events happening around the world, but based on my observations Tempest works even better than Brave for this purpose (at least for same spin battles). It seems to have less recoil and probably more stamina.
Tempest is advertised as an attack type, but it seems to have found use as a stamina type!
Worth noting that Tempest on Xtend+ also saw use by all three winners of Geetster99 Doesn’t Know What to Name his Birthday Tournament a week after BE A HIRO in Maryland.
Verdict
This is a part on the rise. It’s strong with Xtend+ and has seen use by multiple tournament winners shortly after release. I’d definitely recommend picking one up!
Where to Buy the Tempest Ring
Heads up: If you buy something through some of the links on this post, you won’t pay any extra, but I’ll get a small commission. This helps me keep things running. Thanks for your support!
Brave Ring & 2A Chassis – Beyblade Burst Sparking
How was it used?
Brave with 2A was quite popular, although from what I saw it wasn’t especially successful.
Destroy’ and Xtend Plus were the most popular Driver choices for it. And Lucifer was the most common chip due to its heavy weight in comparison to regular Sparking Chips.
For me, I’ve never quite understood the Xt+ 2A variant.
It is strong for same spin matches because it can destabilize opponents, but this strength is overshadowed by how much recoil it has and it’s surprisingly poor opposite spin performance against top tier stamina left-spin Beyblade combos.
I was able to defeat MDK Shady’s Brave Satan Xtend Plus 2A with Master Bahamut Vanguard Bearing, for instance.
Vanguard isn’t even top tier for opposite spin performance in comparison to using a Core Disk + the Wall Frame, and my Bearing was brand new … so the fact that BSt.Xt+ 2A wasn’t able to defeat even that is concerning.
For me, Brave is–unsurprisingly–best suited for attack type combinations. Destroy’ is a good option, as well as traditional attack type Drivers like Xtreme’.
Verdict
Brave isn’t as explosive as Judgement in my experience, but can be part of heavier combinations and is able to get the job done against right spin opponents as a pure attack type.
If you like attack types, pick this one up. 2A comes with Brave as well as Ev’, so it’s a good buy all-around.
Where to Buy Brave Ring & 2A Chassis
Heads up: If you buy something through some of the links on this post, you won’t pay any extra, but I’ll get a small commission. This helps me keep things running. Thanks for your support!
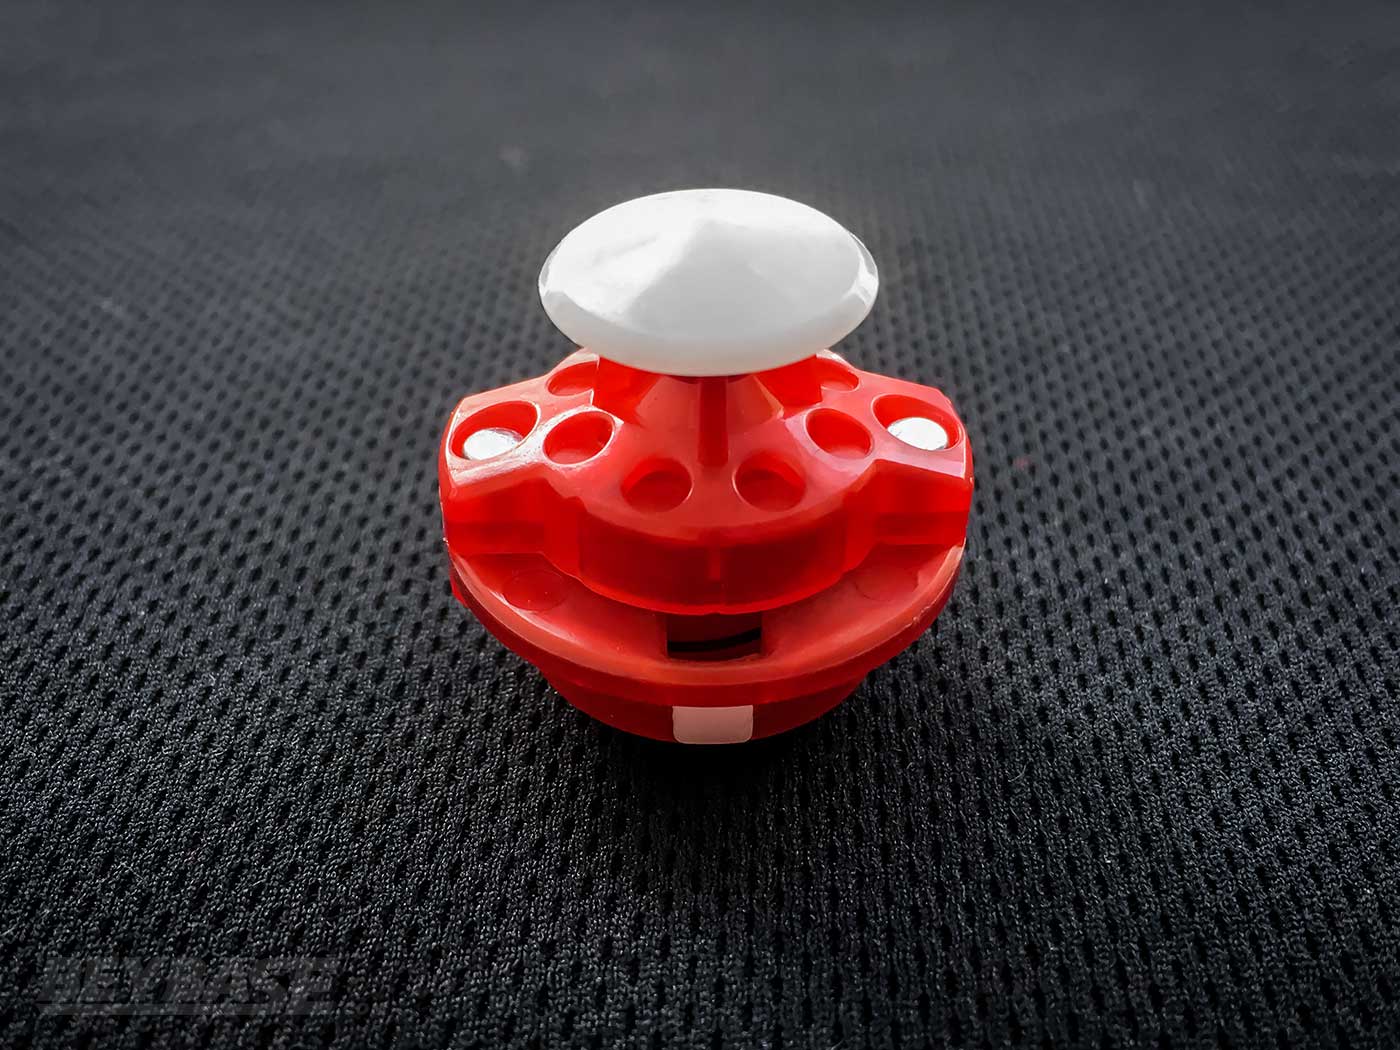
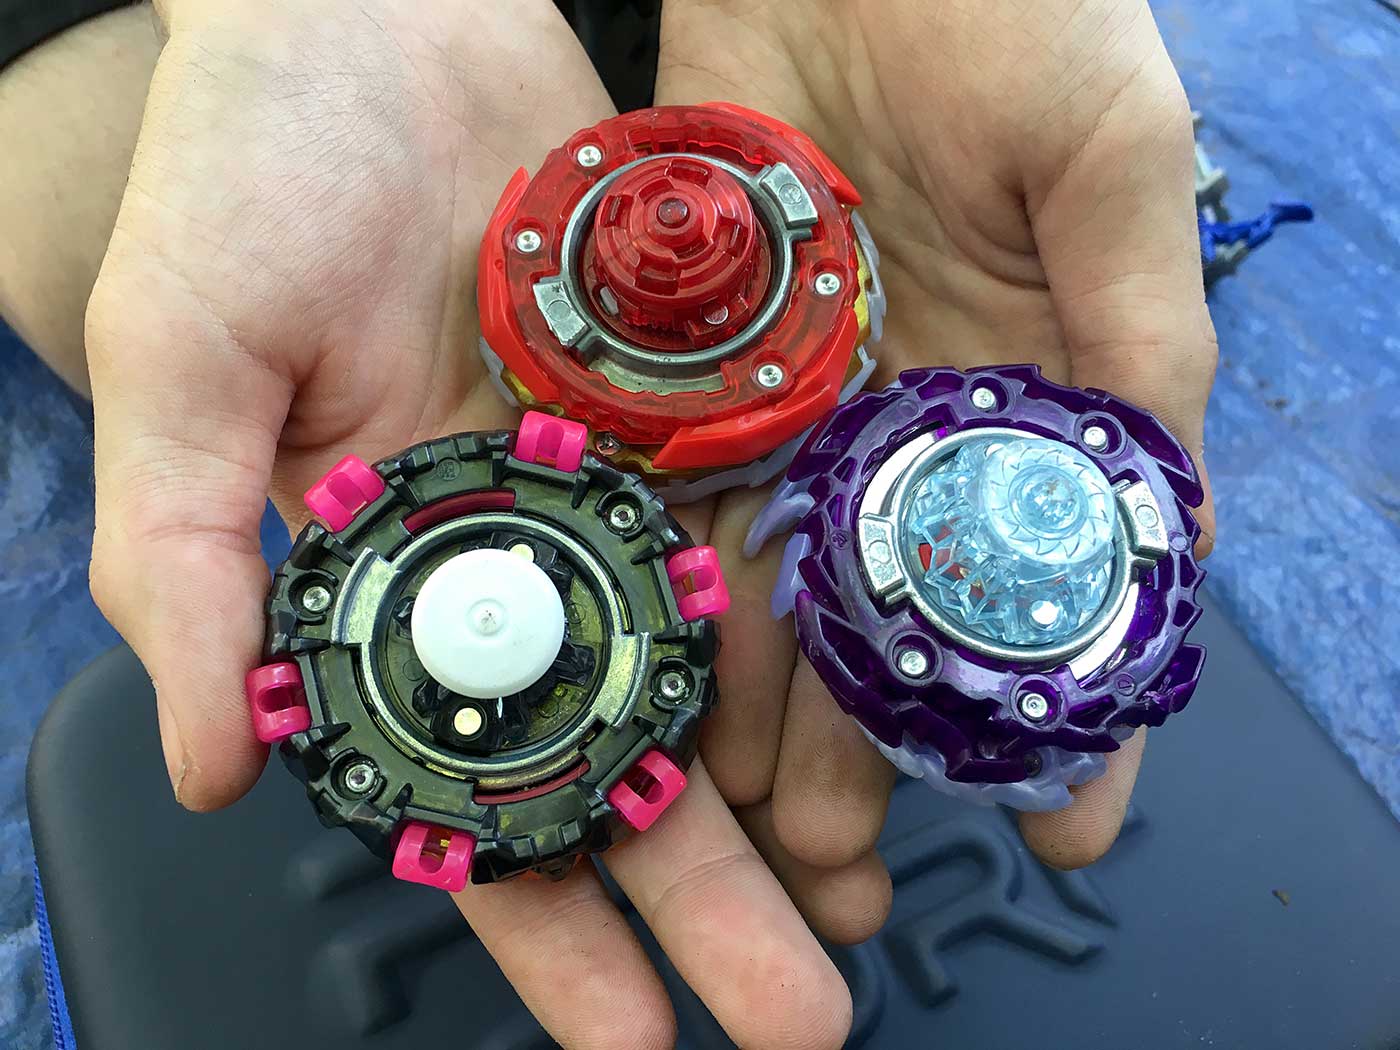
Bearing Driver – Beyblade Burst God
How was it used?
Bearing is the oldest part on this list and it doesn’t seem like it is going anywhere any time soon in spite of great alternatives like Xtend+ and Mobius that have been released since it came out in 2017.
Three of the top four players–BladerBeast, henwooja1, and myself–used Bearing on Master throughout the tournament.
For instance, I used a brand new Bearing at this event on Master Bahamut Vanguard Bearing in order to accentuate Vanguard’s higher level of same-spin stamina versus other common Disk choices like 0 Wall.
And on Master Spriggan 00 Wall Bearing, I used a worn one that would accentuate its ability to win opposite spin matchups. Worn down Bearings don’t lose their balance as quickly because the tip becomes more rounded.
Xtend+ was arguably more popular, but Bearing has a slightly higher defensive upside against KOs in some situations, which seems especially important in a metagame where attack types like Rage are so powerful.
Rage can certainly KO or Burst Bearing combos, but I feel just a bit safer in some situations using Bearing vs Xtend+.
Verdict
Bearing is a key component of any competitive Blader’s collection.
You should own multiple copies as performance varies from Bearing to Bearing and the level of wear on the tip of your Bearing Driver can be useful for differing situations.
Where to Buy the Bearing Driver
Heads up: If you buy something through some of the links on this post, you won’t pay any extra, but I’ll get a small commission. This helps me keep things running. Thanks for your support!
Popular Beyblade Parts – Honourable Mentions
The following parts also appeared in combinations used by players throughout the day and had some level of positive impact:
Lucifer Sparking Chip:
The easiest-to-obtain heavy right-spin Sparking Chip. It was used by players primarily with the Brave Ring. Learn more in my Variant Lucifer review.
Wave Driver:
A new stamina type Driver released with the B-171 Superking Triple Booster Set. It is tall and is able to destabilize same-spin opponents when all else is equal. It has strong opposite spin performance too, but falls a bit short of opposite spin powerhouses Xtend+ and Bearing. Smartsin the6 was able to defeat my RHl.Ev’ 3A by a score of 3-2 with his Prime Apocalypse Sting Wave during the First Stage of this event.
Xtreme’ Driver:
A flat-tipped rubber Driver. It’s arguably the best overall option for attack types in the game if you can control it. 1234beyblade used it for all of his matches in the First Stage.
Xtend+ Driver:
Powerful stamina Driver. Top tier opposite spin performance and strong same spin performance. MDK Shady, henwooja1, originalzankye, BladerBeast, myself … practically everyone used it.
Destroy’ Driver:
Hybrid stamina/attack type Driver with a flat tip and free-spinning base. A good option if speed isn’t as important to your strategy and you want to have the ability to outspin some opponents in opposite spin matchups. originalzankye, Smartsin the6, and Justin TC all used this Driver.
Where to Buy the Honourable Mentions
Lucifer Sparking Chip
Wave Driver
Xtreme’ Driver
- B-00 Shadow Amaterios 0 Xtreme’ (CoroCoro Exclusive)
- B-140 Random Booster Vol. 15 – 06: Dead Hades 8’Expand Xtreme’
Xtend+ Driver
Destroy’ Driver
- B-168 Rage Longinus Destroy’ 3A
- B-125 Random Booster Vol. 12 – 07: Shelter Regulus 8’Bump Destroy’
- B-158 Random Booster Vol. 19 – 08: Shining Amaterios 0 Destroy’
Heads up: If you buy something through some of the links on this post, you won’t pay any extra, but I’ll get a small commission. This helps me keep things running. Thanks for your support!
BE A HIRO Final Stage Report
Matches in the finals were played with WBO Deck Format, which requires five points to win. Read the full rules here.
Finalists
The top four players in this tournament were quite strong!
- Kei (4-1):
After a tough stretch last summer, I (Kei) had been consistently making the finals of each event I entered before the end of 2019. In fact, I was going into this with a streak of two consecutive second place finishes in Burst Format events (Beyblade West and Papabey’s Winter Solstice Classic).
- originalzankye (4-1)
originalzankye has significantly improved recently and placed within the top three in several events last year.
- BladerBeast (4-1)
BladerBeast was coming off a 3-2 performance at BEYBLADE SHOGATSU 2020, but before that in November 2019 he had finished first place at αpocalypse with a 7-1 record.
- henwooja1 (3-2)
henwooja1 was coming off a first place finish at our last event before the pandemic: BEYBLADE SHOGATSU 2020.
Semi-Finals: originalzankye vs. henwooja1
I don’t remember much of the detail about this match, but originalzankye was able to defeat henwooja1 and advance to the finals!
Check out their decks below:
originalzankye’s Deck
- Tempest Solomon (MCC) Xtend+ 2A
- Glide Lucifer Mobius 2D
- Rage Diabolos Destroy’ 3A
henwooja1’s Deck
- Rage Longinus Jolt’ 3A
- Master Spriggan Vanguard Bearing
- Brave Lucifer Xtend+ 2A
Semi-Finals: Kei vs. BladerBeast
I was matched up with BladerBeast in the first round of the finals. Going in to it, I didn’t know much other than that he didn’t seem to have any Beyblade Burst Sparking parts. But I was wrong! He actually had Rage.
BladerBeast’s Deck
He invested heavily in offence with his deck. It consisted of:
- Judgement Joker 7 Bump Xtreme’ Zan
- Master Diabolos Vanguard Bearing
- Rage Longinus Jolt’ 3A
Blader Kei’s Deck
- Archer Hercules (Level Chip) Wheel Xtend+
- Master Bahamut Vanguard Bearing
- Rage Helios Evolution’ 3A
Rage Helios Evolution’ 3A
For me, I was quite confident in RHl.Ev’ 3A going into the finals. My Evolution’ was “awakened”, so the rubber spikes had been completely worn down.
This allows Ev’ to act incredibly aggressive, circle the tornado ridge with great speed, and bounce off the walls violently to hit Beyblades in the centre of the stadium.
I feel like this is one of the strongest combos in the game right now because it has the ability to outrun popular Drivers like Xtreme’ while also having the ability to KO practically anything.
It’s difficult to control, can be a little unpredictable, and risky because it rides the ridge close to the exit when launched straight … but when it works, it’s incredible.
Master Bahamut Vanguard Bearing & Archer Hercules (Level Chip) Wheel Xtend+
Alongside Rage, I used MB.Vn.Br (similar to BladerBeast) and LC aH.Wh.Xt+.
MB.Vn.Br I found was a pretty decent option in terms of having good LAD, decent Defense because of Bearing and Master, and OK same-spin stamina because of Vanguard.
Archer Hercules has been criminally underrated for quite some time. Perfect Phoenix quickly took over upon its release at the beginning of 2019, and for good reason.
Nevertheless, Archer Hercules has a similar amount of stamina and doesn’t have to deal with the potential unpredictability of Perfect Phoenix’s Dead Armour popping off during battle. aH also is far easier to balance tune due to it being a single piece.
It admittedly might finally be on its way out of use shortly, but I personally find that it performs a bit better than pP against left-spin attackers like Zwei and Rage. Although, that might not be saying much with how powerful they are anyways.
The usage of Wheel with it instead of 0 or 00 Cross is notable. Wheel cleanly surpasses Cross Frame-based setups in both same spin stamina and opposite spin LAD.
The Battle
In the battle, BladerBeast and I traded points a few times.
Ultimately, my RHl.Ev’ 3A was able to defeat his RLn.Jl’ 3A and also his MD.Vn.Br, which moved a bit too much from the centre and was an easy target for my Rage combo.
I also won one round with aH.Wh.Xt+ vs MD.Vn.Br and lost one round with it vs RLn.Jl’ 3A.
The final score was 5-3.
Wheel cleanly surpasses Cross Frame-based setups in both same spin stamina and opposite spin LAD.
Final Match: Kei vs. originalzankye
originalzankye’s Deck
- Tempest Solomon (Metal Chip Core) Xtend+ 2A
- Glide Lucifer Mobius 2D
- Rage Diabolos Destroy’ 3A
Blader Kei’s Deck
- Rage Helios Evolution’ 3A
- Naked Diabolos Wheel Xtend Plus Goku
- Archer Hercules 00 Expand Atomic
After observing his first battle, I had a good idea of what he would be using.
Unfortunately for me, I ended up having a few problems:
Lack of Testing Against Rage on Ds’
While preparing for the event, I placed great emphasis on countering Rage combos using Drivers like X’ or Jl’ because they tend to be the most popular in Toronto for attack types. My usage of Ev’ was meant to counter them.
I had tried some less aggressive Drivers, but didn’t test my ability to counter those as much. This includes Destroy’.
The Weight of Solomon, the Metal Chip Core, and Diabolos
The significant weight increase provided to his Tempest combo through the use of the rare Solomon Sparking Chip and the rare Metal Chip Core–which I do not have–was seemingly enough to play a factor in help it to stay in the stadium when up against RHl.Ev’ 3A.
The first round was this matchup and I declined the replay option. The potential influence of Solomon and the MCC was enough to make me believe it was worth taking my chances that he would switch to something else.
In retrospect; I do believe it would have been possible for me to score some points anyways.
But because I was using Helios and not the heavier Diabolos Sparking Chip (which I also did not own), the weight difference was enough to make me question the viability of replaying in that moment.
My lack of Diabolos for Rage also played a factor when originalzankye switched over to his RDb.Ds’ 3A. I was at a disadvantage not only because of Ds’ slower movement pattern, but the weight of Diabolos versus the Helios on my Rage combo.
Due to my lack of experience testing against Ds’ with Ev’, I wasn’t sure the best way to launch against it at first.
The ultimate result of this all was that after a few replays of his Rage combo versus mine, originalzankye took the match by a score of 5-1!
The one positive in this match for me was:
The Top Tier Opposite Spin Performance of the Naked Layer Base
My one point was through using Naked Diabolos Wheel Xtend+ Goku versus his MCC TSl.Xt+ 2A. In my testing for this tournament, I found this combo to be the best option purely for opposite spin Life After Death performance.
It’s not too hard to knock out and doesn’t have the greatest same-spin stamina … but you’ll be hard-pressed to lose an opposite spin stamina match with this.
A lot of players in Japan were using Naked even back in January/February at several of the tournaments I attended during my visit shortly after it was released and now I understand why!
It seems I’m not alone in this among WBO players as well. Prominent player geetster99 recently used Naked to help him earn third place at Geetster99 Doesn’t Know What to Name his Birthday Tournament on August 30th.
I’d really recommend picking up the B-171 Superking Triple Booster Set to get one if you haven’t already.
3rd Place Match: henwooja1 vs BladerBeast
BladerBeast’s Deck
He used the same deck as in the first round.
- Judgement Joker 7 Bump Xtreme’ Zan
- Master Diabolos Vanguard Bearing
- Rage Longinus Jolt’ 3A
henwooja1’s Deck
- Master Spriggan Sting Orbit Metal
- Rage Longinus Destroy’ 3A
- Judgement Diabolos 0 Expand Quick’
The Competitive Challenges Presented by Brand New Parts & Parts You Don’t Own
In evaluating my loss to originalzankye in the finals, it is clear that one of the other problems is not having enough respect for brand new releases.
But, don’t get me wrong.
I placed a lot of emphasis on testing the new parts I felt were good or would be used (such as Rage, Brave, Wheel, Wave), but just didn’t give enough thought to brand new releases such as Tempest.
Rage was ripping through practically everything in my testing, so I may have been a bit blinded by that (and went with it because I knew the event would be unranked) and neglected Tempest and the possibility of someone having Diabolos, Solomon, and the Metal Chip Core a little bit.
This, combined with the blind spot in my testing-based knowledge–Destroy’ on Rage–and parts I simply didn’t own (like Diabolos, Solomon and the MCC) made it a difficult battle to truly prepare for.

Breaking My Own Rules: Building Combos on the Spot
That being said, I do think one of my selections in that match even without knowing or having much experience with the above was poor.
I chose to include Archer Hercules 00 Expand Atomic in hopes of being able to OS MCC TSl.Xt+ 2A and his right-spin Mobius combo, but didn’t consider that:
- I wouldn’t be able to OS his Rage on Ds’.
- He was using a winder-based launcher, which likely would have given me an advantage in same-spin stamina matches as I was using the more powerful Sparking Launcher. So maybe Atomic wasn’t needed.
One of the reasons I was thrown off was because I had tested a Keep’ combo as a counter to Rage, but it wouldn’t have been able to OS Ds’, so I scrapped that idea in the moment.
Despite this however, other options from the tournament-ready combos in my case did exist that would have fared better.
Instead, I simply demonstrated why it’s best to avoid building new things on the spot, as I recommended against earlier in this report under “Refining My Set of Tournament-Ready Beyblade Combos”!
Over and Underthinking Beyblade Choices
Building Beyblade combos on the spot right before a match tends to lead to overthinking the situation at hand.
If you’ve thoroughly prepared before a tournament, you shouldn’t ever have a need to do it.
This and not preparing enough to face brand new releases is actually a trend that has continued for the past three Burst Format tournaments I’ve played in now to varying degrees.
The first two being:
- I lost in the final match of Beyblade West against the–at the time–brand new Imperial Dragon and had built aH.St.Kp’ on the spot, breaking away from the combos I was confident and had tested extensively with.
- I lost in the final match of Papabey’s Winter Solstice Classic to–funnily enough–the exact combo I recommended in my Imperial Dragon review: Imperial Achilles Sting Destroy’.
Finding a balance between over and underthinking
The above two examples actually demonstrate two different problems I–and Beyblade players in general–often face:
- Overthinking:
In the case of Beyblade West, despite knowing almost exactly what my opponent King Loofa would be using, I overthought the situation and built something that had some merit, but I wasn’t fully confident in. Instead, I could have easily used combos like B3.00W.Br or JD.0G.X’ that I had tested with in advance and had a better chance.
- Underthinking:
At Papabey’s Winter Solstice Classic, I had focused heavily on offense in order to make it to the finals. I used a similarly focused deck in the final match against Justin TC, not thinking enough about the known fact that he has a propensity and confidence with attack types, which would make going attack vs attack against him risky.
In the end, in both situations I either didn’t have enough respect for my preparation or had too much respect for it.
But how do you resolve this? I think it’s through balancing between constraint and adaptability.
Top Beyblade Players Should Demonstrate Constraint & Adaptability Simultaneously
There is a fine balance top players need to find when rising to the top level of competition between allowing their intuition and preparation to guide them, and staying cognisant of known threats to what has made them successful up until that point.
You need both constraint and adaptability on some level in your strategy to become successful ultimately.
In the case of this tournament–BE A HIRO–I likely placed a bit too much faith in the power of Evolution’ and downplayed its risks in my mind. It worked against most of the competition that I had anticipated, but I failed to adapt within the constraints of my strategy when it mattered the most.
I will continue to search for this balance of constraint and adaptability in myself.
I encourage everyone reading this to do the same if they want to win Beyblade tournaments!
You need both constraint and adaptability on some level in your strategy to become successful ultimately.
More Tournament Footage
Looking Ahead to the Next Toronto Beyblade Tournament
I’m looking forward to our next tournament in Toronto–Justin TC’s Birthday Bash–which should be before any new parts have been released.
New tournaments with new parts are exciting and challenging.
But tournaments with a consistent and more deeply understood metagame allow players to exercise a greater level of strategy and skill that is less dependent on reactionary choices made with varying levels of understanding.
It will also be a ranked tournament, which may produce a slightly different mindset in players. BE A HIRO was extremely competitive, but it always feels different when you play a ranked match.
Sponsored: Order the newest Beyblades at malloftoys.com!
Heads up: If you buy something through Mall of Toys, you won’t pay any extra, but I’ll get a small commission. This helps me keep things running. Thanks for your support!
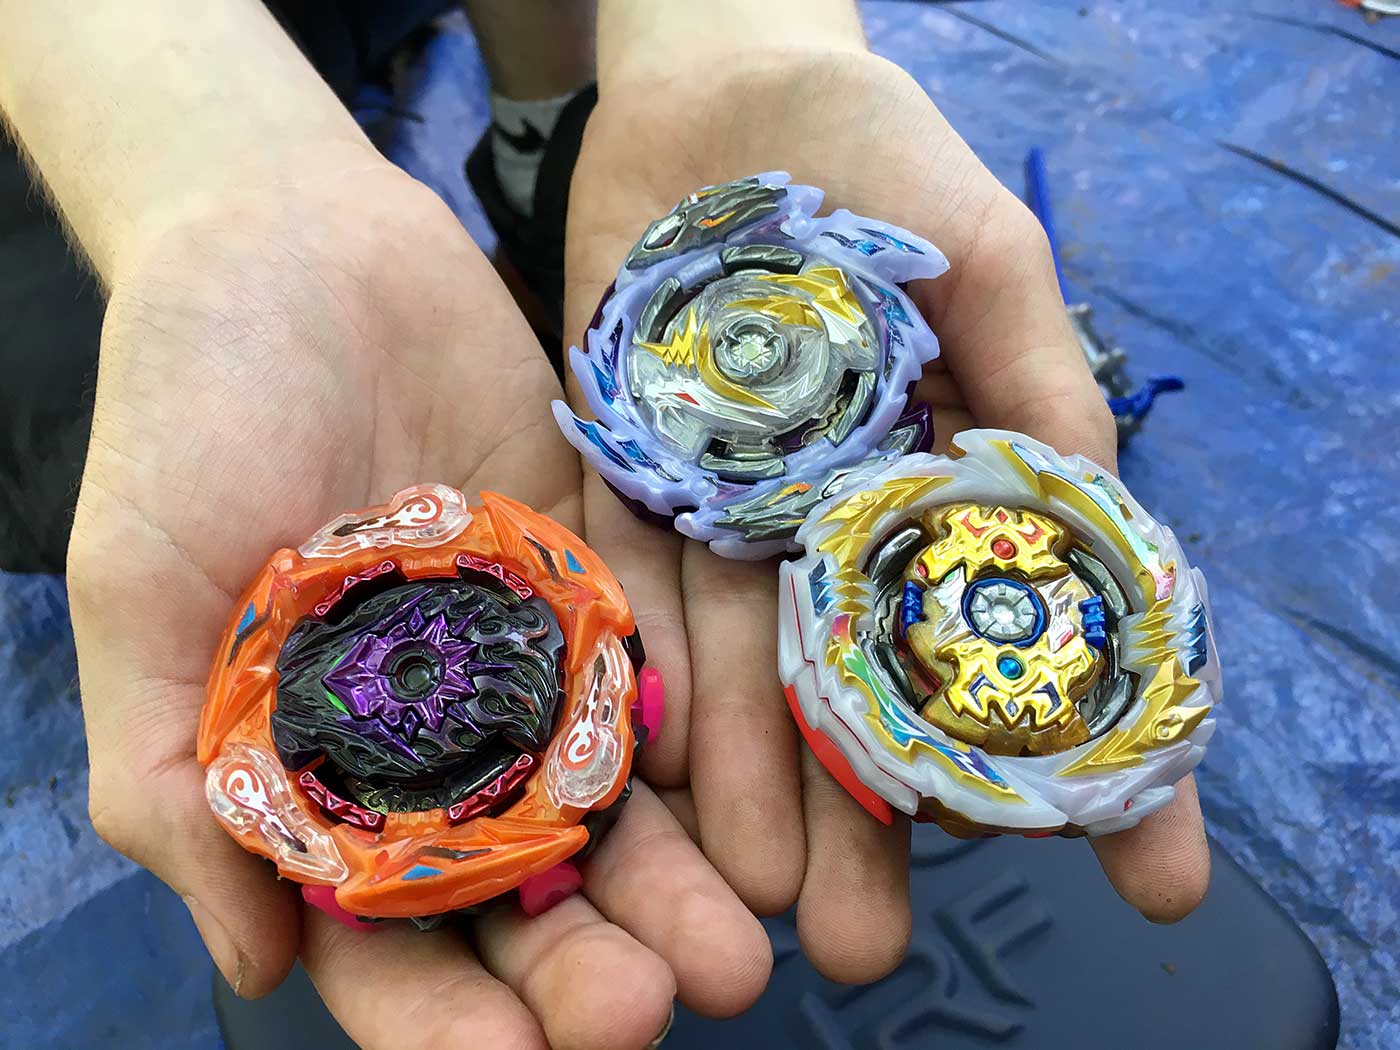
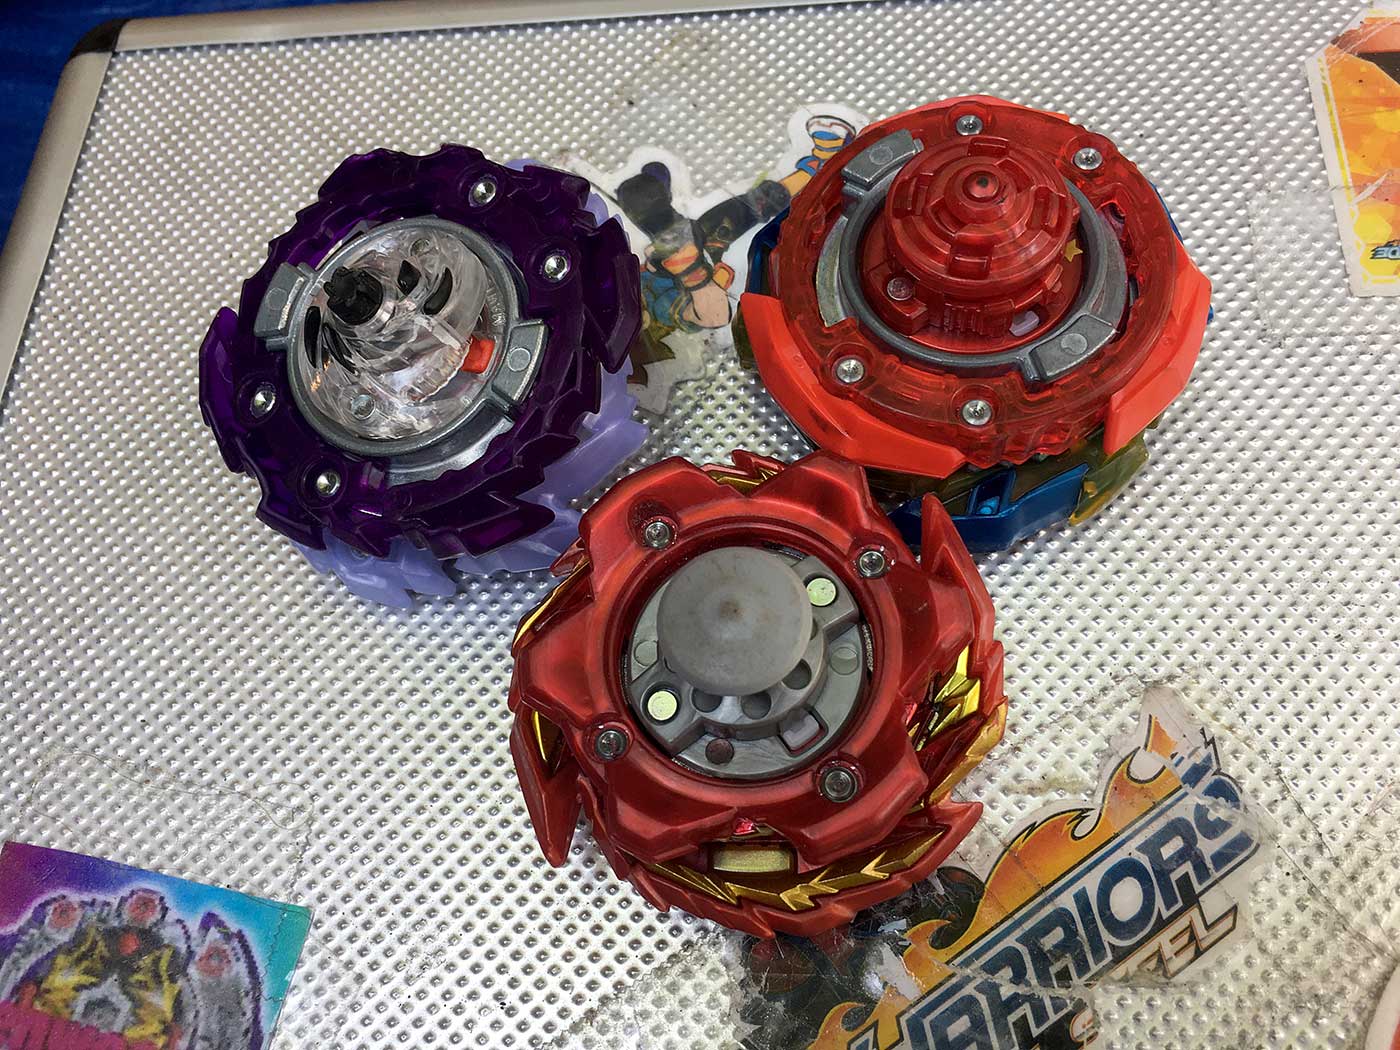
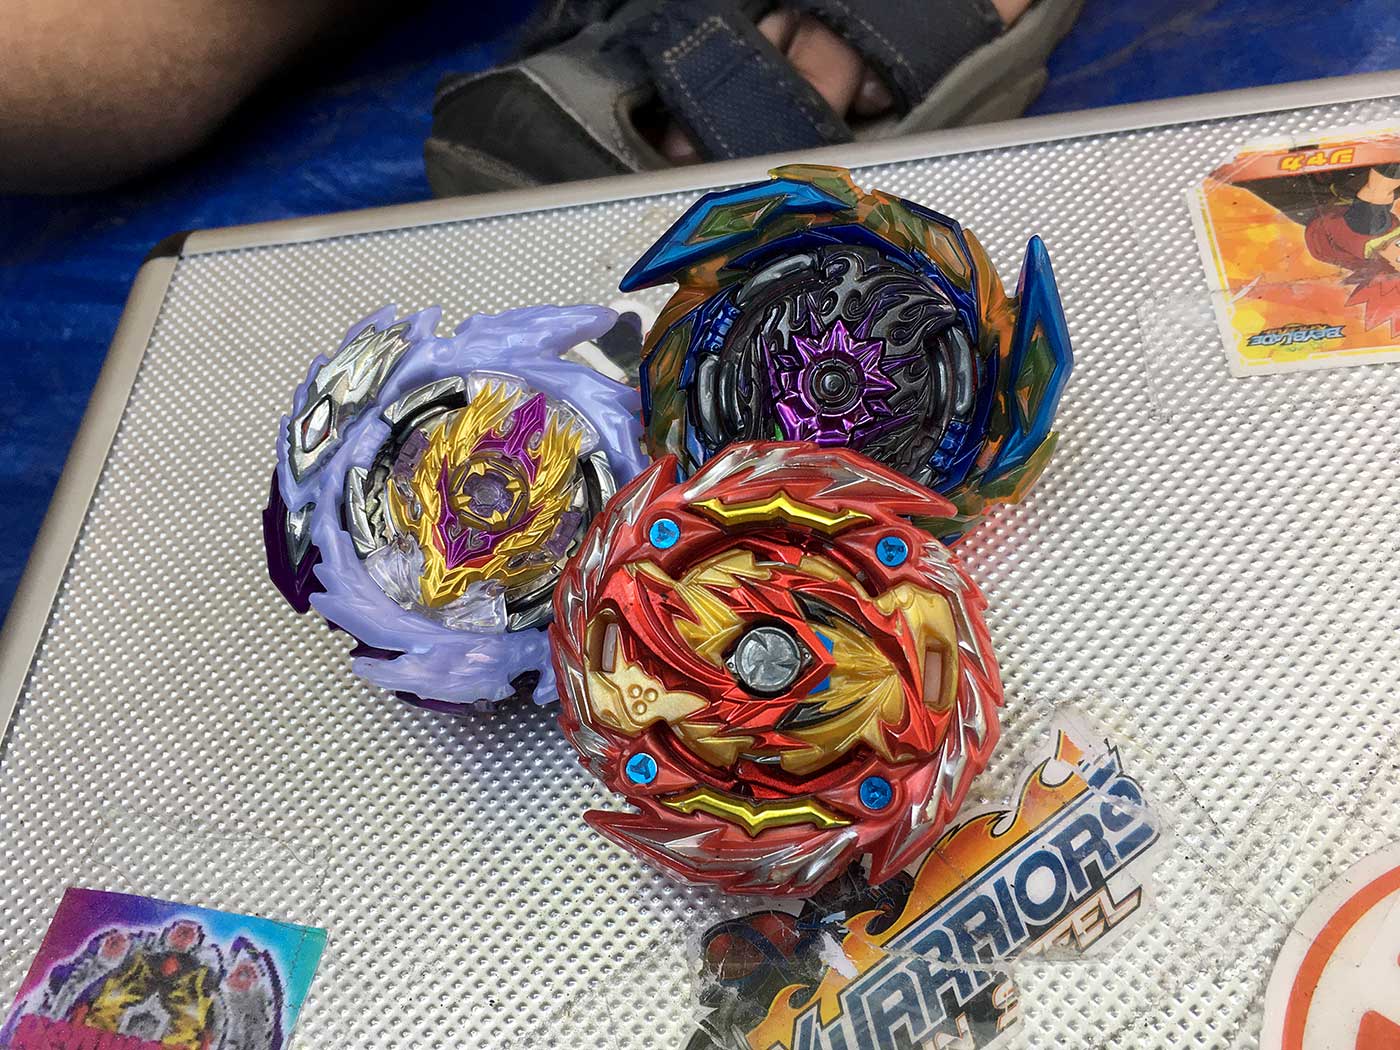
Tournament Winning Beyblade Combinations
1st: originalzankye
- Tempest Solomon (Metal Chip Core) Xtend+ 2A
- Rage Diabolos Destroy Dash 3A (Deck Format Finals Only)
originalzankye on Why He Used Tempest Solomon (Metal Chip Core) Xtend+ 2A
I originally was checking through the WBO winning combinations to see what people were using and say the same combo just replacing the Chip of Solomon with Lucifer. So I swapped the chips and had my combo with Solomon on the Metal Chip Core and used it in the tournament.
The combo isn’t invincible and is very similar to back in GT when people used the original Diabolos chip or the Goku weight. All it is used for is just added stamina to out spin your opponent in the end with all that weight that chip gives. In almost all of my matches I had a clear out spin when using it and only every lost to combos like Rage with it.
- Sparking Chip/Chip Core – Solomon + Metal Chip Core: Weight distribution to give a boost in stamina and have better LAD due to the distribution of weight in the centre).
- Ring – Tempest: Used for mostly it’s bound attack to have the initial hit to ring out opponents and has decent stamina for a ring.
- Performance Tip – Xt+: Doesn’t really need to be explained it’s been a solid part in the meta for a reason.
- Chassis – 2A: The effective 3 rubber blades used for good impact against right beys and for left beyblades good for spin equalization through spin stealing.
2nd: Kei
- Rage Helios Evolution Dash 3A
- Master Bahamut Vanguard Bearing
- Master Spriggan 00 Wall Bearing
- Archer Hercules (Level Chip) Wheel Xtend Plus (Deck Format Finals Only)
3rd: henwooja1
- Master Diabolos Vanguard Bearing
- Master Spriggan 00 Wall Bearing
- Master Spriggan Sting Orbit Metal
- Rage Longinus Jolt Dash 3A (Deck Format Finals Only)
- Brave Lucifer Xtend Plus 2A (Deck Format Finals Only)
How to Build the Winning Beyblade Combinations
Here’s what you need to build some of the strongest winning Beyblade combinations from BE A HIRO:
Tempest Solomon (Metal Chip Core) Xtend+ 2A
- Tempest:
- Solomon (Very Rare):
- Metal Chip Core (Very Rare):
- Xtend+:
- 2A:
- Sparking Chip Alernative: Diabolos
Rage Diabolos Destroy Dash 3A
- Rage, Destroy’, 3A:
- Diabolos Sparking Chip:
Master Diabolos Vanguard Bearing
- Master Diabolos:
- Vanguard (1 of the following):
- Bearing:
Heads up: If you buy something through some of the links on this post, you won’t pay any extra, but I’ll get a small commission. This helps me keep things running. Thanks for your support!
Beyblade Tournament Management
What was done well?
Event Size:
This event was limited to 13 participants and we ended up with 12. This was a great number and allowed for much easier management of the crowd, something which I think is important when a pandemic is ongoing. And especially for a first event back after the imposition of so many new guidelines and requirements.
Mask Wearing/Eating:
Everyone followed the mask/face covering policy and seemed to be mindful of stepping away from the tournament area while eating.
Stadium Disinfection:
We were able to ensure this was done after each match with disinfectant wipes. But JesseObre pointed out that this is actually something we probably should have been doing more frequently in the past already if not for sanitary reasons, but for Beyblade part performance and care reasons. Nobody wants to play in a dirty stadium! We used to clean stadiums during events, but admittedly it wasn’t as intently as we did during this event or with actual disinfectant wipes.
What could be improved?
Play Area/KO Rulings:
It’s safe to say that we were all ready for the WBO’s existing Play Area/KO rulings to be changed. Several players asked about this before the event started. Internal discussions are ongoing with WBO Staff and we’re almost there, but the updated rule wasn’t ready in time for this event. You can read more about this in my latest post on the subject: Where should the “play area” of a Beyblade stadium begin and end? (Extended Play Area vs. Penalty Area).
Confirm Parent/Guardian Presence:
I had trouble getting people to reply about this in my event thread before the tournament date … lesson being: nobody reads!
Contact Tracing:
Almost nobody showed up with their info already written down, again demonstrating that nobody reads!
Physical Distancing:
Everyone was very respectful of physical distancing when asked, but it did take some getting used to for players to step away from the stadium after launching and for judges to remember to ask them to do so if they didn’t. We also had some people filming that were a bit too close at times, so I will keep a closer eye on this next time. There were also times when two people were filming relatively close to the stadium, which probably shouldn’t be allowed at this point in time.
Photo Gallery


Acknowledgements
Thank you to everyone who helped to make this tournament a success!
Specifically, thank you to:
- henwooja1 for bringing tarps, a stadium, and shooting some video.
- Justin TC for bringing a stadium and shooting video
- originalzankye for providing prizes
- MDK Shady for shooting video
- All of our judges (Mitsu, 1234beyblade, BladerBeast, Justin TC, henwooja1) for helping the tournament to run smoothly.
What do you think? Comment below!
I’d love hear what you guys think of the Beyblade metagame as it stands right now, whether you attended the tournament or not. Or if you’re a tournament organizer, what sort of things do you do to help improve the experience for everyone at events during this time?
Comment below and let me know!
If you enjoyed reading this article, please also feel free to share it with any of your friends who are into playing Beyblade competitively or enjoy hosting tournaments.
13 thoughts on “Has Beyblade Burst Sparking Taken Over Competitive Play? – WBO Beyblade Tournament Report”
Comments are closed.
Very precise analysis! Loved the in depth concepts of what happens in the mind of a blader before and during the battle, hopeful that we all maintain proper distancing and disinfection methods in future tournaments, if we can do that, we can ride out the Covid storm!
Thank you, Tempest!
Talking about what happens in our minds before and during battles is a huge part of the game, but I don’t think it usually gets enough attention within the community.
There’s so many factors at play before and during every battle related to the context of the event, who you’re playing against, your preparation, your mental state, and so forth. I’m glad you enjoyed it.
And yes, I hope so too! Overall, I think we did a good job at BE A HIRO. I’d recommend anyone hosting tournaments keep them relatively small for the foreseeable future depending on the circumstances in their local area. It’s much more manageable to enforce special requirements with 12 people than it would be with even 24, in my opinion.
Hello Kei! Greetings from Indonesia! I stumbled on your website by accident when watching a video of BBG’s, and have been an avid reader ever since. Your in-depth review of competitive beyblade scene always fascinates me, and actually being one of the main factors on why i decided to try out this hobby. Just bought a Rage Longinus last week, and currently thinking on building my collection from there. First of all, great article as always. However, i have a few questions after reading several parts of it. It would be really helpful if you can read and answer this, since i have little to no knowledge of beyblade.
1. Why is Ev’ ability to outrun traditional attack drivers such as Extreme’ makes you think that it is a good pick to counter those drivers? Isn’t Ev’ makes rage on 3A self-ko’d itself more due to its movement at the ridge and its rather large recoil?
2. Can the Lucifer chip be a suitable replacement for the Solomon on Tempest? Because i would assume that diabolos isn’t quite available for everyone.
3. Could you please elaborate on why rage is a good counter to Pp? Is it because of the way that the dragon head is shaped? or because Rage can KO’d Pp rather consistently? I found out on my testing that Rage on Ds’ have 50% – 60% chance of knocking out Pp. Note that the Pp that i used doesn’t have a level chip yet since thst is rather hard to come by here, and its full combo is Perfect Phoenix 00 proof Atomic.
That’s all from me, sorry if its rather long. Looking forward for more articles in the future! Stay safe!
Hi Ryan,
Hello from Canada! I’m really happy to hear that I was one of the main factors that pushed you towards trying out Beyblade. That’s exactly what I hope to do with this blog! You’re certainly in the right place for Beyblade too. Beyblade is pretty popular in Indonesia, from what I understand.
1. Evolution’ does have a self-KO risk, but it depends largely on the launching skill of the user. If you awaken your Ev’ and launch it straight from basically the middle of the stadium, I don’t think there’s as much chance that it will skip the ridge and self-KO.
One of the problems that I discovered after the fact and didn’t really mention in this article was that upon review of the tournament footage in slow motion, my launch wasn’t as steady as I would like and despite aiming for the centre, by the time I pulled the string on the Sparking BeyLauncher, Rage was actually being released away from the centre, which allowed my opponent to hit me more easily and increase the chances of self-KO.
Of course, there was many other factors involved too such as my opponent’s launch strategy and timing, but the positioning and angle of your launch contribute greatly to the outcome, as I’m sure you can imagine.
I need to practice more with the Sparking BeyLauncher. It feels different than previous launchers, so the getting a feel for when the Beyblade actually leaves the launcher relative to when I pull it will take some more practice.
If you’re able to stall around the ridge of the stadium with an awakened Ev’, there’s no much chance anything can catch you. The sheer power of a hit from a Beyblade in this state is enough to overcome a lot of recoil and at the very east, hit the opponent out instantly before you exit the stadium yourself.
If your opponent also shoots straight and stalls around the ridge you should win the race. If they bank, you should be able to just knock them out because they will be moving slower and might even be stalling for a second at the ridge before swooping into the centre.
Of course, you can still lose with Ev’, but especially in a metagame where I felt there was little effective defensive options, trying to out-attack opposing attack types seemed like the best option.
Ev’ doesn’t maintain a flower pattern as well as X’, but with Rage it often doesn’t need the speed either, so even if you want to bank Rage Ev’ you’ll still have a decent chance of KOing your opponent.
And personally, while my opinion might change with further testing, I tended to like how Rage felt on Ev’ versus shorter Drivers. Rage might look like it has upper attack, but I find it just smashes things out viciously, so being taller allows it to hit opposing Layers more effectively.
I might have preferred something like X’ vs. Rage Ds’, but in general, I liked the matchup Ev’ had against most opponents I predicted I’d be facing.
2. Lucifer might be a suitable replacement, but it’s something I need to test more myself. You might find this video interesting: https://www.instagram.com/p/CEfyJb_lH_A/
3. I don’t have a detailed technical explanation for this, unfortunately haha. I just find that it does very well against pP. Especially on fast Drivers like X’ I think you could get higher than 50-60%.
No Beyblade Combo is the best everything has counter’s but the combos here are really interesting and Surprising Master was used a lot I am Surprised no First,Mirage or Super From my testing Abyss on Revolve Counter’s Rage Quite well even though I hAD some Problem’s choosing the Chasis but at last I chose 1B but Brave attack isn’t top tier but it spin steals or specifically Spin equalizes like crazy anyway great review
Relatively speaking, Master is surprisingly not the worst versus Rage in left-spin. It’s also hard to burst, so especially in the first stage it felt like a safe choice (particularly if you knew your opponent didn’t have Rage/Zwei).
Personally, I’m not a huge fan of First, Mirage, or Super! What do you like to use them for and why are they good?
Interesting regarding Abyss. I didn’t have it at this tournament so it’s a part I’ve been wondering about.
I’m not a huge fan of Brave 2A for stamina. It doesn’t seem to do well in opposite spin battles using Xt+ based on my testing versus Wheel Xt+ combos. And that was in both modes on 2A if I remember correctly. But I’ll revisit.
Interesting report! I’m a bit surprised that you didn’t use the aH At even once during the final match despite it being such a smart pick. I don’t have a Rage to test against myself, but if it didn’t KO you surely a maxed Atomic could OS Ds’ on such an aggressive chassis like 3A? And it could OS Curse and maybe Tempest too due to the Driver matchup despite it’s weight disadvantage.
And personally, I’d have to disagree with the point about building combos on the spot. At least for nearly all of the tournaments I’ve attended since Burst began, I’ve brought all of my competitive parts disassembled in a case and built them after my match had been called. I definitely get the advantages of having a predetermined game plan and sticking to it, but I’ve found that building combos on the spot gives you a lot more room to adapt to different opponents, especially ones that you may not have thought to prepare for during testing. On top of that, it also makes you less predictable.
You’re actually right. I just did a few quick rounds and the combo I choose would have indeed OSed RDb.Ds’ 3A! It still could have KOed aH relatively easily if he shot well, but in retrospect trying it probably would have been my best bet in that match and put more pressure on him.
I was probably a bit too hyped up on Rage Ev’ going into this tournament. Rage was also dominating a lot throughout the tournament, and in the first round BladerBeast had KOed my aH.Wh.Xt+ with Rage pretty easily, so I was feeling a bit scared of the matchup and decided to just ride things out with Rage Ev’.
But, it was our first event after seven months and unranked, so live and learn! The next event will be interesting now that everyone has a better feel for the metagame.
Ha, you’re probably the most successful person on the WBO at going against my building combos on the spot advice here.
I don’t mean to suggest that you can’t be successful by approaching things this way, but just that preparing ahead of time allows you to potentially make better decisions based on a wider base of testing knowledge and a set of combos you’re deeply familiar with than you could building something on the spot that you’ve never tested before but are using based on a theory.
This also combines with the benefits of balance tuning your combos ahead of time. The difference might not have a measurable affect in a lot of battles, but it could in some and you can’t be confident in this aspect unless you’ve spent the time to optimize the combo beforehand.
Your strategy also doesn’t have to be limited to just like three Beyblades, you could prepare 20 Beyblades if you wanted to in this way to cover any conceivable situation.
There’s no way anyone would know all of the combos you’ve prepared, so I don’t think that it makes you more predictable. For instance, at BE A HIRO I only revealed around 5 combos throughout the event. This is only half of what I prepared. The others didn’t get shown because the opportunity to use them didn’t arise.
The way I see it, if you’ve prepared properly there shouldn’t be anything anyone could throw at you that you wouldn’t have an answer for.
There are many other variables to consider such as the size of your collection and ability to pre-build multiple combos, some of which might use the same parts. But what I’m advocating for is the sort of ideal scenario in my mind of walking into a tournament.
Even though Lord is falling out of usage, is it still a solid pick for combos with Rage 3A apparently starting to dominate the meta? Can it stand on it’s own even when not against Rage 3A or is Master phasing it out?
First of all thank u so very much for taking so much effort to write bthese entries. On top of organizing and blading this must be quite a challenge! (I read a while back about how you feel less excited about blading and writing nso you went to Japan to spark things up)
Secondly I hope you realize how valuable your writing is, because there aren’t many sources for beyblades out there that people can rely on. Many youtubers focus on news on releases, unboxing and battle while some modding. And to be honest (and no offense) I thought WBO threads and constant control of beyblade wiki a little detached to the general public. If you are an avid bladder, sure. But no ordinary person will read through their threads.
That’s why your entries are so valuable. You show and give vital details on beyblading, combos, metagame, competition organization, thought process without sounding so complicated. It feels like you are talking to us, the public, not your fellow bladers.
Please do continue and if I could help support in any way, do let me know.
Hello Bladder Duck,
You’re welcome! You’re right that it is a challenge, on many levels. It’s always a battle against how much time I have to dedicate to BeyBase, playing, organizing, and helping run the WBO.
That is a big part of the reason why I started this blog. There was nothing like this really out there and I felt capable of filling the gap.
Thank you so much for the kind words. It’s really re-affirming to hear you say these things. Showcasing the depth of Beyblade while still being accessible to people who aren’t are well-versed in it is one of my goals.
If you’d like to support me, sign up for my newsletter and share my articles with anyone you know who might be interested in Beyblade! 🙂
Also, I am curious: is there any type of information or articles that you have found to be particularly useful? Anything you want to see more of on this blog?
would the Spriggan chip be a good chip on the tempest ring and I am getting world Spriggan next week and I don’t know if 2b fits on tempest does it
thanks I am excited for your answer
Hey there. Spriggan would work fine on Tempest, but I’d recommend using Solomon or Diabolos if you have them instead. 2B will work on Tempest as well! But Wheel 1S works even better.