Beyblade Burst DB Tournament Finals Report
Affiliate Disclosure: If you buy something through some of the links on this post, you won’t pay any extra, but we’ll get a small commission. This helps us keep things running. Thanks for your support!
On August 21, 2021 the Toronto community gathered for Bey Fray Qt at High Park, our first ranked tournament of the year.
In the first part of this tournament report, I outlined my 3 Step Guide To Preparing For a Competitive Beyblade Tournament and in part two we reviewed the rule changes in effect, the results of the first stage of the tournament, as well as The Top 3 New Beyblade Burst DB Parts For Tournaments.
What You’ll Learn in This Report
In this third part we’ll now be transitioning to covering the final stage of the tournament. Through video as well as my play-by-play analysis and the final results, you’ll learn the answers to:
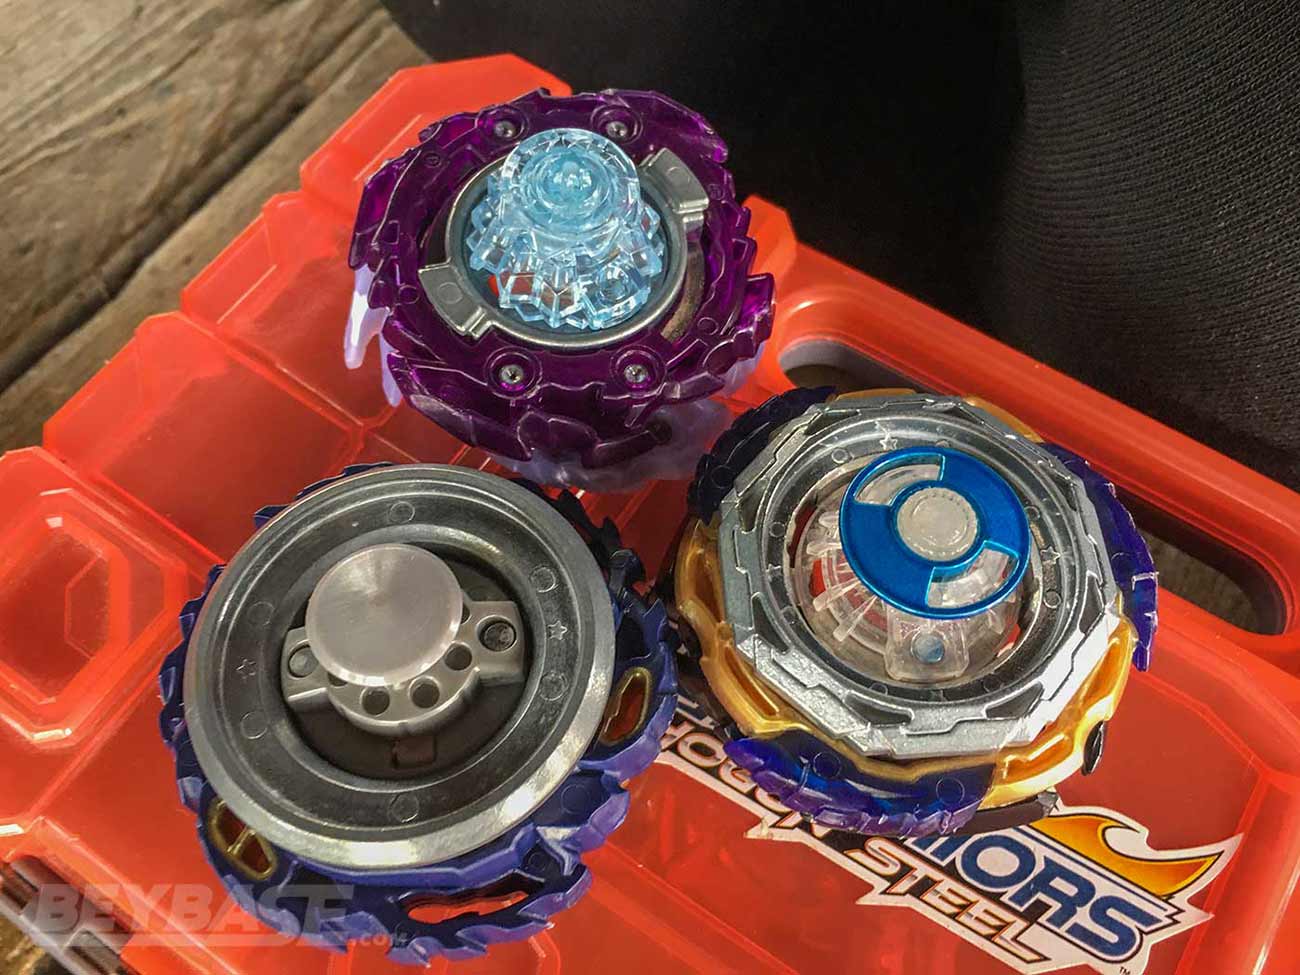
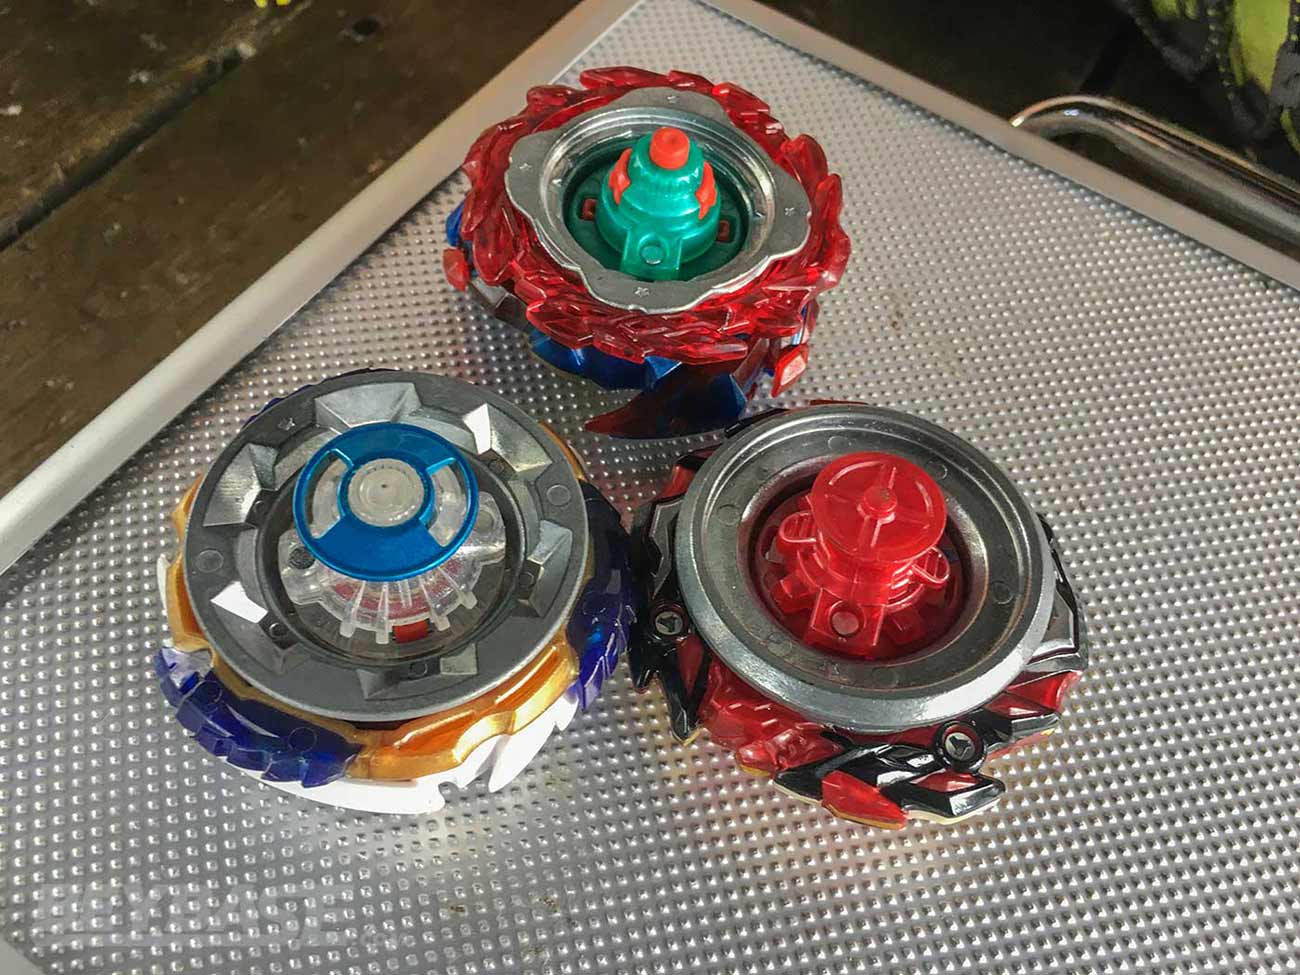
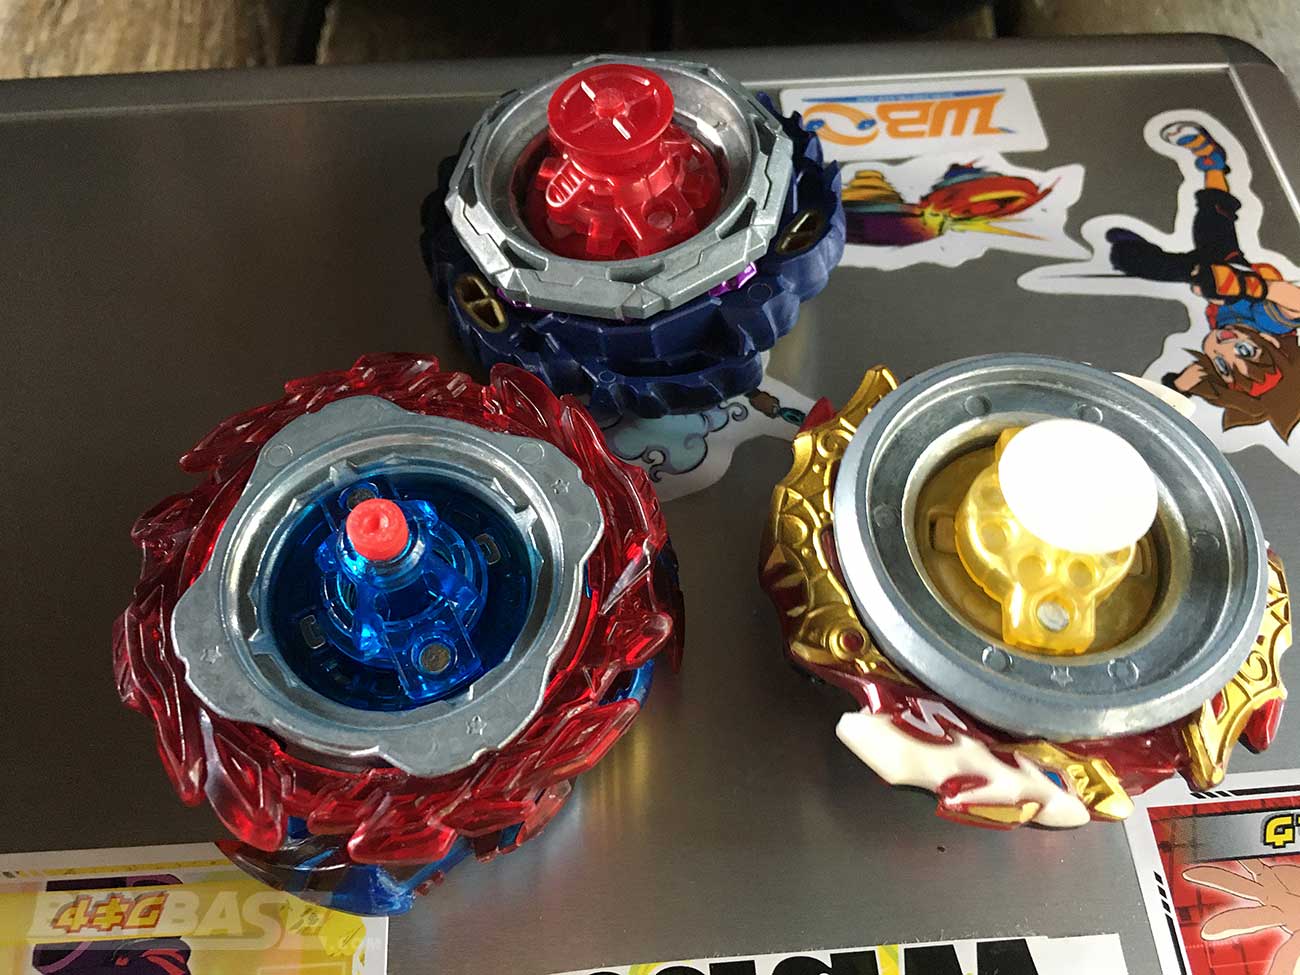
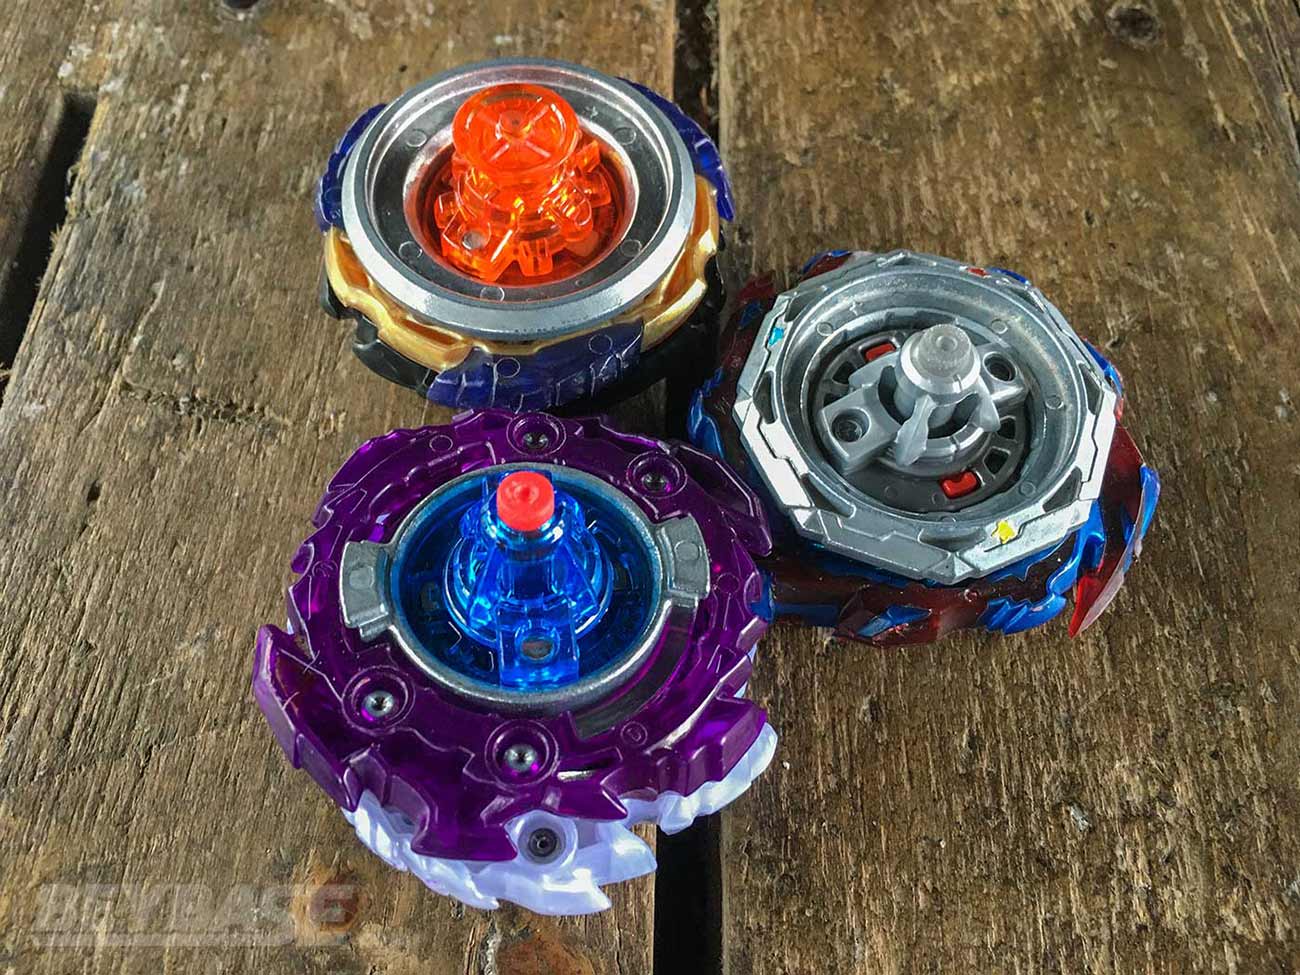
- What Beyblade combos did each finalist use?
- If the Savior Blade made right-spin attack competitive again through the success and failures of the players who used it during the finals.
- What Beyblade combos did the winning players use?
- How to build some of the key winning combinations
Tournament Details
- Date: August 21, 2021
- Location: High Park – Toronto, ON, Canada
- Format: WBO Burst Format (Rulebook)
- WBO Event Page
- Challonge Bracket – First Stage | Final Stage
Heads up: If you buy something through some of the links on this post, you won’t pay any extra, but I’ll get a small commission. This helps me keep things running. Thanks for your support!
Bey Fray Qt Tournament Article Series
Champions aren’t born overnight. In my latest article, I break down how my pursuit of knowledge, adaptability, and reproducibility compounded into victory at a 256-player G2 tournament.
Sponsored: Order the newest Beyblades at malloftoys.com!
Heads up: If you buy something through Mall of Toys, you won’t pay any extra, but I’ll get a small commission. This helps me keep things running. Thanks for your support!
Final Stage Report
The top eight players advanced to a single elimination WBO Deck Format final.
Finalists
- henwooja1 (5-0)
- Justin TC (4-1)
- Tahoor (4-1)
- originalzankye (3-2)
- Kei (3-2)
- 1234beyblade (3-2)
- Lrexman (3-2)
- Ninjahacker (3-2)
Quarter-Finals: henwooja1 vs. Ninjahacker
Ninjahacker was playing in his first tournament, but managed to make it into the finals!
He had a good selection of parts, but overall his combinations were unconventional and he didn’t quite have the shooting ability to take advantage of things like his RS.Xc 3A against henwooja1’s AFF.Tp.Br-0.
henwooja1 was able to easily take this match by a score of 5-2 relying solely on his Astral Fafnir Tapered Bearing-0.
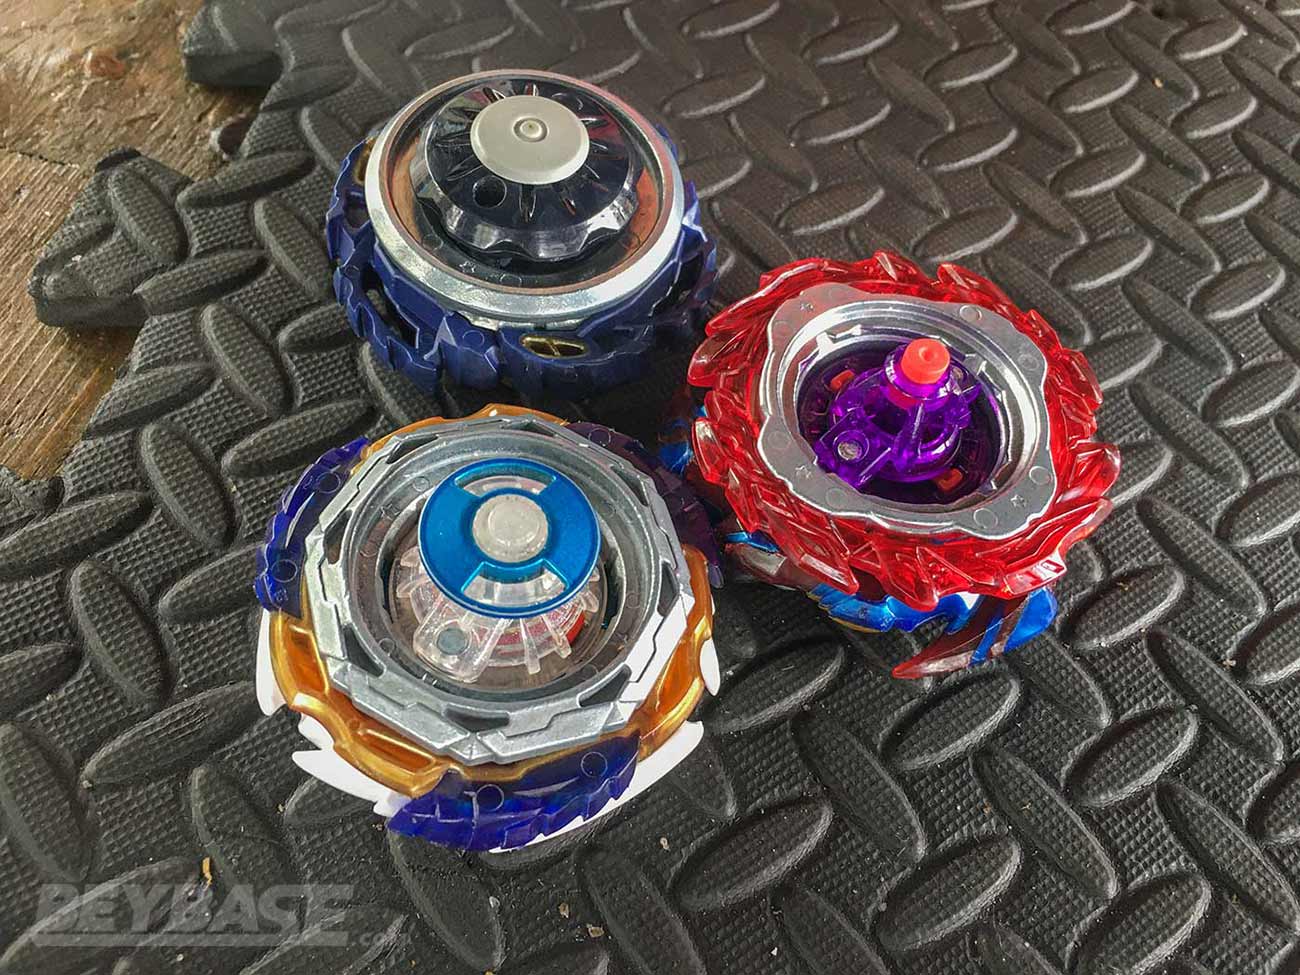
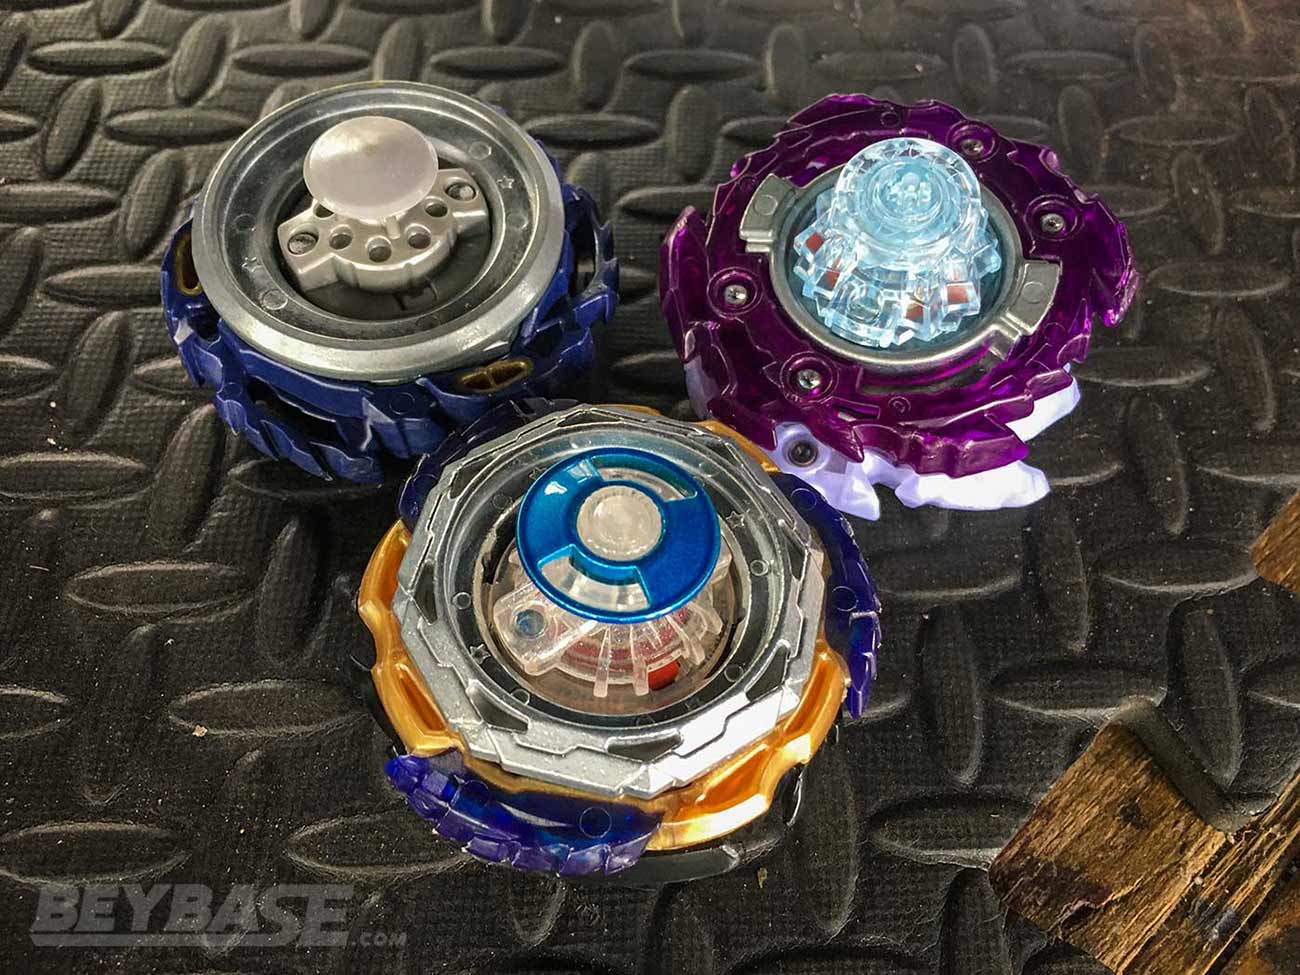
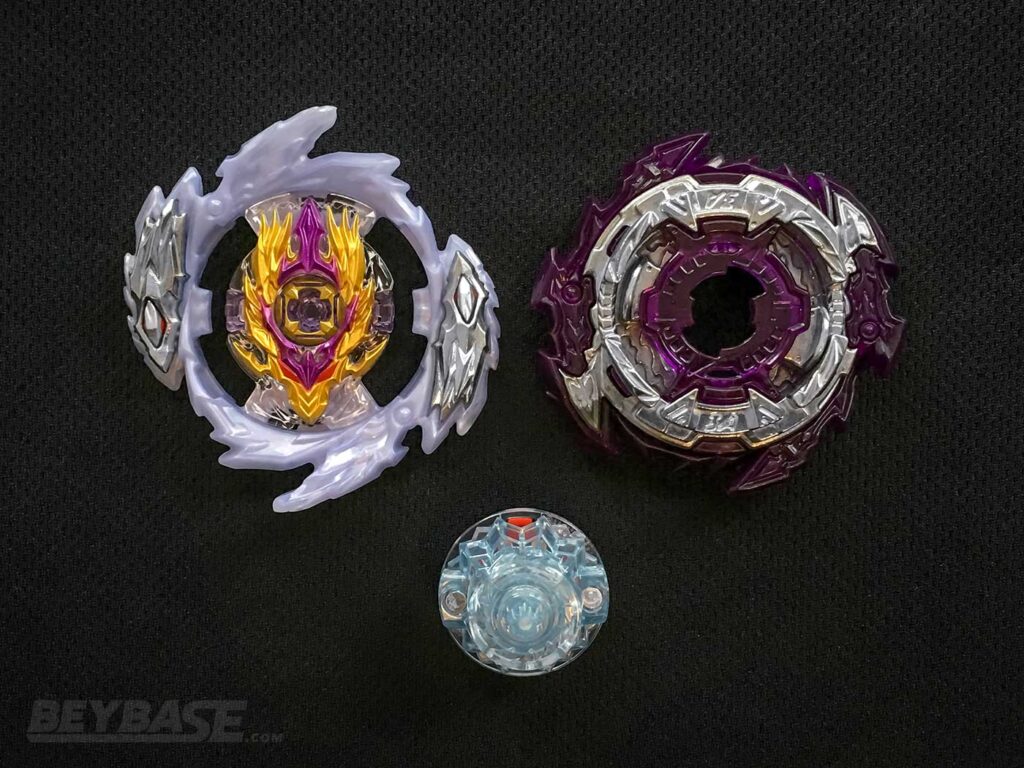
henwooja1’s Deck
- Dynamite Belial Over Rise-10
- Astral Fafnir Tapered Bearing-0
- Savior Valkyrie Nexus-S Quick’-6
Ninjahacker’s Deck
- Tempest Lucifer 2 Nexus-S Quattro
- World Helios 2 (Metal Chip Core) Wheel Xtend+ 1S
- Rage Spriggan Xceed 3A
Quarter-Finals: originalzankye vs. Kei
This was my sixth time playing Zankye in the finals over the past seven standard Burst Format events we’ve played in together! In the past three events–BE A HIRO, Justin TC’s Birthday Bash, and HIGH PARK THROWDOWN 12–we’ve met in the final match.
But this time, it was the quarter-finals. Right after we had played each other in the fifth round of Swiss at the end of the first stage.
Kei’s Beyblade Deck Composition Strategy
High Mode had helped me win that first match, so it was on my mind going into this one. I figured that because High Mode is a bit less versatile than Low Mode and because you can only make one mode change for parts which require disassembly during the match, it would make sense to construct my deck with my ABH.Ov.Rs-0 in High Mode to start.
Thus far in Beyblade Burst Dynamite Battle, many players have balked at the idea of using High Mode. As such, the likelihood of my opponent being in High Mode to start as well was low. This could become an advantage because then the opponent would be forced to consider if they want to switch to High Mode later in the match for a specific matchup, which might compromise them in other ways.
The rest of my deck was hyper aggressive thanks to the inclusion of both a right-spin attack combination using the Xtreme Dash Driver (SRG.Gg.X’-2) and a left-spin attack type using the Metal Xtreme Driver (MCC RHl2.MX 3A).
This particular deck composition was the one with the best matchup spread based on the rough deck scoring system I spoke about in part one of this report. That is, on paper.
It’s quite smothering to the opponent because there is almost nothing in the entire game that can counter both of these attackers simultaneously. These attackers combined with the versatility of ABH.Ov.Rs-0 (which was awakened) make it a fairly difficult deck to play against.
However, the skill cap is also high. It’s the ultimate high risk, high reward type of deck. More than any other type of deck, you need confidence to run something like this.
It’s not the best choice in all situations, but with right-spin attack now being competitively viable again thanks to the release of the Savior Blade, it was too good of an opportunity to pass up for this event.
I additionally felt a need to shift my strategy in this event slightly away from the Rise Driver that I leaned on so heavily during our previous event HIGH PARK THROWDOWN 12.
As mentioned earlier, I had some uneasiness about it going into this event because of the different rules we’d be using and the reality that many people were likely to be using it at this event after seeing me with it last time at HIGH PARK THROWDOWN 12 (I was right, and it even spread to many other top players in recent events across the United States).
But ultimately, I decided to keep it as part of my arsenal for now given its versatility. However, the focus was now on the benefits brought by what I surrounded it with: top tier attack types.
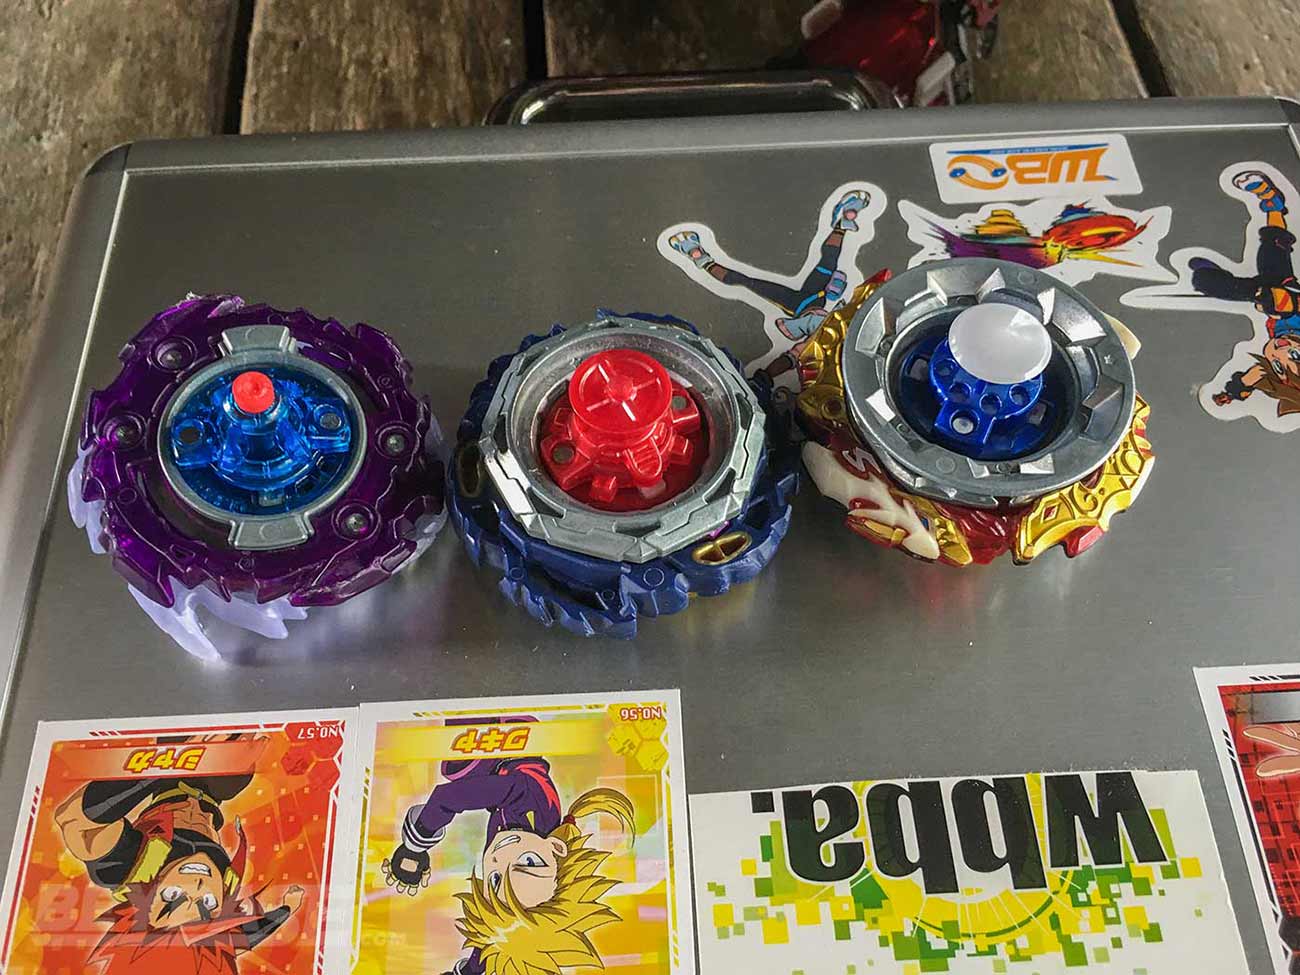
originalzankye’s Deck
- Dynamite (F Gear) Belial Giga Zone’+Z-3
- Vanish Bahamut Over Drift-10
- Savior Valkyrie Nexus-S Xtreme’-7
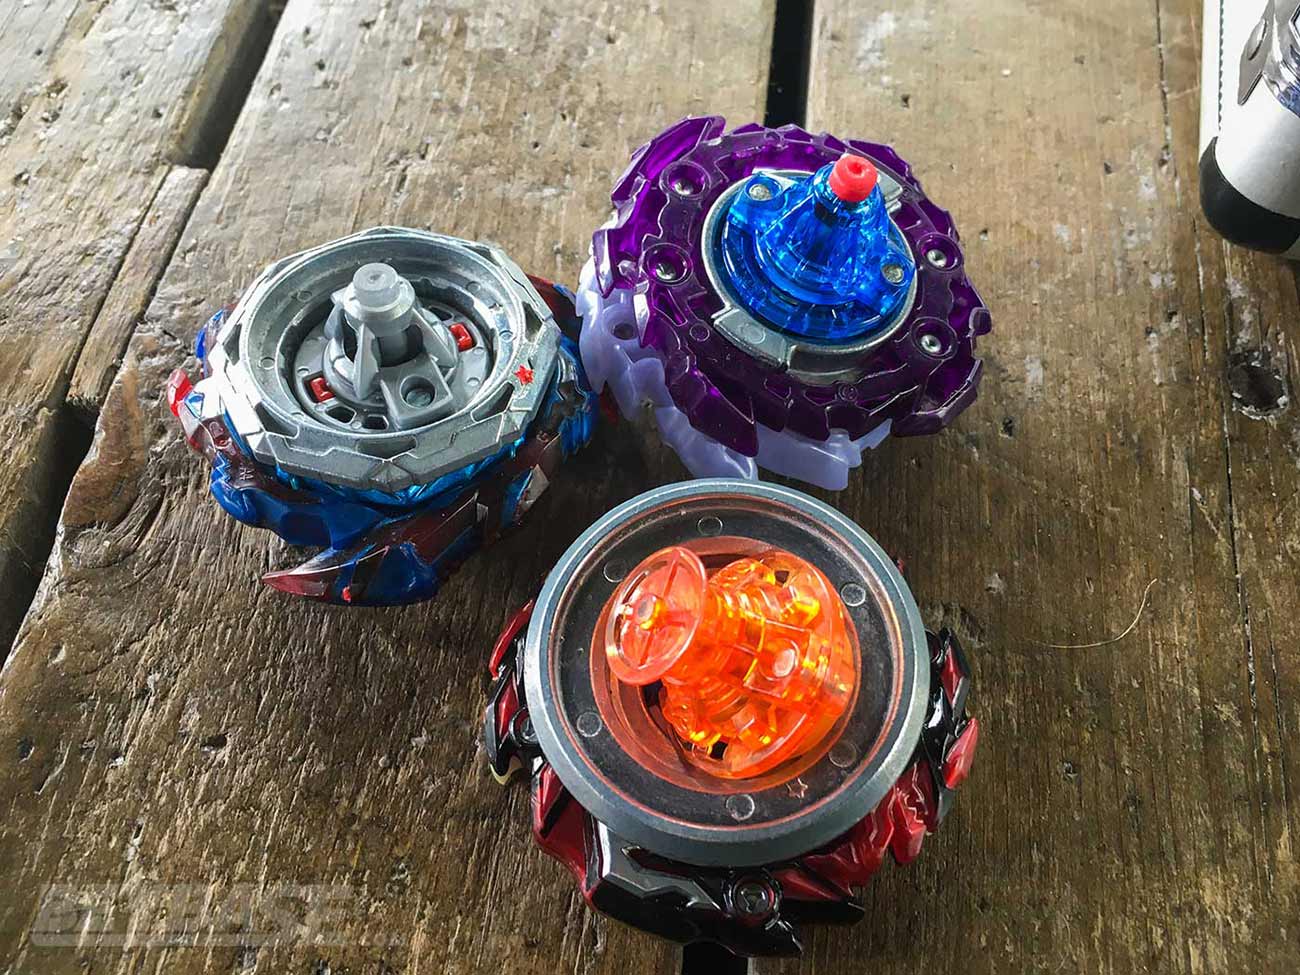
Kei’s Deck
- Astral Bahamut Over Rise-0
- Savior Ragnaruk Giga Xtreme’-2
- Rage Helios 2 (Metal Chip Core) Metal Xtreme 3A
Match Play-By-Play
I opened the match with ABH.Ov.Rs-0 (High Mode). Zankye chose SVL.Nx-S.X’-7.
The reason I chose ABH.Ov.Rs-0 is because:
- It had a chance against all three of his combinations.
- It’s method of winning against two of the three combinations in his deck (SVL.Nx-S.X’-7 and D(F)BL.Gg.Zn’+z-3) was less risky than the method of winning required by my Rage and Savior combos.
- Statistically speaking, I knew that Zankye may feel there is a higher probability of me using an attack type since there were two of them in my deck.
- If he chose to open with D(F)BL.Gg.Zn’+Z-3 I wanted the opportunity for at least one guaranteed round before he could make the choice to switch to High Mode himself.
Surprisingly, he selected SVL.Nx-S.X’-7.
Zankye appeared during the countdown as if he would be launching on an angle, but ended up launching in a fairly flat position. I launched lightly and was able to avoid being KOed despite some decent hits at the beginning.
The score was 1-0 for me.
He asked for the replay and thanks to another light launch, I was able to burst him and take a 3-0 lead.
The big issue with his Savior combo was that he was using the purple Xtreme Dash Driver from B-140 Random Booster Vol. 15 06: Dead Hades 8 Dash Expand Xtreme Dash. This version of Xtreme’ has less burst resistance than the silver one from B-173 Random Booster Vol. 22 03: Super Satan 6 Xtreme Dash 1S in my experience.
After that I chose to stay with ABH.Ov.Rs-0 and Zankye switched over to D(F)BL.Gg.Zn’+Z-3, but stayed in Low Mode.
After three consecutive draws, Zankye managed to earn his first point by outspin, bringing the score to 3-1.
From here, I understood that even if I lost another point playing this match up, I would have effectively two shots at using an attack type to win the match.
Given this, I figured it made sense to try and earn a fourth point with ABH.Ov.Rs-0 while I could. So, we played the same match again.
After another three consecutive draws, Zankye earned his second point to bring the score to 3-2.
I declined the replay option. Zankye stayed with his D(F)BL.Gg.Zn’+Z-3 and I (finally) switched into an attack type, SRG.Gg.X’-2.
By some miracle, I was able to score an epic last second knock-out, to take the match 5-3!
My combo used literally every ounce of attack power it had left to inflict the knock-out. It’s worth noting that my usage of the Giga Disk helped SRG.Gg.X’-2 to spin just a little bit longer at the end of the match.
This was not totally crucial in this scenario, but if I had been using the Nexus-S Disk like many other players in this tournament were with the Savior Blade, perhaps I would have lost stamina quicker to begin with and then at the end of the match I certainly would have scraped and stopped spinning faster.
Quarter-Finals: Justin TC vs. Lrexman
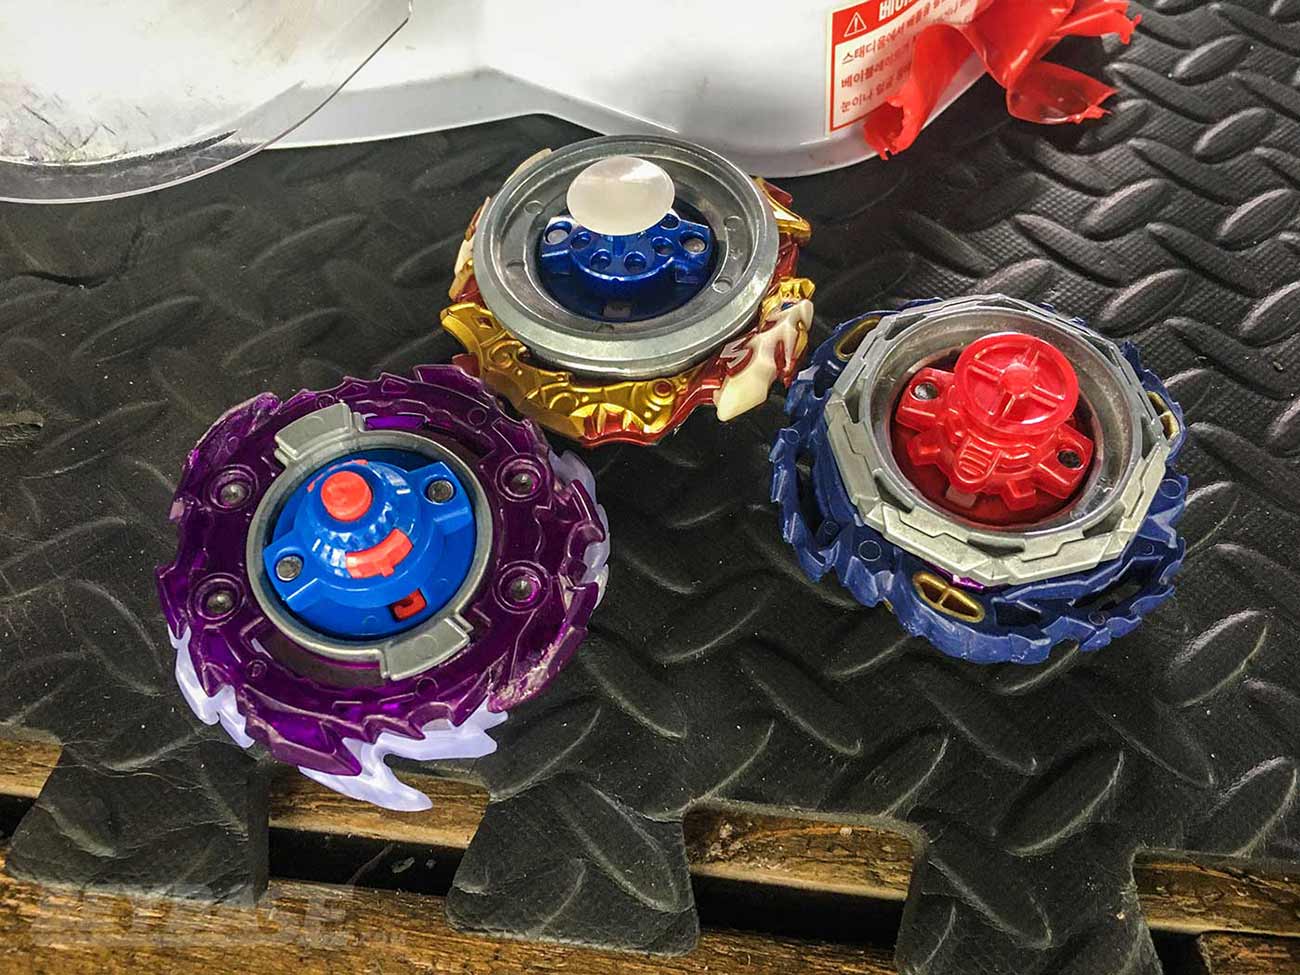
Justin TC’s Deck
- Rage Helios 2 (Metal Chip Core) Quick’ 3A
- Astral Spriggan Over Bearing-0
- Vanish Fafnir Giga Rise-10
Lrexman’s Deck
- Astral Spriggan Over Bearing-7
- Vanish Bahamut Tapered Zone’+Z-10
- Dynamite (F Gear) Belial Giga Drift-2
It was nice to see Lrexman in the finals of this event. He’s a good player and certainly understands how to build good combos, but doesn’t usually make the top cut for one reason or another.
That’s one of the great things about Swiss format; especially in smaller Swiss events it is a little bit more forgiving in terms of who gets to make the finals given that we take the top eight. In smaller Round Robin or Block Round Robin events with 16 or less players, it’s just the top four who make it.
Justin TC opened this match with his MCC RHl2.Qc’ 3A. His Quick Dash Driver was quite worn down.
This probably results in a slower movement pattern, but slightly higher stamina and is likely what contributed to him to taking the 1-0 lead by outspin versus Lrexman’s VBH.Tp.Zn’+Z-10.
Lrexman chose to decline the rematch option. Justin TC then decided to switch into his right-spin ASP.Ov.Br-0. Seeing this, Lrexman chose to go with his D(F)BL.Gg.Dr-2.
This was a poor choice. Lrexman launched his Drift Driver combo straight, which caused it to begin circling the tornado ridge and eventually get knocked out.
You typically do not want to ever enter a same-spin matchup with Drift versus a Bearing Driver combo, but if you are forced into that situation, you need to launch Drift on an angle. This delays or sometimes nullifies the transition to circling the tornado ridge, which saves you a lot of stamina and gives you a chance to win.
Justin TC was now up 3-0. The two point KO rule being used for Deck Format in this tournament only magnified this mistake and is probably a contributing factor to why you’ll see below that none of the top three players won with it or chose to use it.
Justin TC smartly chose to stick with ASP.OV.Br-0 after Lrexman again declined the rematch option.
Lrexman went with his ASP.Ov.Br-7 this time, which was in left-spin. His Bearing managed to edge out Justin TC’s, bringing the score to 3-1.
Justin TC declined the rematch option and Lrexman chose to switch over to his VBH.Tp.Zn’+Z-10. Justin went back to MCC RHl2.Qc’ 3A.
Lrexman made a strong choice as in the first round of the match he had probably launched a bit too weakly. Knowing this and that Justin TC’s Quick Dash Driver would not be as aggressive as a fresh one, VBH.Tp.Zn’+Z-10 was able to easily defend against MCC RHl2.Qc’ 3A and take the round by outspin. The score was now 3-2.
Justin TC invoked his option for a replay and this time was able to KO VBH.Tp.Zn’+Z-10 and take the match by a score of 5-2!
The mistake that Lrexman made here as you will see in the above video is that he launched much more aggressively and towards one of the stadium pockets this time for some reason, which made his combo an easy target for Rage.
Quarter-Finals: Tahoor vs. 1234beyblade
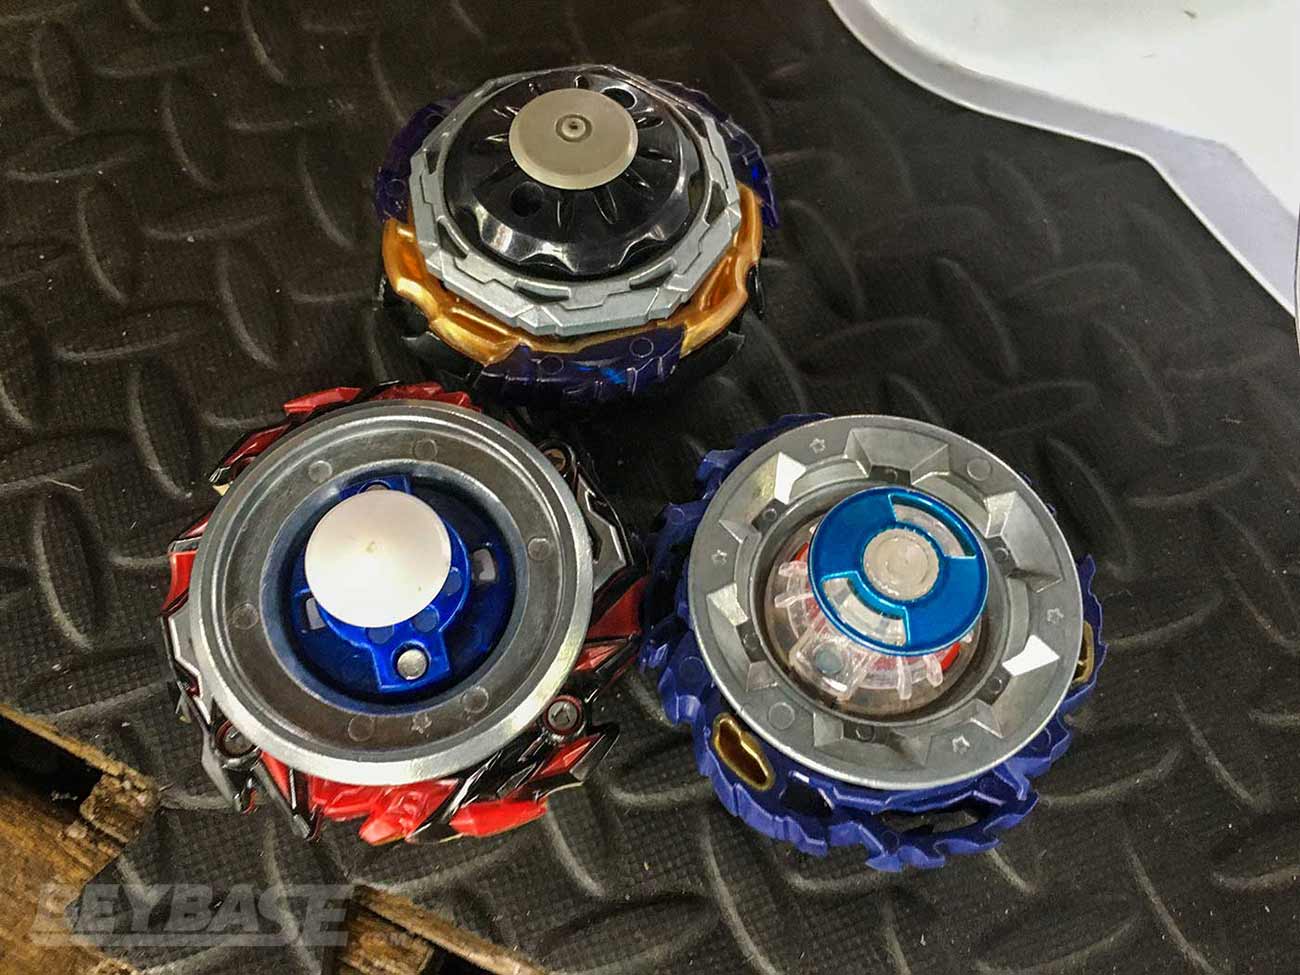
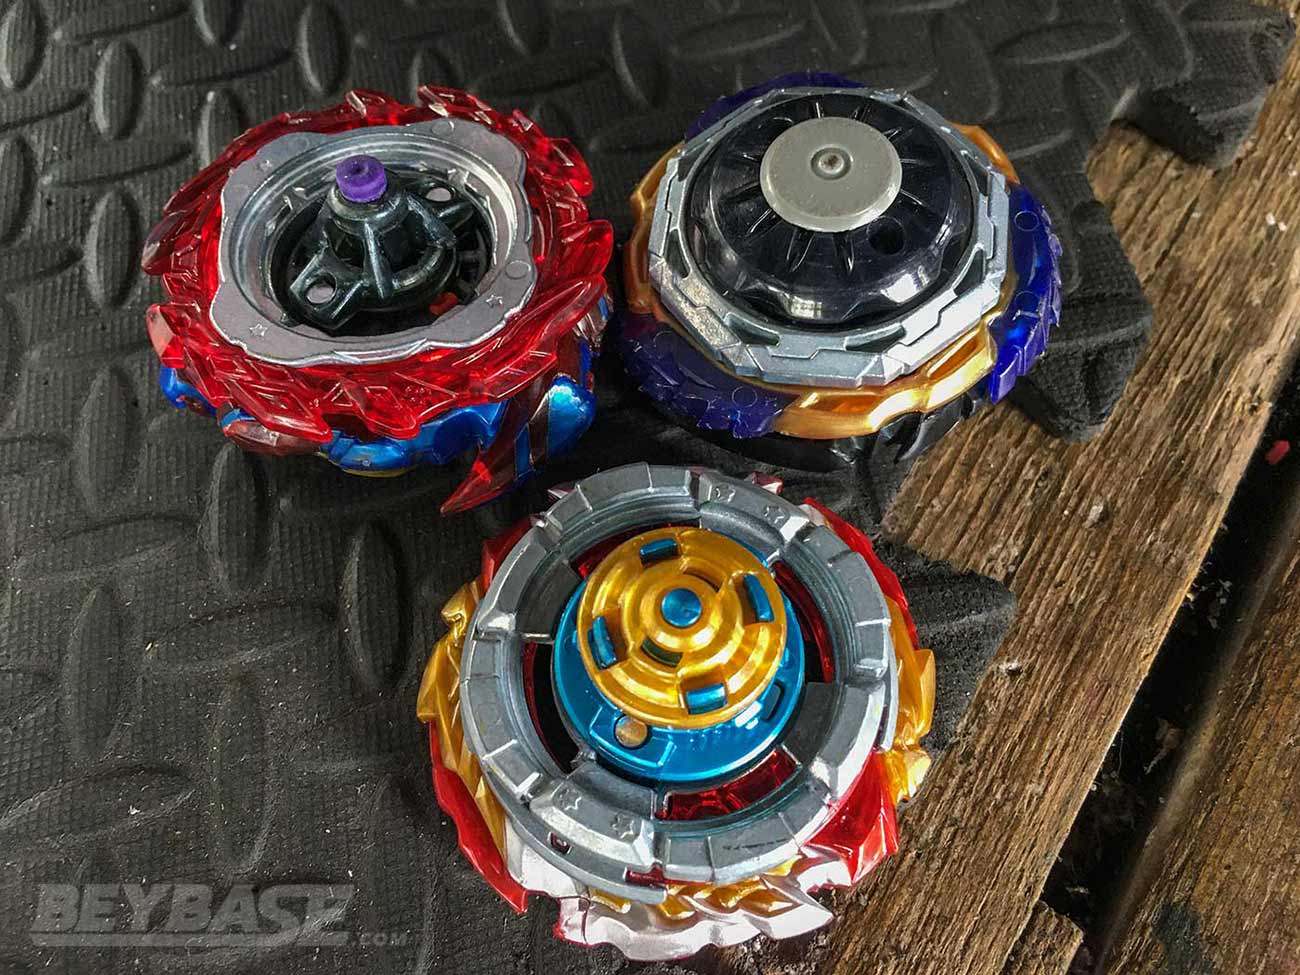
Tahoor’s Deck
- Dynamite (F Gear) Belial Giga Zone’+Z-0
- Vanish Fafnir Over Bearing-3
- Rage Longinus Destroy’ 3A
1234beyblade’s Deck
- World Spriggan Wheel Xtend+
- Dynamite (F Gear) Belial Giga Drift-2
- Savior Spriggan Nexus-S Xtreme’-0
Tahoor won this match.
This was the one match I missed watching as it was ongoing during my match with Zankye, but I was told by 1234beyblade that it mainly came down some poor launches and self-bursting with his SSP.Nx-S.X’-0. He was using the Shadow Amaterios Xtreme Dash Driver, which in my experience is much more likely to self-burst with the Savior Blade than the silver one.
Semi-Finals: henwooja1 vs. Kei
Pre-Match Thoughts
This match was fun. I knew henwooja1 had been using a nice mix of stamina, attack, and whatever you want to call awakened Rise combos entering this match.
I stuck with the same deck that had won me my match against Zankye.
Before this event I spent time trying to think about the best, most versatile way to counter awakened Rise combos 100% of the time and couldn’t really come up with anything. I didn’t have to think about this going into HIGH PARK THROWDOWN 12 because I knew nobody else would be using it.
What I ultimately decided was that awakened Rise combos do serve their purpose: they aren’t the best choice against many competitive combos, but the point of it is that it gives you a chance against them.
With this being the reality, the only way to really ‘counter’ them is to understand how they behave, which will guide how you should launch against them.
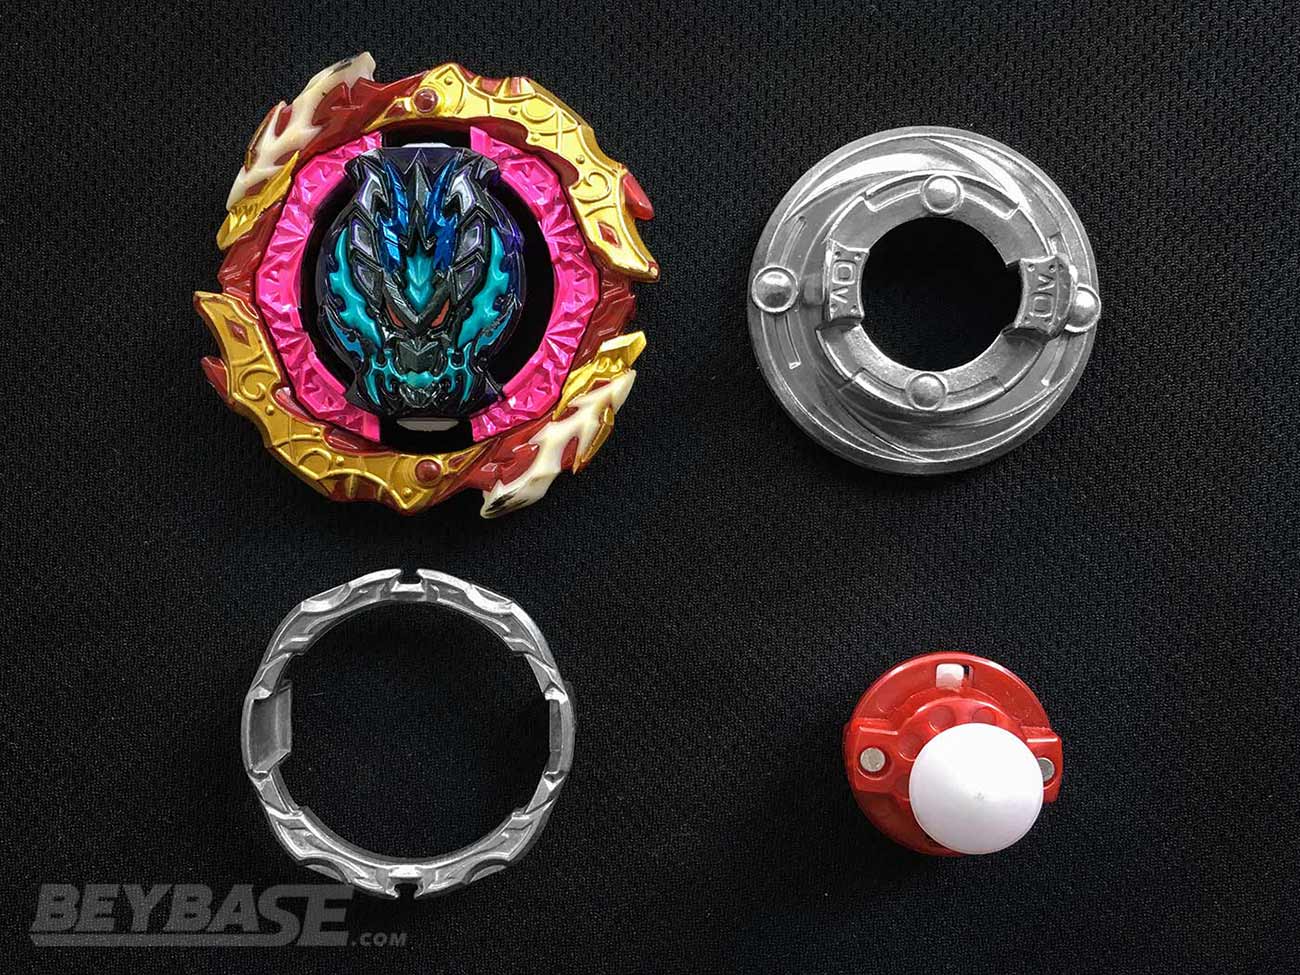
henwooja1’s Deck
- Dynamite (F Gear) Belial Over Rise-10
- Astral Fafnir Tapered Bearing-0
- Savior Valkyrie Nexus-S Quick’-6
Kei’s Deck
- Astral Bahamut Over Rise-0
- Savior Ragnaruk Giga Xtreme’-2
- Rage Helios 2 (Metal Chip Core) Metal Xtreme 3A
Match Play-By-Play
I opened the match with SRG.Gg.X’-2. Coming off the incredible last second KO versus Zankye to win my quarter-final match, I was feeling more confident with it. It also had a great chance against both right-spin Beyblades in his deck, and a decent chance against his AFF.Tp.Br-0.
henwooja1 opened with D(F)BL.Ov.Rs-10.
I launched flatly and relatively weakly. The reason for this was because it was likely that henwooja1 would launch his combo very aggressively to try and take advantage of the superior speed it possesses when circling the tornado ridge.
I didn’t want to compete with that, so the idea was to make the central area of the stadium my territory and try to nudge him out of the stadium.
As you can see in the video, his combo was able to knock mine onto an angle towards the edge of the stadium eventually. However, thanks to the rubber tip of the Xtreme Dash Driver, SRG.Gg.X’-2 was able to essentially stone wall D(F)BL.Ov.Rs-10 on both the initial hit that knocked my combo onto an area toward the edge, and then the follow-up which bursted him.
One of the downfalls of the Rise Driver is its burst resistance. So if you can land a huge hit on it in the same spin direction–not always easy because of how fast it moves–you stand a good chance of bursting it.
The score was now 2-0 for me.
henwooja1 declined the replay. I stuck with SRG.Gg.X’-2 and he switched over to SVL.Nx-S.Qc’-6.
Knowing that the Quick Dash Driver is slower, I adjusted my launch strategy and decided to launch my combo on an angle to try and sweep into the centre.
I was able to execute a basically perfect shot that enabled me to quickly intercept and knock-out his combo before it had any chance start circling around the stadium.
I love Quick’ as an attack type Driver, but despite the superior stamina it possesses, I am sometimes wary of using it when I feel that my opponent will be using something that will outrun me like Xtreme’.
That being said, this situation is actually similar to what I just experienced in the first round. The roles were just reversed. henwooja1 was using the slower combo that was less likely to self-KO and I was using the faster one that was more likely to self-kO.
The results of situations like this are not always black and white. It often depends on the launch techniques used by both players and your actions regardless of which side you are on depend on what information or experience you have with the player that might indicate to you how they are going to launch their Beyblade.
The score was now 4-0 for me.
I again stayed with SRG.Gg.X’-2 and interestingly, henwooja1 went back to D(F)BL.Ov.Rs-10 rather than AFF.Tp.Br.0.
My weak launch strategy in the first round of this match was successful, so I took it to an even greater level in this round by launching even weaker. This resulted in a double burst finish draw.
In the replay, I believe henwooja1 launched on a slight angle. He may have done this in my previous round as well. I switched my launch technique launching my combo on an angle to try and throw him off.
He ended up self-KOing with no contact, handing me the 5-0 win!
One of the other problems with the Rise Driver is that while it is capable of riding the tornado ridge at extremely high speeds, it also relies a lot on bouncing off the inner side walls of the Burst BeyStadium Standard Type’s stadium cover to avoid fulling KOing itself. And when you launch it on an angle I’ve found that it is a bit more susceptible to self-KOing than if you launch it straight with the intention to have it circle the tornado ridge at top speed.
henwooja1’s recent success, struggles, and slow rise to the top
henwooja1 was coming into this match undefeated in Swiss with a score of 5-0 and a win in his quarter-final match against Ninjahacker.
Other than his quarter-final match where it was Ninjahacker’s first tournament, henwooja1 had a tough road to get to this position. He beat Smartsin the6 in round one, Dan–who recently made his return to tournaments, but has extensive knowledge of the game–in round two, Justin TC (WBO Rank #2) in round three, myself (WBO Rank #1) in round four, and 1234beyblade (WBO Rank #4) in round five.
He went 8-1 during the first stage of our previous event to this one–Back to the Classics Part 1–but ended up placing fourth in that event. He’s placed either fourth or third place in our past three events.
But despite any recent failures in the finals of these events, he has clearly demonstrated to me that he has a strong understanding of the game and commitment to being better.
There’s a reason why he’s reached WBO Rank #6 and I can only see that increasing after this event is processed and even further into the future.
Semi-Finals: Justin TC vs. Tahoor
Justin TC’s Deck
- Rage Helios 2 (Metal Chip Core) Metal Xtreme 3A
- Astral Belial Tapered Bearing-0
- Vanish Fafnir Giga Rise-10
Tahoor’s Deck
- Dynamite (F Gear) Belial Giga Zone’+Z-0
- Vanish Fafnir Over Bearing-3
- Rage Longinus Destroy’ 3A
Justin TC won the opening round and took a 1-0 lead by outspining Tahoor’s D(F)BL.Gg.Zn’+Z-0 with ABL.Tp.Br-0.
It was interesting to see that Astral won. I’m not sold yet on it being better than the Dynamite Blade for same-spin stamina. Giga also is probably technically better than Tapered, but Tapered works well on Bearing …
If you watch the video though, while it is hard to tell precisely how hard each player launched, Tahoor’s combo almost self-KOs at the start, likely draining a lot of its stamina.
Tahoor chose to go for the replay and in the second round he landed just a bit closer to the flatter centre area to avoid circling the tornado ridge and wasting stamina. As a result, he was able to secure that area and proceed to smash Justin TC’s ABL.Tp.Br-0 down, draining its stamina completely.
The score was now 1-1.
For round three, Tahoor stayed with D(F)BL.Gg.Zn’+Z-0 and Justin TC chose to switch over to VFF.Gg.Rs-10.
As expected, both players launched lightly because they were spinning in the opposite direction of their opponent.
Justin TC had spent the time to awaken his Rise Driver for this tournament. ‘Awakening’ the Rise Driver means wearing down the tip so that it is almost flat. This greatly increases its opposite spin performance because it becomes more likely to stay upright at the end of a battle.
This matchup results in our longest consecutive draw streak of the tournament. Six straight draws occurred before Tahoor was able to earn the win and take a 2-1 lead.
The only reason it was able to do so is because at the end of the battle it was able to create some separation from the opponent so Tahoor’s combo had nothing to steal spin from. Because Zone’+Z has a free-spinning tip, it was able to go just a little bit longer than Rise.
Justin TC went on the offensive in the next round and scored a quick KO with MCC RHl2.X’ 3A against Tahoor’s D(F)BL.Gg.Zn’+Z-0.
The score was now 3-2 for Justin TC.
I missed one round and can’t recall exactly what happened, but Tahoor was able to score one point against Justin to tie things up at 3-3.
In the final round, Tahoor switched to RLn.Ds’ 3A and was able to KO MCC RHl2.X’ 3A and win the match 5-3, advancing to his first ever final!
That’s always a bit of a tough matchup. The Destroy’ Dash Driver has good same-spin stamina and this slow movement speed that somehow makes it difficult to strike at times with same-spin Xtreme’ attack types.
After this match, one thing which Justin TC lamented was that he forgot that switching to High Mode was an option. This might have given him the edge in the VFF.Gg.Rs-10 versus D(F)BL.Gg.Zn’+Z-0 matchup.
3rd Place Match: henwooja1 vs. Justin TC
henwooja1’s Deck
- Dynamite (F Gear) Belial Tapered Zone’+Z-10
- Astral Fafnir Over Rise-0
- Savior Valkyrie Nexus-S Quick’-6
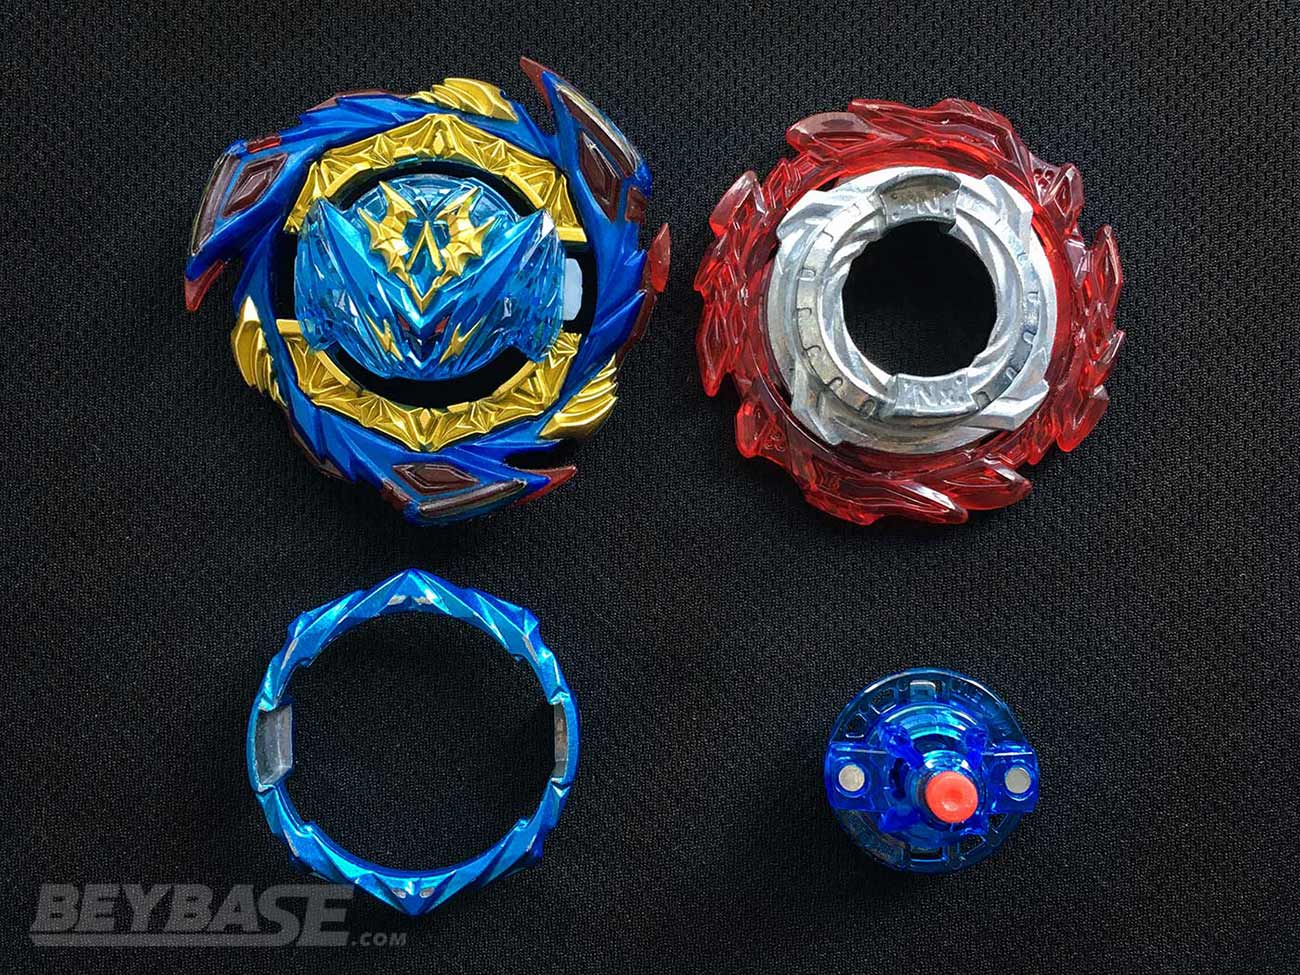
Justin TC’s Deck
- Vanish Fafnir Giga Rise-10
- Astral Spriggan Over Bearing-0
- Savior Belial Nexus-S Metal Xtreme-2
Justin TC unleashed the Savior Blade in this match. The first round was an interesting matchup between SBL.Nx-S.MX-2 versus henwooja1’s AFF.Ov.Rs-0, which was awakened.
henwooja1 chose to launch his combo hard for some reason, which made him an easy target for Justin TC.
Due to the Nexus-S Disk he started scraping, but before he lost too much stamina he was able to score a KO thanks to AFF.Ov.Rs-0 circling the tornado ridge as a result of henwooja1’s hard launch.
The score was 2-0 for Justin TC.
henwooja1 decided to opt for the replay. This time he did a weaker banked launch, which gave him a strong chance of staying in the stadium.
Savior demonstrated how much power it has as an attack type despite this by rag dolling Astral around the stadium. At the end, it was able to score a lucky burst to win the round. This is pretty rare in my experience with Savior versus left-spin opponents. In these scenarios it has always been more likely for Savior to self-burst.
The score was now 4-0 for Justin TC.
Justin TC stayed with SBL.Nx-S.MX-2 and henwooja1 made the choice to switch over to his Savior Blade combo, SVL.Nx-S.Qc’-6.
It’s an interesting choice to make. After having lost the first two rounds this probably felt like his best chance of winning in the moment, but personally I would have stuck with ASP.Ov.Rs-0 unless I was confident I could out launch my opponent. Choosing to go into an attack versus attack matchup is usually a sign of desperation, but sometimes there are things you might notice about your opponent’s launch technique that indicate you could counter them through your launch technique alone.
That might have been the case here as henwooja1 launched his combination flatly, and with both confidence and precision into the centre of the stadium.
He was able to strike Justin TC’s combo which had been launched right near the edge of the stadium. Having the Quick Dash Driver on his combo also probably contributed to henwooja1’s decision because it has more stamina than the Xtreme Dash Driver that Justin TC was using.
The score was now 4-2 for Justin TC.
henwooja1 chose to stay with SVL.Nx-S.Qc’-6 and Justin TC switched over to his left-spin Rise combo: VFF.Gg.Rs-10.
henwooja1 had the right strategy in mind and launched Savior on an angle to sweep into the centre, but unfortunately self-KOed before it even touched Vanish.
Justin TC won the match 5-2 to earn himself third place!
Sponsored: Order the newest Beyblades at malloftoys.com!
Heads up: If you buy something through Mall of Toys, you won’t pay any extra, but I’ll get a small commission. This helps me keep things running. Thanks for your support!
Final Match: Tahoor vs. Kei
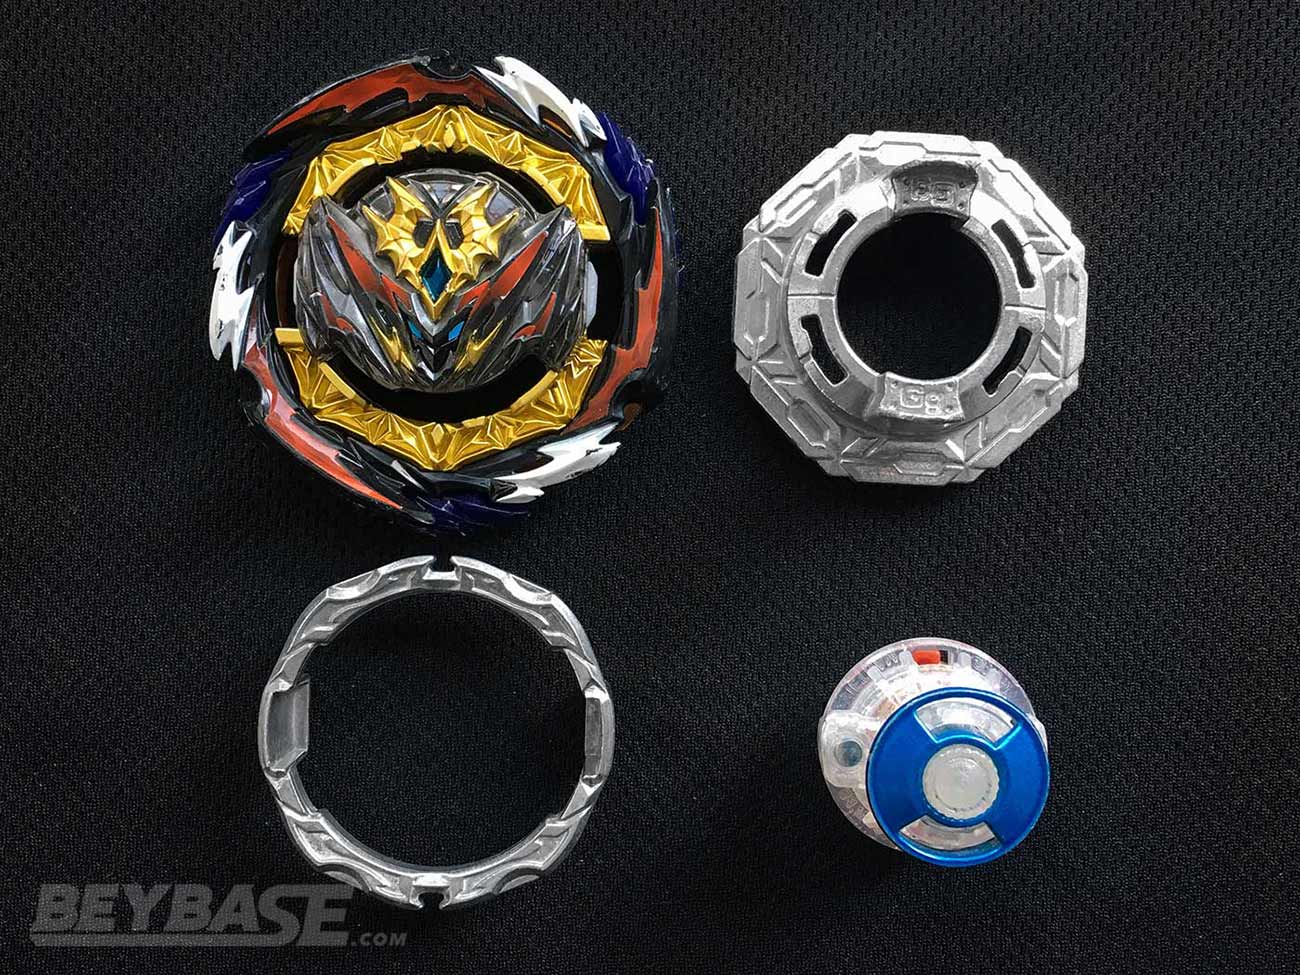
Tahoor’s Deck
- Dynamite (F Gear) Belial Giga Zone’+Z-0
- Vanish Fafnir Over Bearing-3
- Rage Longinus Destroy’ 3A
Kei’s Deck
- Dynamite (F Gear) Belial Over Rise-0
- Savior Ragnaruk Giga Xtreme’-2
- Rage Helios 2 (Metal Chip Core) Metal Xtreme 3A
Match Play-by-Play
I opened the match with MCC RHl2.MX 3A and scored a quick KO against his D(F)BL.Gg.Zn’+Z-2.
I stayed with Rage and he switched over to his RLn.Ds’ 3A. He scored a non-contact KO, bringing the score to 2-1.
I declined the replay and he stayed with Rage. I switched to D(F)BL.Ov.Rs-0, launched lightly, was able to tank many hits from it and take a 3-1 lead.
I stayed with Dynamite and he switched back to D(F).BL.Gg.Zn’+Z-2. I chose to employ a hard banked launch in this round and was able to initiate a chase around the tornado ridge, but ended up self-KOing.
In retrospect, this strategy was a critical mistake on my part. It would have been smarter to play more conservatively and do my best to avoid taking a two point loss here.
Doing this crippled me because it meant that in all likelihood, I had just one shot left with another attack type to win the match. If I had taken a one point loss, the score would have been 3-2, giving me two more chances with Rage or Savior to win once.
Instead, it was 3-3 and the pressure was on despite me having the ‘advantage’ as the loser of the previous round.
This deck is designed to reward a user who is able to execute with attack types. But in a do-or-die situation, anything can happen.
I declined the rematch so that I could secure the best possible matchup.
Tahoor chose to stay with Dynamite, so I switched over to SRG.Gg.X’-2, which I hadn’t lost with up until that point.
Unfortunately for me, I banked it a bit too hard–which I will discuss in further detail below–and ended up self-KOing after some initial contact.
Tahoor won the match, and his first ever tournament by a score of 5-3!
Post-Match Thoughts
I was disappointed with both my selection choices and performance in this match.
Going into it, I knew what Tahoor’s deck would probably look like. He had been using a deck similar to the one he used at HIGH PARK THROWDOWN 12.
Lack of Testing Versus Destroy’ Driver
The biggest part of his deck that I didn’t like and subsequently realized I didn’t test enough against was RLn.Ds’ 3A.
In fact, I basically failed to test against it entirely in preparation for this tournament.
So, how could that happen?
Despite it being–relatively speaking–high on the winning combinations data for Drivers that I had been looking at, I get this feeling that in my mind there was an unfounded confidence against this particular combo.
The primary reasons for that were that:
I was successful against it with Rage on Xtreme’ in the finals of Justin TC’s Birthday Bash last year. However, if you watch the video of the finals from that event you’ll see that I was afforded the luxury of KOs being worth just one point and did lose a few rounds of that matchup.
And that I had been successful against Tahoor by a convincing 5-0 score during HIGH PARK THROWDOWN 12. There was not much correlation here though because I never used the Rage Helios 2 (Metal Chip Core) Quick’ 3A that was in my deck during that match against his RLn.Ds’ 3A.
As a result, despite being aware that there was a strong likelihood that RLn.Ds’ 3A would be in his deck, I didn’t fully respect it when deciding what the composition of my deck would be.
I included D(F)BL.Ov.Rs-0 in an effort to have a respectable way to defend against it, but I failed to really deeply consider how risky relying on any rubber-based attack types would be to go up against it given that knockouts were worth two points.
It was actually a smart anti-meta choice by Tahoor to run Destroy’ in this event because so many players were running Quick’, Xtreme’, or Metal Xtreme. He didn’t really need to concern himself with how well Destroy’ can KO things compared to those Drivers if everyone around him was going to be throwing hyper aggressive attackers at him.
The Destroy’ issue might have been one I could have overcome if instead of the Dynamite Blade on the Rise Driver I chose to use Dynamite on something like Bearing, which would have also had the ability to defend against RLn.Ds’ 3A, while also being able to outspin his D(F)BL.Gg.Zn’+Z-0 and have a chance against VFF.Ov.Br-3.
A large portion of my pre-tournament testing was spent focusing on understanding the same-spin metagame and how important it would be in a world where everyone is focusing on the opposite-spin metagame.
Based on my testing, I knew that awakened Rise would have a chance in same-spin situations, but again … in retrospect, the risk of this was too high in this tournament because of the two point KO rule combined with awakened Rise’s tendency to self-KO.
In the round where I used D(F)BL.Ov.Rs-0 against his D(F)BL.Gg.Zn’+Z-0, I do believe I executed a good launch given the situation, but the result was unsurprising given that although Zn’+Z can be knocked to the edge to begin circling the ridge, its chances of not skipping it are higher than the Rise Driver.
And coming back to the Destroy’ issue, I will say a few other things about this: in the MCC RHl2.MX 3A versus RLn.Ds’ 3A round, I do think the element of luck should be considered as well.
Upon reviewing the footage of that round with the round from the last round of my match versus Zankye at Justin TC’s Birthday Bash, I noticed that the launch technique and positioning used were relatively similar. The problem is that in the match against Zankye I was able to get a quick hit on his Rage Ds’ combo while in this match, I missed Tahoor entirely and self-KOed.
In the round versus Tahoor, his combo landed very close to the tornado ridge, whereas Zankye landed much closer to the centre, which enabled my combo to hit his.
This just does go to show you how much influence your launch technique and positioning has on the outcome of a match. In the scenario with Tahoor, it would have been probably better for me to launch flat and try to catch him at the ridge. But it is hard to know these things with certainty because part of the reason he ended up near the ridge is because of the way he pulled back his launcher/combo right at the end of the countdown.
Considering this and the fact that it is somewhat difficult to replicate this type of match in a solo testing environment, I’m not too down on myself about all of this. But I think it is important to recognize so that I can be better in the future.
Attack Type Launching Technique Problems
The final piece of this that was disappointing were both my test launches and actual round launches with SRG.Gg.X’-2 that clinched the match for Tahoor.
Up until that point, I had launched this combination relatively well in my matches against Zankye and henwooja1.
But for some inexplicable reason, I started to bank the combo on far too steep of an angle at the end of this match.
This caused the combo to stall towards the edge of the ridge for some time instead of immediately sweeping into the middle like it had in previous rounds where I didn’t bank as heavily.
It’s difficult to see watching the footage at full speed, but if you slow it down you’ll see.
Another factor which contributed to the poor nature of these launches were the unnecessary–or rather, exaggerated–hand movements.
Some hand movement is inevitable, but the key when launching an attack type is how controlled such movement is. The more your hands move, the less likely your Beyblade is going to land exactly where and how you want it to. And good attack type players will take the time during testing to understand where and how their Beyblade should land inside of a stadium in order to give it the best chance of victory.
The more your hands move, the less likely your Beyblade is going to land exactly where and how you want it to.
This is an issue I’ve identified before in my own launching tendencies, but it’s easy to lose track of because of how natural it is for your hand to move in a situation where your other hand is moving a lot in order to pull the string of the launcher.
It’s something that as a player you need to constantly remind yourself of as you are preparing to launch an attack type like this. If you don’t, it’s almost the same as just randomly waving your hand over the stadium, pulling the string, and hoping you’ll get a burst or knock-out.
In the end, although I am disappointed by the choices I made and result of this match, I take it as a positive learning experience.
Prior to the last two rounds in which I used an attack type, I was 5-0-1 with them and ultimately ended up just one win away from winning the tournament.
What were the winning Beyblade Burst combos at this tournament?
The list below covers all of the winning Beyblade Burst combos used by the top three players of Bey Fray Qt. Any Beyblade they won a first stage match with or at least one round in a match that they won during the final stage is listed.
One thing current competitive players may notice is the absence of any combinations using the Drift Driver. This is a little bit unusual when you look at where the game as a whole has been trending lately.
Drift was used by some players–including myself in one match during the first stage–but no one who did use it and was successful made it to the top three.
Combined with Toronto’s evident overall preference for the Bearing Driver, it’s also worth considering the two point KO ruling that was in effect for the finals of Bey Fray Qt. Similar to how it affected attack types, this made it slightly more risky in my opinion to use Drift in same-spin situations. This is due to the Drift Driver’s tendency to act erratically when hit away from the centre of the stadium.

1st: Tahoor
- Astral Fafnir Giga Bearing-0
- Vanish Fafnir Giga Bearing-3
- Rage Longinus Destroy’ 3A (Deck Format Finals Only)
- Dynamite Belial (F Gear) Giga Zone’+Z-0 (Deck Format Finals Only)
- Vanish Fafnir Over Bearing-3 (Deck Format Finals Only)
2nd: Kei
- Astral Bahamut Over Bearing-0
- Astral Bahamut Over Rise-0
- Savior Ragnaruk Giga Xtreme’-2 (Deck Format Finals Only)
3rd: Justin TC
- Astral Spriggan Over Bearing-0
- Astral Bahamut Over Bearing-0
- Savior Belial Nexus-S Metal Xtreme-2 (Deck Format Finals Only)
- Vanish Fafnir Giga Rise-10 (Deck Format Finals Only)
- Rage Helios 2 MCC Quick’ 3A (Deck Format Finals Only)
How to Build the Winning Beyblade Combinations
Here’s what you need to build some of the strongest winning Beyblade Burst Classic combinations from Bey Fray Qt:
Astral Bahamut Over Bearing-0
Astral Blade, Over Disk & 0 Armor
Bahamut Dynamite Core
- B-186 Random Booster Vol. 26 – 01: Roar Bahamut Giga Moment-10
Bearing Driver
- B-98 God Customize Set – Deep Chaos 4Flow Bearing
- B-121 Cho-Z Triple Booster Set – Wolborg 8 Bearing
- B-00 Union Diabolos 00Expand Bearing
Savior Belial Nexus-S Metal Xtreme-2
Savior Blade
Belial Dynamite Core & 2 Armor
Nexus-S Disk & Metal Xtreme Driver
Dynamite Belial (F Gear) Giga Zone’+Z-0
Dynamite Blade & Belial Dynamite Core
F Gear
Giga Disk
- B-181 Random Booster Vol. 25 – 01: Cyclone Ragnaruk Giga Never-6
Zone’+Z Driver
0 Armor
Acknowledgements
Thank you to everyone who helped to make this tournament a success!
Specifically, thank you to:
- henwooja1 for bringing tarps, a stadium, shooting video, and judging.
- Justin TC for bringing a stadium and judging.
- Lrexman for bringing some stadiums.
- BladerBeast for judging and bringing a stadium.
- Tempest546 for shooting some of the photos.
- All of our other judges (1234beyblade, originalzankye) for helping the tournament to run smoothly.
Or become a BeyBase HQ member to get early article access and behind-the-scenes updates. Thank you!
What do you think? Comment below!
I’d love hear what you guys think of the Beyblade metagame as it stands right now, whether you attended the tournament or not.
Comment below and let me know!
If you enjoyed reading this article, please also feel free to share it with any of your friends who are into playing Beyblade competitively or enjoy hosting tournaments.
Bey Fray Qt Tournament Article Series
25 thoughts on “Has the Savior Blade Made Right-Spin Attack Competitive Again? (Bey Fray Qt Report – Part 3)”
Comments are closed.
I might suggest reviewing the ties a little closer. I’m pretty sure Astral actually won 2 and Dynamite won 1. But obviously that is the hardest thing for a judge in the moment.
I would definitely like you to try Astral Giga on Mobius. I truly think it can counter a lot of the current meta. The spin direction and high/low mode would really depend on your local meta.
Which battle are you referring to? You’re right that judging opposite spin battles can be very difficult, though. We do generally review battle footage on the spot in these cases very carefully.
Unfortunately, none of my Mobius Drivers (new or awakened) perform as well as it seems to for the players who I’ve seen be successful with it. Doesn’t have the opposite or same-spin stamina that I’ve seen it is (somehow) capable of. Can you share more about your experience with the Driver and that combo? One thing I imagine is that it would be pretty susceptible to attack type combos in the same spin direction.
The battle with zankye.
And unfortunately I dont have any actual tournament results to back up my claims. Just my own personal testing. But there is not anything special about my Mobius either. It just really seems to fit Astral. I wish I had more details to give you, but all I have right now is that it just seems to work
Edit…If anything, same spin stamina combos are the issue…same spin attack isn’t really an issue. With my own personal testing.
Well, I’ll definitely give it more of a look when I get a chance. Obviously, people are finding success with it, so I believe that it is/can be good!
Do you know if its possible to get roar bahumut while saving money I don’t want to spend a lot of money on random boosters and buying a single beyblade for 60 dollars
Hey Abo, unfortunately I’m not sure there is a way to get it for cheaper unless someone is generous or doesn’t realize it’s the most desirable pull from that random booster. That said, if you are patient, there is a chance they re-release the Bahamut Core in another–cheaper-product in the future.
Hi, Kei! I’ve seen Metal Xtreme used during this tournament and I was wondering if it’s a viable option for people who don’t have Xtreme’ despite the risk of damaging the teeth of the bey?
Hey Fox. I definitely think it is a viable option if you don’t Xtreme’. Especially on Rage combos where the teeth wear is not really an issue in my experience, it’s a good choice. In that case, Rage also probably benefits from the extra weight the metal provides versus the Xtreme’. That’s why I used it in my deck at this tournament.
Hey kei!
As a person who only gets beys a few times a year, what stock DB beys can I get to beef up my collection?
Also, could we get more Q&a articles? They really helped me understand the metagame.
Hi Juice Box! Honestly, a lot of the DB releases so far have included some great parts.
If I had to recommend a few, it would be Dynamite Belial, Vanish Fafnir, and Guilty Longinus. I don’t have Guilty Longinus yet, but it’s just so heavy that I can’t imagine it won’t be good haha.
Dynamite Belial and Vanish are useful is practically any stamina/defense combination you can think of. There are other parts like Giga, Over, Astral, and Bahamut that are all very good too, but they come in random boosters or larger sets.
You can get them on many stores online, but if it helps here are a few links to them on Mall of Toys (BeyBase Sponsor):
Dynamite Belial: https://malloftoys.com/collections/takaratomy-dynamite-db/products/pre-ordertakara-tomy-b-180-beyblade-burst-booster-dynamite-belial-new?rfsn=4662534.afcd00
Vanish Fafnir: https://malloftoys.com/collections/takaratomy-dynamite-db/products/soon-takaratomy-beyblade-burst-dynamite-db-b-185-vanish-fafnir?rfsn=4662534.afcd00
Guilty Longinus: https://malloftoys.com/products/copy-of-pre-order-takara-tomy-beyblade-burst-db-booster-b-189-guilty-longinus-kr-mds-2?rfsn=4662534.afcd00
These are affiliate links, so I’ll get a small commission if you order through them. Thank you! Hope this helps.
I will certainly consider doing more Q&A articles! If I do, I’ll send out an e-mail to BeyBase newsletter subscribers asking for submissions, so be sure to subscribe if you haven’t already.
When you were showing 1234 beyblade’s deck it had a blue extend with the zet Achilles upgrade chip. Where did the blue extend come from?
Hey Delta. It’s from the B-00 CoroCoro Cho-Z Customize Set: https://beyblade.fandom.com/wiki/Cho-Z_Customize_Set_CoroCoro_Ver.
Why exactly do you think the Savior blade is being used on Nexus+S so much? Is it just because it’s the heaviest disc right now, or is there some use with the S-Gear’s width?
Does the Valkyrie Core’s bound gimmick help some with some stamina or defense strategy, like absorbing hits from attack types?
That’s a good question. I tried Nexus-S on the Savior Blade as well, but didn’t like it because of the scraping issues it causes. They were probably using it because of the weight, but I didn’t think it was worth it given the aforementioned scraping issue. Some people were using Quick’ which I think is a bit taller than Xtreme’, so maybe it doesn’t scrape as much on that …
The Valkyrie Dynamite Core definitely seems better suited to stamina/defense than attack, that’s for sure. On attack types it probably only softens the blow of any attacks you inflict. With stamina/defense, it would act as a cushion and dissipate some of the impact of any hit. This was balanced by the two teeth they gave it, but it still can work well on some stamina/defense combos. It also has better same-spin stamina than other Dynamite Cores from what I’ve seen, so as long as your Driver has decent burst resistance, it’s not a bad choice if you want to have a bit more stamina for same-spin matchups.
Hey Kai,
I was wondering if Metal drivers damage the bahumut core like how it damages teeth core
Hey Abo, I’m actually not sure as there hasn’t been any competitive left-spin attack types up until now. I’m assuming I’ll find out when I get Guilty Longinus.
Nice to see you always analyzing and improving your game. I’m not so much of an aggressive attack type user and always use more passive or heavy combos.
That said, remember when I talked to you on the Q and A about tournaments in WA? We’re actually having one now! I’ve tested out so much myself and I’m happy to actually have a chance at participating in a tournament for once! Who knows, maybe I’ll learn a lot from it considering I never get to play against another person.
I do remember! That’s great to hear! How did you get it organized?
I don’t know how honestly. It’s probably better asking Zector as the host. I tried the quiz, but failed 2 times. I still can’t figure out what I missed…
Hey, Kei. I noticed that the Valkyrie blade wasn’t used much in the tournament. Is this because of the bound ability? Also, do you think the Shot Driver has any use in tournaments in the foreseeable future?
Hey kei!
Through my testing, I’ve found out that Venture is actually controllable. I feel it is a good same spin balance driver owing to its stamina and sudden bursts of speed. When it is slightly banked, it circles near the ridge twice then speeds up along the ridge and can stonewall anything, or redirect for a KO from the walls. And lastly, it also has good defense because of the rubber. Only problem is, sometimes, after getting a solid hit, it self KOs. Have you done any testing with Vn?
Hey Ben. I’ve admittedly not tested it too much. That said, based on my limited experience, it was hard to continue considering because it doesn’t have the same type of speed, controllability, and defense that Xtreme’ has that enables a high level of pure attack proficiency in almost all scenarios depending on the user.
Venture probably has good same-spin stamina in comparison to Xtreme’, but that’s not usually what I’m looking for in an attack type Driver. But it does depend on the situation: what do you think you’ll be playing, what rules are you playing with, and so forth. If anything, I might consider it for an anti-attack situation.
I’d like to test more with it, but those were my initial thoughts.
I just looked at confirmed future releases and apparently they’re going to make bearing’ and metal drift so the meta might transition back to completely lad centralized and no bursting.
Hey Kei! Sorry about asking the same questions on the WBO as I asked here for the previous 2 articles, I just didn’t knew they loaded, I won’t do that next time sorry about that. Anyways, I was wondering how you came up with this strategy for your deck? I understand you felt confident in high mode as it helped you win your previous match in first stage I believe but why did you choose the specific astral Bahamut combo? And I gotta say I really admire your courage when it comes to attack types. You always know when to go on the offensive at the right times. It takes serious guts to go with 2 attack types in a deck. Especially considering despite the win being worth 2 pts, you could also KO yourself with contact and be giving the opponent 2 points.
On a side note I was wondering how you feel about the nexus+s (locked) rise combination. It’s one of the first combos I saw people use when nexus+s first released. I personally used Vanish/Astral/Dynamite+F on over rise for my combos but I started testing nexus+s and it’s much more aggressive. One of awakened rise’s weaknesses is it’s same spin stamina so while Over does help balance the combo out I prefer things that make the specific things better if you know what I mean. In the first stage I’d probably go with over rise as it has a better chance against most things than nexus+s but I feel like I’m a deck format, nexus+s would provide the extra weight and attack power that rise may need to KO some more beys at the cost of stamina which other beys would cover. I have been Using Astral Belial (low) Nexus+s (locked) rise (awakened)-2 and it’s pretty good. As you may remember when I was asking you about rise on the WBO I got that perfect state for me you mentioned. 1 problem now is that since I have it to the best stage for me, once it awakens further I have to get another rise and go through the whole process (which took 2 years for me) again. But anyways, the Astral combo is very consistent when it KO’s mobile beys. It struggles against specific same spin beys like my Dynamite+F Spriggan Over Orbit Metal-3 but seemed to KO things like atomic, hybrid, drift easily due to their tendency to stay closer to the edge. I also tested the astral combo against vanish spriggan over drift-3 and it tied consistently with I think just 2 losses (barely) and 1 win (barely) out of 20 rounds I think. It held its own against my rage combos when hard launched (apparently astral right struggles against rage when weak launched).
Sorry for the insanely long comment, I’m just excited that I know how to comment on BeyBase now.