Affiliate Disclosure: If you buy something through some of the links on this post, you won’t pay any extra, but we’ll get a small commission. This helps us keep things running. Thanks for your support!
Toronto’s First X Event Since X’s Release
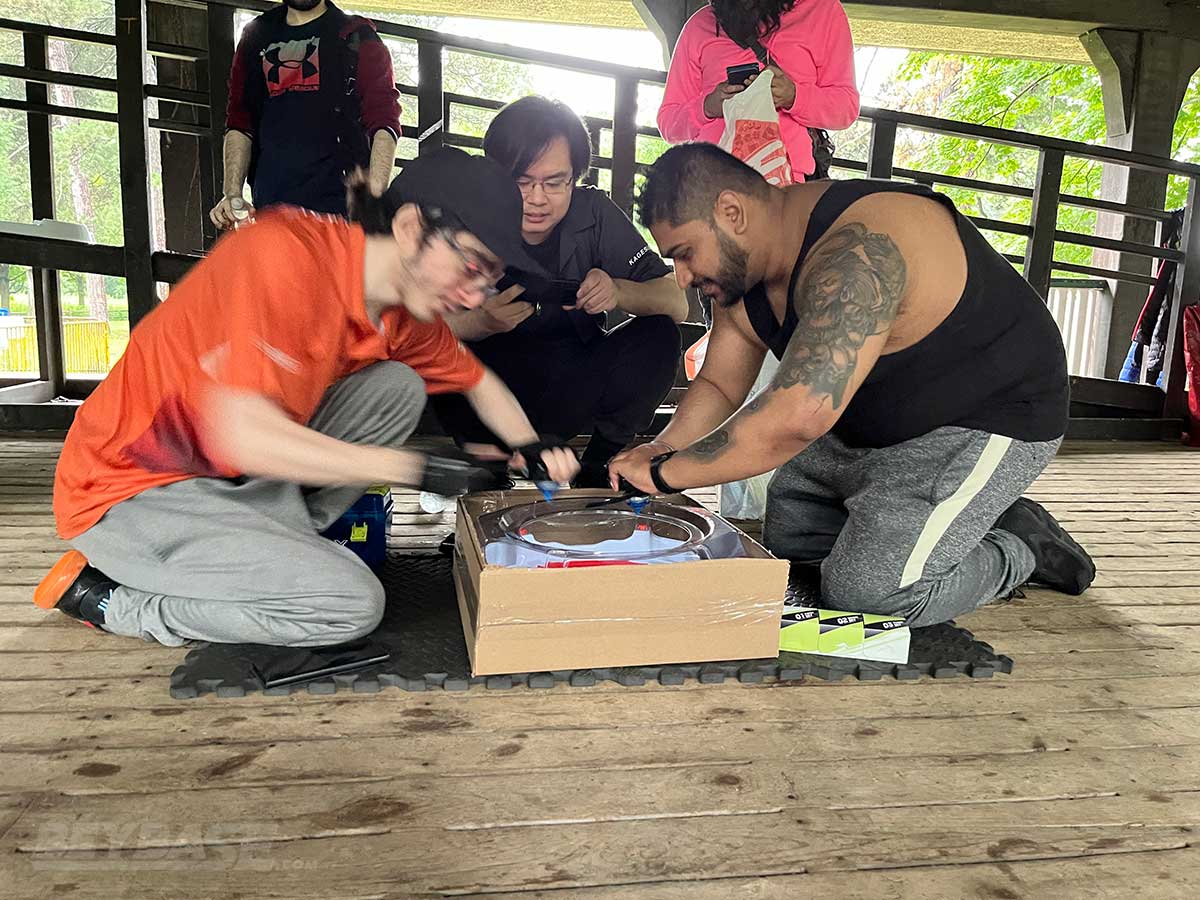
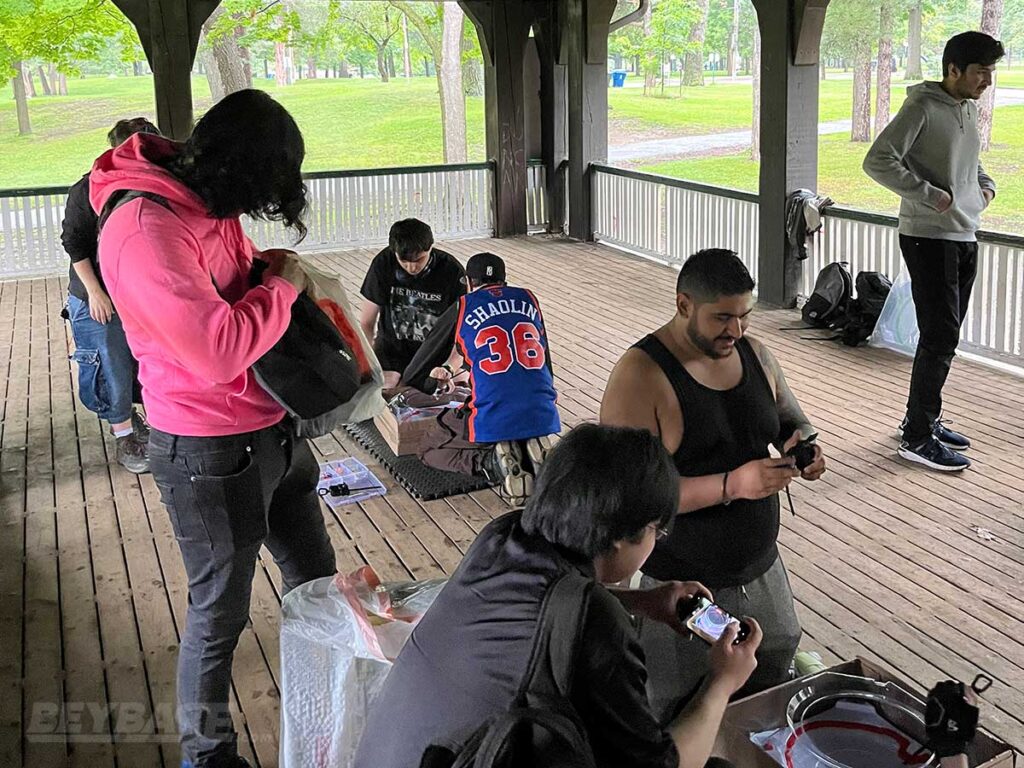
With Beyblade X being announced earlier in the year and subsequently released on July 15th, 2023 in Japan, the Toronto community agreed to get together two weeks later to dip their toes into the new series.
Because the series is so new, information was at an all-time low, both in terms of parts’ meta relevance as well as Blader patterns or combo predilection. This made it a very interesting time from a competitive standpoint.
Want to join future Beyblade tournaments in Toronto and around Ontario, Canada? Join the Ontario Beyblade Community (OBBC) today.
What You’ll Learn
In this tournament report written by Dan and edited by Blader Kei you’ll come away with knowledge on the following:
- What rules and structure were in place for our first event
- Match-by-match analysis and thoughts from tournament host and player Dan’s point of view
- The top three winning combos of this event and how they work
- Key takeaways from the event on Beyblade X as a game
Tournament Details
- Name: X Marks the Spot
- Date: July 29th, 2023
- Location: High Park, Toronto, ON, Canada
- Format: WBO’s X Format (Rulebook)
- Match Type: 1on1 (Match Type Guide)
- Event Page: View
- Challonge Links: First Stage Bracket | Final Stage Bracket
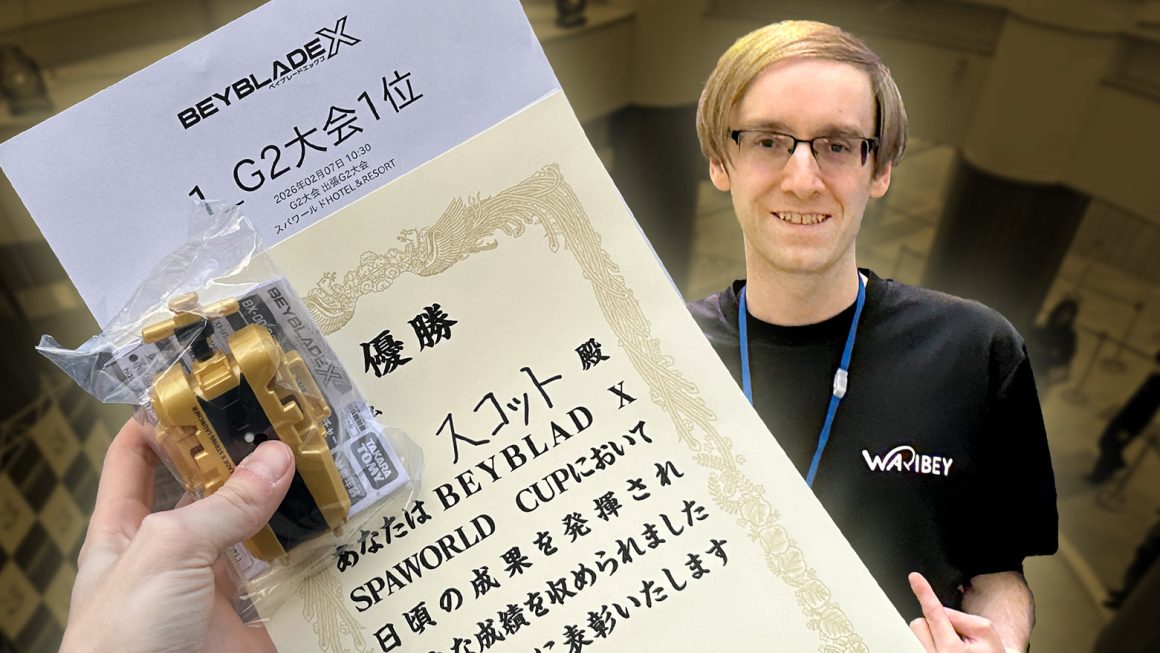
Champions aren’t born overnight. In my latest article, I break down how my pursuit of knowledge, adaptability, and reproducibility compounded into victory at a 256-player G2 tournament.
Sponsored: Order the newest Beyblades at malloftoys.com!
Heads up: If you buy something through Mall of Toys, you won’t pay any extra, but I’ll get a small commission. This helps me keep things running. Thanks for your support!
What rules did we use for the first Beyblade X Tournament in Toronto?
For our first event we saw it fit to operate under the default rules outlined by worldbeyblade.org rather than experimenting right off the bat with the new format.
Trying the default rules and understandings outlined felt most logical and fair when starting a new series for the first time. We did modify one unexpected aspect of the tournament, though, which we will get to later.
Given that this was a new format, we also lent out loaner Beyblades and launchers for those without any yet.
A mixture of early supply shortages and simply being “too new” made getting product tricky even two weeks after release date.
Tournament Rules
Basic Rules
Here is the short and simple outline of the rules used:- First Stage Matches are played to 4 points
- Final Stage Matches are played to 7 points
- Xtreme Finish is worth 3 points
- Knock-out/Over Finish is worth 2 points
- Outspin/Spin Finish is worth 1 point
- If your Beyblade enters a pocket but comes back out, it is still in play
- If your Beyblade is knocked over the roof of the stadium, it is a draw and we redo
Xtreme Stadium Side Preference Management
Here is how we dealt with the Beyblade X Xtreme Stadium “side issue” in a meta that only has right spin combos:
- Players would do rock-paper-scissors, first to 2 points wins
- The winner determines their initial position (right or left, closer or farther to the only usable side of the Xtreme Line currently)
- After the initial choice the stadium is flipped in aeternum to give the both players side opposite to them the previous battle
Every generation has its share of divisive rules, but fortunately with the advent of Beyblade X, most things seem to be very clear cut. Everyone agreed that providing both players with consistent access to either side, via whatever means work best for them, is the most fair way to play.
However, this does differ from how it is done at official Beyblade Battle Base (B4) events. At these events in Japan so far, rock-paper-scissors can be played optionally if the players have a preference, but after selecting the side, both players remain there for the duration of the battle.
“Over the Roof” Knockouts
The only rule here that is contested by the community is the validity of over the roof knockouts.
Japanese B4 events rule it in the same way WBO’s default rules are written, but for spectators and players alike, extravagant finishes like a moonshot deserve more than an anticlimactic redo, but the awarding of points.
For some context this scenario only happened twice over the course of roughly 40 matches, so it isn’t particularly common, but definitely does happen through the course of regular play.
We chose to not enact any Ranked Clauses for this event, but in the future we will definitely consider things like over-the-roofs to count as some form of general knock-out rather than a draw.
Tournament Format

Swiss
What we did choose to do differently is a “small” Swiss event rather than Group Round Robin. We did promise and set up for Swiss, but for one reason or another, actually fell 3 short of 17 players that normally warrant the Swiss tournament format under existing WBO Organized Play guidelines.
Instead of devising a grouped round robin, given this was a new series that inevitably attracted newer and younger members, giving over half the Bladers a complete tournament experience from First Stage to Finals seemed to be much more entertaining and rewarding.
For those wondering, going with Group Round Robin with a smaller Blader pool would mean more overall matches. This can be a lot to handle with higher double digit numbers, but in general gives more first stage for your time and is necessary for ranked events with <17 players according to current WBO Organized Play guidelines.
This tournament style choice, along with the speed of the new X format, turned out to be very convenient as on top of rewarding for new players it allowed us to finish with some time to spare for other events later. Definitely something for newer or growing Beyblade communities to consider, even just for fun.
Eyewear Protection
Finally, for everyone’s safety we invested in eyewear protection and measures like this cannot be recommended enough for Beyblade X.
Beyblades flying upwards and outwards at high speeds are more common than ever in Beyblade X. Playing safely should be a top priority, however you intend to achieve it.
Dan’s First Stage Matches
Going into this event it was expected that most players had little to no experience with Beyblade X up until this point, myself included.
I decided to learn what I could from the Japanese meta that where they already started hosting multiple of their own events since launch two weeks earlier.
With a decent bit of single-player testing under my belt I came to similar conclusions as my Japanese contemporaries, and decided that I would play it “safe” with the undoubtedly “best” setup according to the Japanese meta on launch: Hells Scythe Blade on the Ball Bit.
In my notes my initial gameplan did include going with Dran Sword 3-60T too, but this idea never came to be.
Sponsored: Order the newest Beyblades at malloftoys.com!
Heads up: If you buy something through Mall of Toys, you won’t pay any extra, but I’ll get a small commission. This helps me keep things running. Thanks for your support!
Round 1: Dan (Hells Scythe 4-60B) vs. Skynet (Knight Shield 4-60T)
Final Score: 1-4, Skynet
As mentioned I assumed going into this that everyone was a clean slate and made no judgment based on any predetermined perceptions of Bladers or through any observations beforehand. This seemed like the most fair thing to do when testing the validity of the to-be best Beyblade X combo so far – indiscriminate play.
I lost the rock-paper-scissors match, meaning Skynet got to decide our initial position, opting for the far-side of the stadium where right-spin beys are furthest from their “Xtreme Line” railing.
Battle 1: 2-0, Over Finish – Skynet
With that said, a well done launch on his part in battle 1 made it so his Knight Shield 4-60T ended up on my side unexpectedly, and a quick ricochet off of the Xtreme Line meant an easy first knockout for him. The score was now 0-2 in Skynet’s favour.
It seemed safer for me to not shoot my Hells Scythe closer to the pocket side than necessary, as that would have avoided this kind of scenario where it can be gotten from behind. This is definitely a positional error when you have the more passive combo.
Battle 2: 2-1, Spin Finish – Dan
With the stadium flipped I shot Hells Scythe closer to the apex of the Xtreme Line, further from the exits this time. Despite some decent hits from KS, it was an easy outspin for Hells Scythe. 1-2.
Battle 3: 4-1, Over Finish – Skynet
Another flip, and instead of launching safely towards the “outskirts” of the stadium, I shot in the center to hopefully meet Knight Shield head-on for a quick knock-out or to do enough damage to cause serious stamina depletion.
Despite getting the above scenario, a knock-out didn’t occur immediately. Instead a small back-and-forth, with a critical hit from Knight Shield sending my Hells Scythe into pocket. 1-4, a quick and decisive match.
Despite it being a loss, the match was exciting, quick, and to the point.
The last battle was certainly unexpected, as KS from my testing normally lacked the required Smash Attack (innate design elements leading to the ability to propel opponents out of the Play Area) to knock Hells Scythe out after a few initial hits, but it did so here. Ultimately, the Knight Shield Blade’s somewhat inconsistent, but still present aggressive upside and synergy with the Taper Bit was on full display in this match.
A mixture of bad luck on my part and same-height contact likely made this scenario all the more possible.
Round 2: Dan (Hells Scythe 4-60B) vs. Tahoor (Wizard Arrow 4-80B)
Final Score: 4-0, Dan
After the last match I was definitely feeling a little bit unsure about whether I had made the right Ratchet choice, but sticking to 4-60 was my intention from the get-go as a part of a greater experiment.
I won the rock-paper-scissors this time and against Tahoor chose to stay closest to right-spin’s designated Xtreme Line side.
From my understanding the Wizard Arrow Blade into the Hells Scythe Blade was a terrible matchup for the former, as it lacks the balance late game to put up with the beating Hells Scythe deals to it.
Battle 1: 2-0, Burst Finish – Dan
Just a simple shot into the center is what I did here, as trying to grind on the Xtreme Line for this matchup seems unnecessary when you have an innate endurance advantage. Tahoor launched his Wizard Arrow onto my side, similar to Skynet in the match before.
It seems like everyone here has a preference for that side. Looking back, I believe this could be an effective play against a basic flat center launch like what I was doing.
Unlike Knight Shield, though, Wizard Arrow rarely if ever has the required Smash Attack to produce knockouts, relying on Hells Scythe’s own recoil entirely.
To my surprise there were some very meaningful hits in battle 1, but no knock-outs to show for it. Instead, Wizard Arrow’s recoil propelled it onto the Xtreme Line and bursted itself. Where Knight Shield had Taper’s superior burst resistance last match, Wizard Arrow did not. 2-0 in my favour.
Battle 2: 4-0, Burst Finish – Dan
Stadium flipped and I once again decided that on the farther side I would angle and aim Hells Scythe farther away from pockets, into the corner. What ensued was a seemingly regular endurance match, with much less fireworks than the last match. Not quite.
It turns out that Tahoor’s Wizard Arrow had potentially burst mid-match but had continued to spin on the disassembled Bit. The result was a very wobbly center-spin followed by a decisive hit from Hells Scythe to confirm Wizard Arrow’s disassembled state. Good judging from Hato actually called this sooner than I had even perceived it.
This scenario may bring into question whether a Burst should mean disassembled and visibly apart, or disassembled at all, even if still spinning and upright until the very end. This sometimes has been a point of confusion for members online as well, at least as recently.
Regardless, another decisive match that was done in record time despite being an endurance match.
Round 3: Dan (Hells Scythe 4-60B) vs. Fabelavelon (Dranzer S 3-60T)
Final Score: 4-3, Dan
I had won the rock-paper-scissor by the skin of my teeth, a trend for this particular match. I chose to go with the side closest to the right-spin Xtreme Line rail again.
Battle 1: 3-0, Xtreme Finish – Fabelavelon
The first battle I didn’t quite shoot close enough to the rail itself, landing smack in the center. Against Dranzer S that, while not particularly strong, has the means to produce early knock-outs, this isn’t always a great spot to be in.
Quick contact was made, with Dranzer S propelling itself onto my side of the Xtreme Line and dashing directly towards Hells Scythe for a clinical Xtreme Finish. 0-3 in Fabelavalon’s favour.
Battle 2: 3-1, Spin Finish – Dan
Next match I launch into the center again and both Beyblades exchange a few meaningful blows, but no knock-outs come of it. Dranzer S has exceptionally poor endurance, so despite its best efforts, it is an easy outspin on the Ball tip. 1-3. Flip.
Battle 3: 3-3, Over Finish – Dan
Battle 3 is markedly more exciting for me and Hell Scythe. Early contact almost netted me an Xtreme Finish but Dranzer S managed to claw itself out of the Xtreme Zone in that split second. A second and third hit on Dranzer S were much more decisive, earning a regular pocket knockout. 3-3.
Battle 4: 4-3, Spin Finish – Dan
The final flip and battle began in the same way as the rest: a center launched Hells Scythe and a very aggressive Dranzer S. Hells Scythe evaded two powerful X-Dashes and managed to hang on until the end. While Dranzer S can land some decisive blows at the start, it failed to do so here and there is little hope for it late-game. 4-3 in my favour.
This match really highlights two things about Beyblade X that are quite interesting: matches can ramp up fast, but come-backs and momentum breaking are hard-wired into the DNA of the game.
Being down to match point in the first battle is definitely an interesting experience, but in this case provided Hells Scythe can stay in the bowl and evade X-Dashes, I had no worries about being outspun at all.
This meant there was little to no added pressure for me towards the end of any of the battles where neither Beyblade was knocked out. If Hells Scythe could stay in early, it had an excellent shot at winning.
Round 4: Dan (Hells Scythe 4-60B) vs. Poablader099 (Knight Shield 3-60T)
Final Score: 2-4, Poablader099
I do not recall who won the rock-paper-scissors but I’m inclined to believe I lost because I ended up on the side farthest from the right-spin Xtreme Line rail that I like to start on.
Poablader099, unlike all my other opponents, was much younger and relying on our loaners for the event, using the Knight Shield Blade on the Taper Bit. In natural young Blader style, he had an insane launch.
Battle 1: 0-0, Draw
Knight Shield shot to my side of the Play Area and immediately got to work chipping away at Hells Scythe full force. No knockouts were earned, and much to my surprise the end was a draw. Hells Scythe on Ball stopped at the same time as Knight Shield on Taper. In-battle this was because of a rather unlucky destabilizing hit from Knight Shield right at the end, it happens.
If you’re judging by the score line, this is actually a pivotal moment that taught me a pretty meaningful lesson. Normally there is an innate disadvantage between Bladers in terms of launch strength that in many instances translates into “stronger launch wins same-spin matchups”.
This is doubly true against much younger opponents. Right? Well… in X not so much. Acclimating your launch to your opponent’s perceived ability will net you draws, losses, and cost you matches in Beyblade X.
Between the excellent Winder Launchers X debuted with, the Taper Bit, and the massive hits one can land early, Stamina users should think twice about scaling back their launch. In hindsight, this is one moment that cost me the match.
Battle 2: 2-0, Over Finish – Poablader099
Stadium flip, and with that lesson fresh in my head, I launch a bit harder into the center. Knight Shield deep in my end of the stadium, X-Dashing a bit early but Hells Scythe manages to not be in the line of fire.
The subsequent hits, though, prove to be fatal. Knight Shield knocks my Hells Scythe directly onto the Xtreme Line, it ricochets with fervor northwards, hitting the opposite side of the Xtreme Line again. Knight Shield is also perfectly aligned to hit it once more. The third hit onto the Xtreme Line at an angle bursts my Hells Scythe. 0-2.
The Xtreme Line seems to be just as much of an obstacle as it is a tool for Bladers to use in battle.
Battle 3: 2-2, Over Finish – Dan
Battle three, stadium flip and I am once again on the side I really don’t like all too much for no tangible reason. Poablader launches with a lot of strength, and unfortunately knocks his Knight Shield into the pocket after riding the Xtreme Line. It almost manages to come back out to lose by outspin instead, but Hells Scythe is conveniently right by to ensure it stays in the pocket. 2-2.
Battle 4: 3-2, Spin Finish – Poablader099
Battle four and I am on the right-leaning Xtreme Line side again. Rather than launch forward I experiment. Figuring my opponent will launch directly at my side again I choose to launch in a way that should see Hells Scythe X-Dash after a short delay, catching Knight Shield.
They did not do that during this battle, as those with a more comical mind would expect. Just my luck.
Instead much of my Hells Scythe’s stamina is expended with the X-Dash that produces no knock out for me, and combined with very impressive hits from Knight Shield, meant an easy outspin for my opponent. 2-3 in Poablader099’s favour.
Battle 5: 4-2, Spin Finish – Poablader099
Following another flip I launch closer to my Xtreme Line to try and avoid early aggression from Knight Shield, which had almost paid off in the form of a self-knockout by my opponent.
Unfortunately Knight Shield easily came back and continued to prove that just because you’re running a self-described stamina type doesn’t mean you should consider Taper a free win at the end.
Hells Scythe was hit with enough force throughout the match that by the end Knight Shield could destabilize it and force Hells Scythe to scrape out just a bit earlier than it did itself. This resulted in a 2-4 victory for Poablader, and the second time today that I thought maybe I should have gone with a taller Ratchet.
Dan’s Analysis of Final Stage

With a score of 2-2 I was actually under the impression I was not going to make it to Finals, but remembered we were running Swiss, where I barely made the cut-off at 7 of 8. It seems like our newest and youngest were among the best that day, so maybe the Swiss ended up helping me more than it did them in the end, funnily enough.
Being so low put me in a direct trajectory to face Hato who had placed second seed in First Stage. I had committed to seeing the overall viability of the supposed ‘combo to beat’ during First Stage, but by this point I wanted to try something more out there.
Quarter-Final: Dan (Dran Sword 3-60N) vs. Hato (Dran Sword 3-60F)
Final Score: 1-8, Hato
Against my better judgment I chose the above combo. There is just something fun and alluring about a stationary attack combo, especially in a game that feels so focussed on movement and guided attacks. It feels like bucking the trend or trying to play by your own rules.
Dran Sword on Needle is actually a fine combo in certain scenarios, but far from what the optimized Dran Sword combo should look like in a vacuum. As it turns out Hato had been using stock Dran Sword to run amok in his First Stage matches and didn’t plan on stopping.
In a direct Blade mirror things don’t look super great. The Dran Sword with Flat, to me, seems to have more autonomy and the Needle variant simply gets acted on. Losing rock-paper-scissors meant little here because I found that my mint Needle tended to act the same docile way regardless of launch or positioning.
Battle 1: 2-0, Over Finish – Hato
First battle I was on my preferred side, and immediately both Dran Sword Blades started attacking one another. Unfortunately, and this is something I have noticed in testing, the Dran Sword Blade on the Needle Bit can go out of control when hit. Sometimes to its detriment.
My Dran Sword did just that, becoming erratic and ejecting itself out of the Play Area and into a pocket after a few big hits. 0-2 for Hato.
Battle 2: 5-0, Xtreme Finish – Hato
Stadium flipped. Hato’s Dran Sword, with all its movement, landed an incredible 2-hit sending my Beyblade right onto the Xtreme Line, unfortunately propelled right into the Xtreme Finish in a true collaborative effort. 0-5 for Hato.
I’m so glad my Dran Sword displayed its very convincing solidarity with my opponent.
Another knock-out is, at this point, elimination. Dran Sword on Needle has a distinct advantage in endurance, but given how these matches are going, knock-outs seem all too likely.
Battle 3: 5-1, Spin Finish – Dan
We flip, launch, and after massive trades back and forth, no knock-outs were to be had for the first time in this match. Needle secures the victory with a very convincing outspin, as is expected, but the match doesn’t feel any less lop-sided now. 1-5.
Battle 4: 8-1, Xtreme Finish – Hato
Another flip, the first X-Dash from Dran Sword on Flat is narrowly missed, but the second sends my own flying into the Xtreme Finish Zone for the second time this match, ending the battle and securing the win for Hato at 1-8.
I definitely knew that Dran Sword 3-60 Needle was a gamble, and a fun one I was willing to make. Unfortunately I landed on just about the worst matchup I could think of for it, apart from perhaps an unusual Knight Shield combo.
In the context of 3on3 this combo makes a lot of sense, and even in the context of the event where I hadn’t come across another Dran Sword once yet, it makes “sense” despite being an imperfect choice. It just didn’t pay off for me this time!
During all this I didn’t get a good look at some of the other early Finals matches, but I did make sure to pay close attention to all the final podium matches of the day.
For Third Place: henwooja1 (Wizard Arrow 4-80B) vs. Skynet (Hells Scythe 4-80B)
Final Score: 8-3, henwooja1
This matchup on paper didn’t seem like it was going to be super interesting to me. In my mind Hells Scythe had a clear advantage and under most conditions would sail to victory. This thought was proven to be very wrong as the match went on.
Battle 1: 2-0, Over Finish – henwooja1
Skynet had the side closest to right-spin’s X-Dash for the first battle, but his combo didn’t make use of it. Instead both combos made little contact right at the beginning, hovering around each other but just narrowly missing one another.
That was until, in an instant, Wizard Arrow made contact at the perfect time and angle to net a very decisive knock-out on Hells Scythe. 2-0 for henwooja1.
Battle 2: 4-0, Burst Finish – henwooja1
Stadium flip and both Bladers launched with fervor. Once again little contact at the beginning but an explosive set of successive hits, specifically one that managed to uppercut Hells Scythe, made for a burst finish on Skynet’s Hells Scythe. 4-0 for henwooja1.
Battle 3: 4-1, Spin Finish – Skynet
In the next battle Skynet launched noticeably harder than before and the match went a lot closer to how I expected it to based on personal testing – some meaningful hits here and there, but no knock-outs and a decisive spin victory for Hells Scythe afforded to it by its better stability late-game. 4-1.
Battle 4: 6-1, Burst Finish – henwooja1
Still in the lead but a ways away from the 7 points required for victory, henwooja1 headed into the fourth battle. With a few hits back and forth Hells Scythe seemed like it couldn’t take some of the damage it was taking, burst quite early. 6-1 for henwooja1.
Surprisingly this wasn’t associated with an X-Dash or even a particularly strong set of hits, just consistent damage and more than likely unfavourable Ratchet contact.
Battle 5: 6-3, Over Finish – Skynet
The fifth battle started off with a run-of-the-mill set of contacts but very much in line with two “stamina types” battling (much as Beyblade X proves stamina matches are riddled with knock-outs too).
Surprisingly, near the end Hells Scythe, while on tilt lands, a last-ditch attack netting it a knock-out finish for a score of 6-3 in Skynet’s favour. These last-ditch efforts are all too common in Beyblade X, you can’t be sure it’s over until it’s really over!
Battle 5: 8-3, Burst Finish – henwooja1
The sixth battle highlights exactly the kind of thing I was trying to do in previous matches where I assumed my opponent would try to encroach on my space in the right-spin oriented X-Dash Zone.
Skynet launches towards henwooja1’s side, with henwooja launching his Wizard Arrow in a way that it will catch the Xtreme Line and loop back around to make contact with the now-lagging Hells Scythe.
With that loop back around it got an immense hit on Hells Scythe that was still recalibrating itself after the launch, resulting in an immediate burst finish, ending the match at 8-3 in favour of Henwooja1.
Sponsored: Order the newest Beyblades at malloftoys.com!
Heads up: If you buy something through Mall of Toys, you won’t pay any extra, but I’ll get a small commission. This helps me keep things running. Thanks for your support!
For First Place: Hato (Dran Sword 3-60F) vs. Tahoor (Wizard Arrow 4-60B)
Final Score: 7-6, Tahoor
Despite coming in the last possible spot for our Finals today, Tahoor had made it all the way to the first place podium match! Talk about a Cinderella story.
I didn’t get to see his matches much apart from the one with me, but from what I understood he stuck to this single combo the whole way through. Considering how much Knight Shield I saw compared to Dran Sword, it would not surprise me if that is the case and it would explain his success thus far.
When it comes to what “should be” the counter to a combo like this Wizard Arrow, at this point in Beyblade X I am not sure there is anything more potent than Dran Sword on an aggressive tip. In some ways it was Hato’s game to win.
Battle 1: 2-0, Over Finish – Hato
For this very last match of the tournament Hato had the farther side of the stadium for the first battle, with Tahoor closer to the right-spin X-Dash Rail. Wizard Arrow was launched into the center, as was Dran Sword. Dran Sword was starting to make its rounds and landed some pretty solid hits onto Wizard Arrow.
As if guided by Bey Gods, Dran Sword was not only able to land successive hits that perfectly lined Wizard Arrow up to be knocked out via ricochet, but it even skipped the Xtreme Line a bit at the end to make even more direct contact. Not unlike watching a blue pool cue ball sinking a red striped ball.
2-0 for Hato and a strong start, very convincing victory and very much in line with what one would expect on paper.
Battle 2: 4-0, Over Finish – Hato
The second battle starts with Hato on the opposite side meaning Dran Sword should be getting X-Dashes sooner than before. It did, and was able to do a couple, but neither hit. Instead, on its loop back around Dran Sword hit Wizard Arrow onto the apex of the Rail, perfectly bouncing it off and backwards into a pocket. A stylish 4-0 for Hato.
Stadium flip. Dran Sword is launched hard, as is Wizard Arrow. But this match is likely to be a classic example of launching too hard on the farther side – missing the mark and Xtreme Finishing itself.
Battle 3: 4-3, Xtreme Finish – Tahoor
Dran Sword caught the rail from its own side, giving it even more momentum than normal if it had started at the half-way point, completely missing Wizard Arrow and propelling itself into the Xtreme Finish Zone. 4-3, and Tahoor was now on the board.
Battle 4: 6-3, Over Finish – Hato
In similar fashion to the battles before, with the following flip Dran Sword was able to get a convincing ricochet knock-out onto Wizard Arrow, making it 6-3 for Hato.
Earlier I called this matchup “Hato’s to win”, because it is up to the Dran Sword combo to fulfill its role and knockout the otherwise stationary sitting duck that is Wizard Arrow 4-60B.
It was now Hato’s game to lose – one single point from victory and with enough of a lead for there to be a mislaunch buffer.
Battle 5: 6-6, Xtreme Finish – Tahoor
The stadium flips and Dran Sword is now on the farther end again. Unlike last time, Hato’s Dran Sword does make contact with Wizard Arrow, almost sending it into the pocket. Unfortunately it also gets redirected by Wizard Arrow back into the Xtreme Finish Zone. The score is tied up at 6-6.
Battle 6: 7-6, Spin Finish – Tahoor
Last stadium flip of the tournament and it is now or never for Dran Sword, and it all comes down to this.
Hato certainly launched hard enough to earn a knock-out, but unfortunately it was redirected deep into his corner pocket, where the Play Area turns into open air. May be a case of nerves or desperation for a big initial hit.
Dran Sword was launched hard enough initially to give it enough movement to get out of the otherwise auto-lose zone, but with nowhere near enough stamina to secure a knockout. Wizard Arrow won with ease, securing a convincing outspin.
The scoreline ended at 6-7 for Tahoor.
There is definitely something to be said for the Stamina type user in the matchup that has to keep their composure in a matchup that seems them being unilaterally acted on, which Tahoor dealt with very well.
This is also a bit of a cautionary tale to not launch overly hard and Xtreme Finish yourself!
That outcome is fairly reproducible, especially on aggressive Bits like Taper and Flat. Launching too hard is risky, as is launching too light.
There is a delicate power balance you must strike when wielding a mobile attack type combo in X that I predict can and will be mastered by those that choose to commit to these kinds of combos.
X is certainly different in the nuance that exists compared to previous generations, but it isn’t without unique gameplay or skills of its own. This much is obvious after playing and observing one single event.
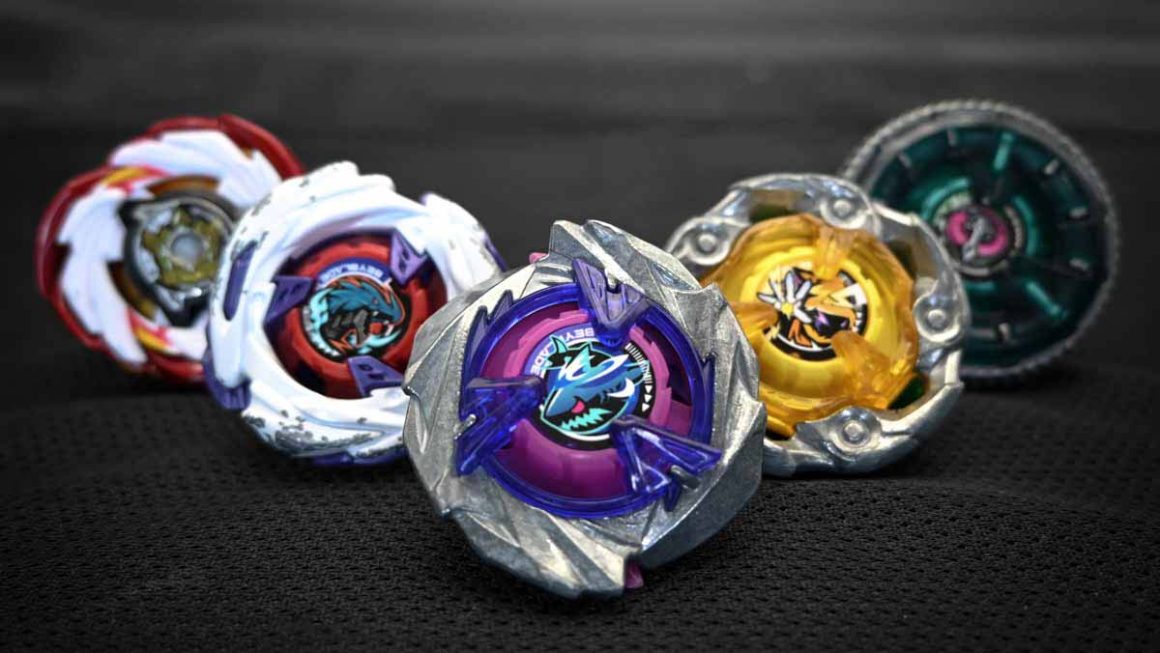
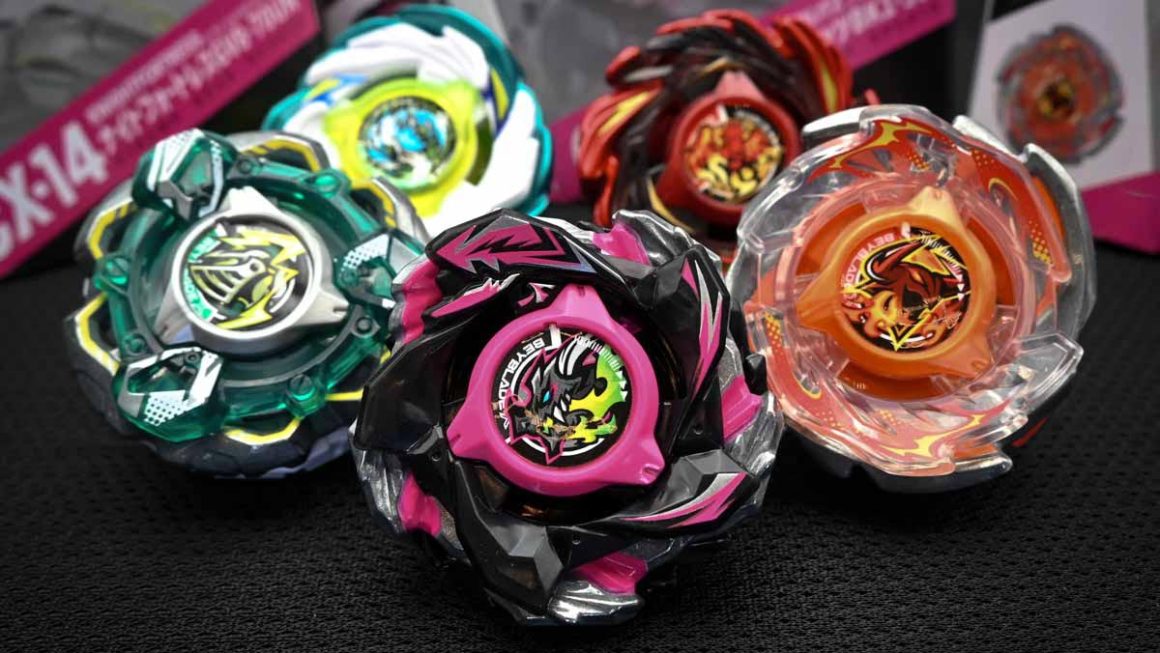
What were the tournament-winning Beyblade X Combos at “X Marks the Spot”?

Having finished up the play-by-play let’s recap the winning combos, and how exactly they work.
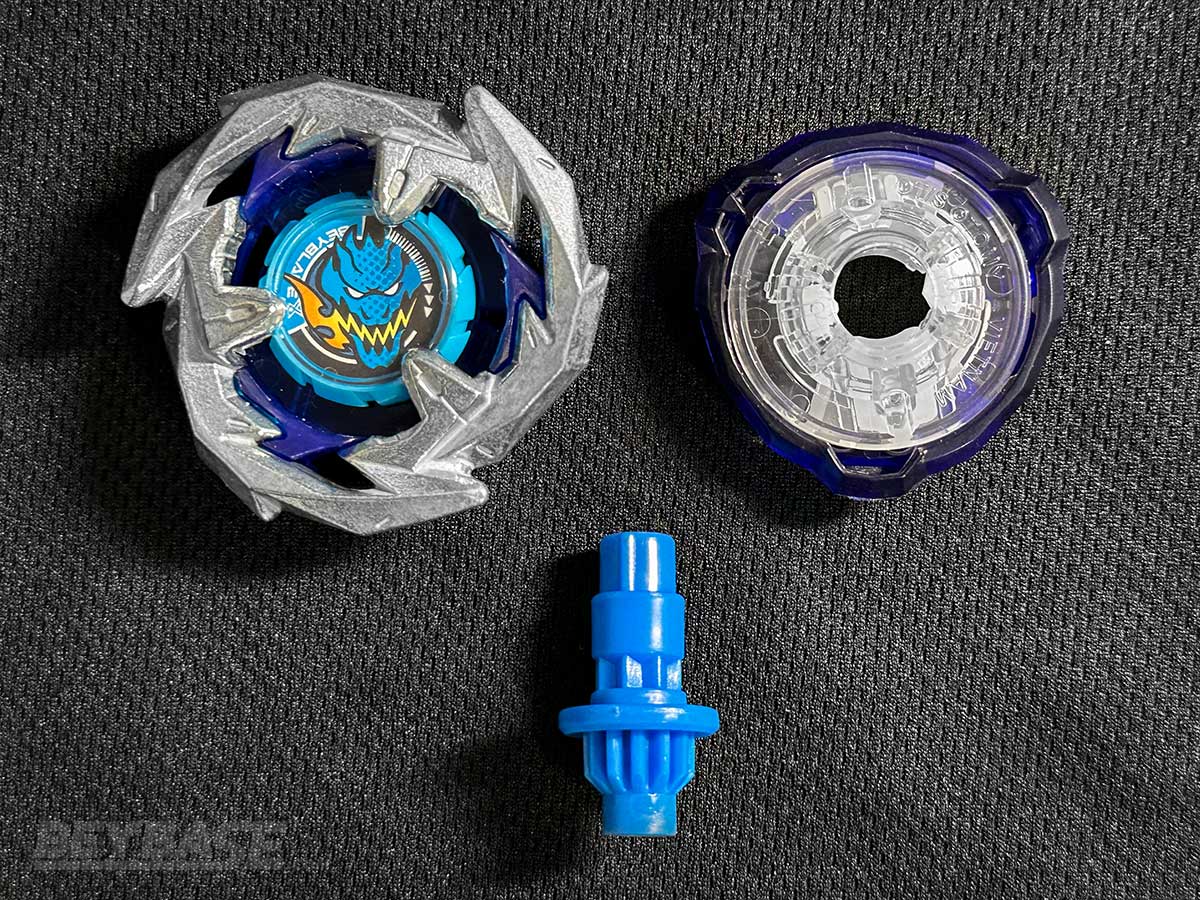
1st Place: Wizard Arrow 4-60B (Tahoor)
This combo is a pretty fair stamina-oriented Beyblade that utilizes the Ball Bit to maximize endurance, Wizard Arrow Blade for a mixture of decent endurance and smooth surface to produce less recoil vs. Attack and finally the 4-60 Ratchet to be closer to the ground, reducing the likelihood of direct contact with the Ratchet and bursting to heavy hits.
It struggles against Hells Scythe combos in general, shown by our match together, but has enough Stamina and low-recoil to give most Knight Shield and inferior Wizard Arrow combos a lot of trouble.
Of course it has to be mentioned that this combo isn’t exactly immune to Dran Sword attack combos, nothing yet is. This kind of combo is mostly hoping that the slick Blade design, high endurance Bit, and low Ratchet are enough to keep it in the Play Area when sharing it with Dran Sword.
A lot of luck and good positioning is required to make the most of it in that matchup.
How to Build Wizard Arrow 4-60 Needle
-
Wizard Arrow Blade (1 of the following):
-
4-60 Ratchet (1 of the following):
-
Ball Bit (1 of the following):
2nd Place: Dran Sword 3-60F (Hato)
Dran Sword 3-60F is, as shown at the event and recommended in our Beyblade X Buyer’s Guide, very deadly when given the opportunity to strike. It is also the stock Dran Sword combo, perhaps a testament to how good it is out of the box.
The Flat Bit may leave a little to be desired when it comes to increasing outspin potential, but the reality is that the main aim of this combo is to knock things out, not outlast them.
You can rack up a lot of points all at once with a combo of this nature, but the risk is high. Flat is a wild Bit that, if launched improperly or just simply unlucky, can result in a 2 or 3 point deficit in a flash.
While this combo doesn’t have any true in-game “counters” the huge skill and luck factor involved when piloting this more than make up for the fact that none of the existing parts available can say they reliably deal with Dran Sword well.
How to Build Dran Sword 3-60 Flat
-
Dran Sword Blade, 3-60 Ratchet, Flat Bit:
3rd Place: Wizard Arrow 4-80B (henwooja1)
This combo is more or less identical to the first place combo, but the choice of the 80mm Ratchet affords the combo a bit more burst resistance via tighter locks. Unfortunately this also means that it is more susceptible to direct Ratchet contact, which can sometimes offset its durability.
Being able to precess a bit longer can be a blessing, but at the same time being more easily destabilized is a reality as well. It is far from definitive, but far from a bad choice.
Against Attack combos this higher height seems to be about as susceptible to knock-outs as other options, if not more, but against the likes of Knight Shield the added height makes a world of difference when it comes to staying inside the stadium.
Definitely a viable alternative to the first place combo.
How to Build Wizard Arrow 4-80 Ball
-
Wizard Arrow Blade (1 of the following):
-
4-80 Ratchet & Ball Bit (1 of the following):
Key Takeaways after Toronto’s First Beyblade X Tournament
For me personally there were a few key takeaways from this event:- There is no “safe” pick in the current X metagame. Constructing what is considered to be the most reliable and easily executed combo a world over and launching it is not enough. There are far too many factors at play to ever be truly “safe” in a single combo choice when evaluating the probability of success in a single battle. Our definition of what is “safe” may change in Beyblade X to something with better track record over a longer time horizon, but that remains a hypothesis at present.
- Innate strength disparity between Bladers plays much less of a role than ever before. Even when X still consists of only same-spin matchups. This points to the game of Beyblade being more equitable and inclusive than ever.
- Expect a lot of “extreme” score lines in Beyblade X (meaning shutdowns and comebacks). Tangentially related to the idea of “safe” combo picks is this. Even under ideal scenarios battles can end up at a complete 180 from where they started. Just as possible, though, is utter stomps. Certain matchups or execution may see complete sweeps happen in an instant.
- Stadium side preferences vary significantly. I perform astronomically better on the left side of the Xtreme Stadium (pockets to my right hand side) than I do on the right side, with pockets to my left. It allows me to have a more natural launch away from pockets on passive combos and a kind of riskier but longer Xtreme Line ride with attack combos. Both come natural to the way I launch compared to the right side where I feel like I launch and perform a lot worse. Other players seem to not care what side they’re getting though … if this changes over time as players gain more knowledge and experience with the intricacies of the stadium remains to be seen.
What do you think? Comment below!
I’d love to hear what you guys think of the WBO Beyblade X Format metagame as it stands right now, whether you attended the tournament or not.
Comment below and let me know!
If you enjoyed reading this article, please also feel free to share it with any of your friends who are into playing Beyblade competitively or enjoy hosting tournaments.
Or become a BeyBase HQ member to get early article access and behind-the-scenes updates. Thank you!
One thought on “The 3 Beyblade X combos that topped Toronto’s first ever X event (WBO Tournament Report)”
Comments are closed.
I play better on the left side too I think. When I can get an x-dash thats long and smooth and the opponent is already in the middle of the dish, its an almost guaranteed hit and often KO. It really depends of what launch style they use to combat the worse starting position.