Affiliate Disclosure: If you buy something through some of the links on this post, you won’t pay any extra, but we’ll get a small commission. This helps us keep things running. Thanks for your support!
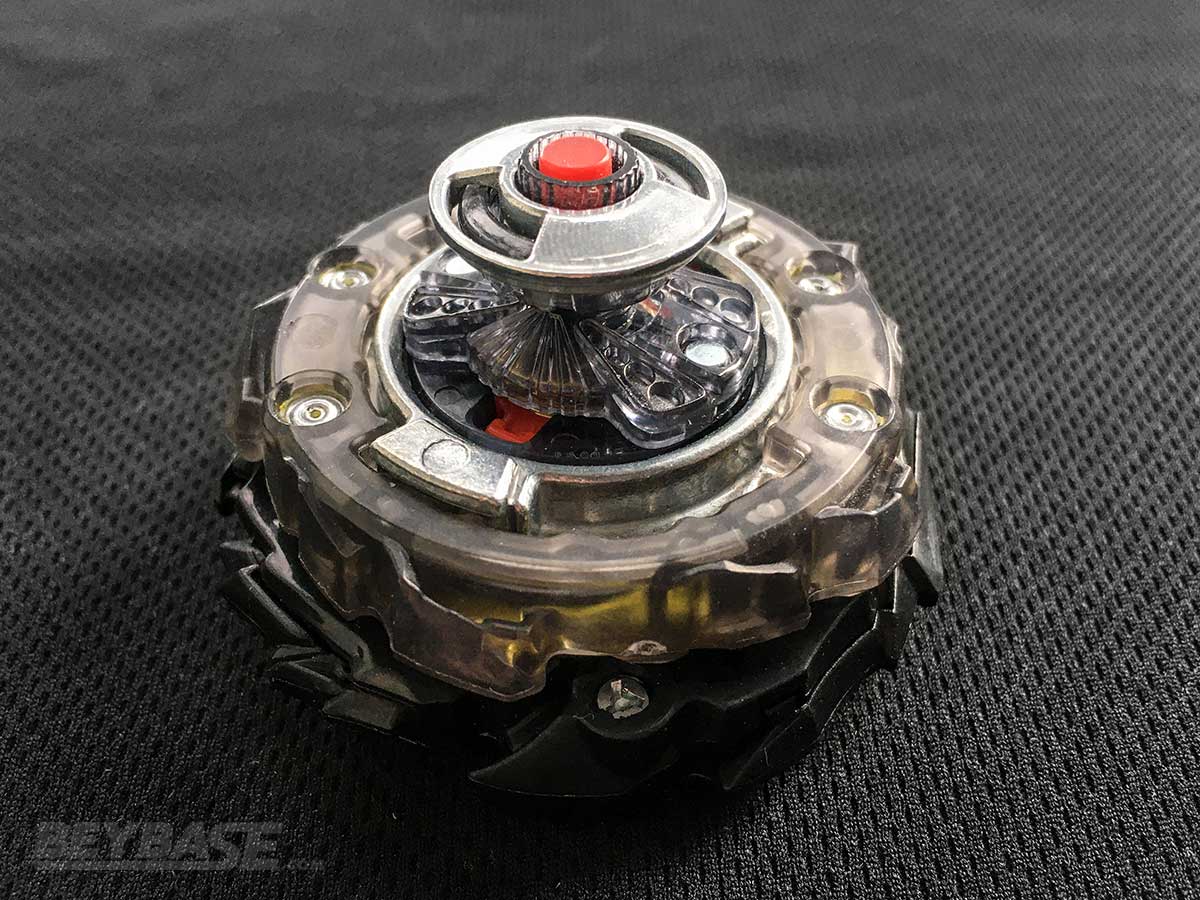
Like the previous Random Booster, Beyblade Burst B-196 Random Booster Vol. 28 contains few completely brand new parts. The only new inclusions are the Metal Dimension Driver and High Charge Dash Driver.
If B-194 Random Booster Vol. 27 was focused on bringing Bladers up-to-date with current Dynamite Battle releases, RB28 is focused on bringing rare parts into your hands.
In this article, we explain three main reasons why you should buy B-196 Random Booster Vol. 28:
- It provides a great shot at previously “locked away” parts.
- Of the Dynamite Battle parts it contains, most are competitively important.
- It’s a one-stop-shop for competitive Sparking-era parts.
Following that, we also detail:
- A few key observations we have made about unique parts found in this RB.
- Minor changes in weight and material used in a few parts compared to their previously released versions.
Product Details
- Brand: TAKARA-TOMY
- Product Code: B-196
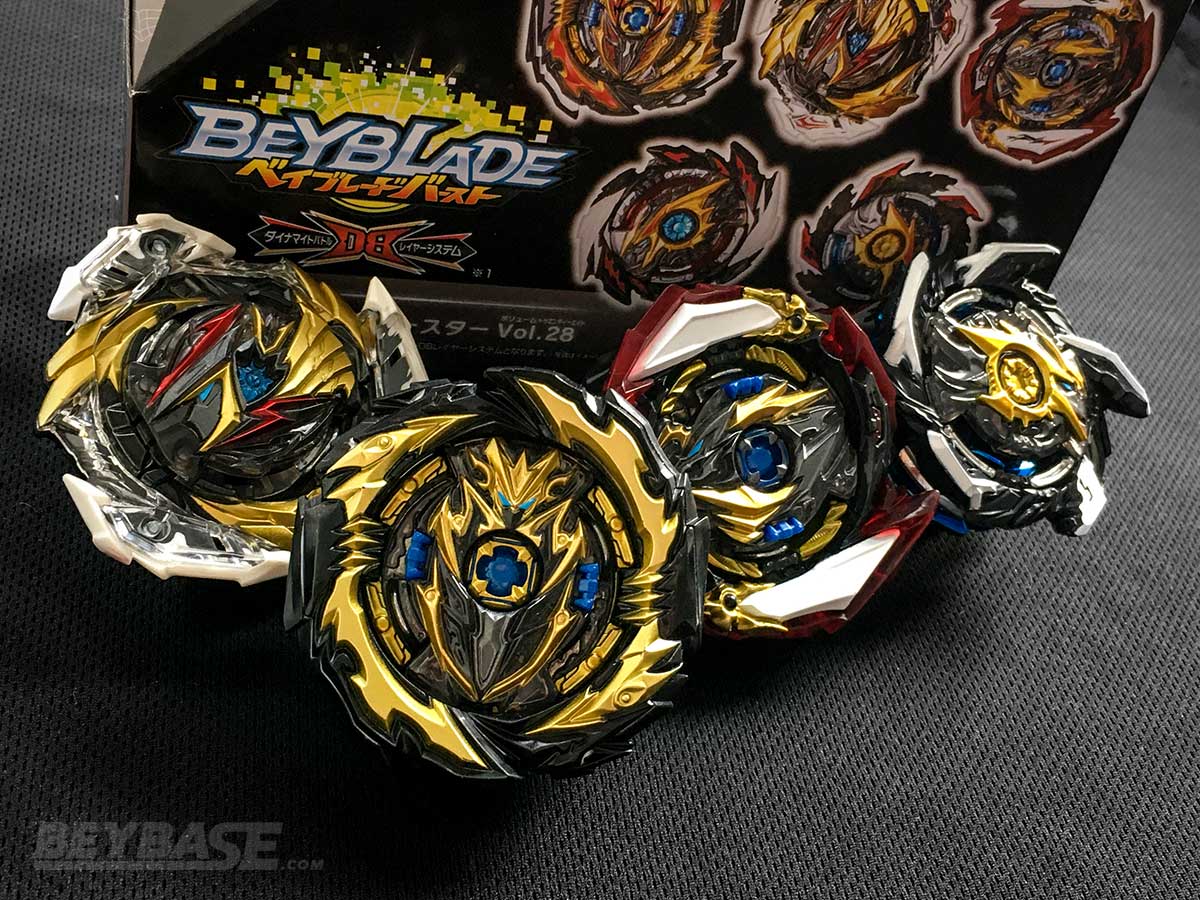
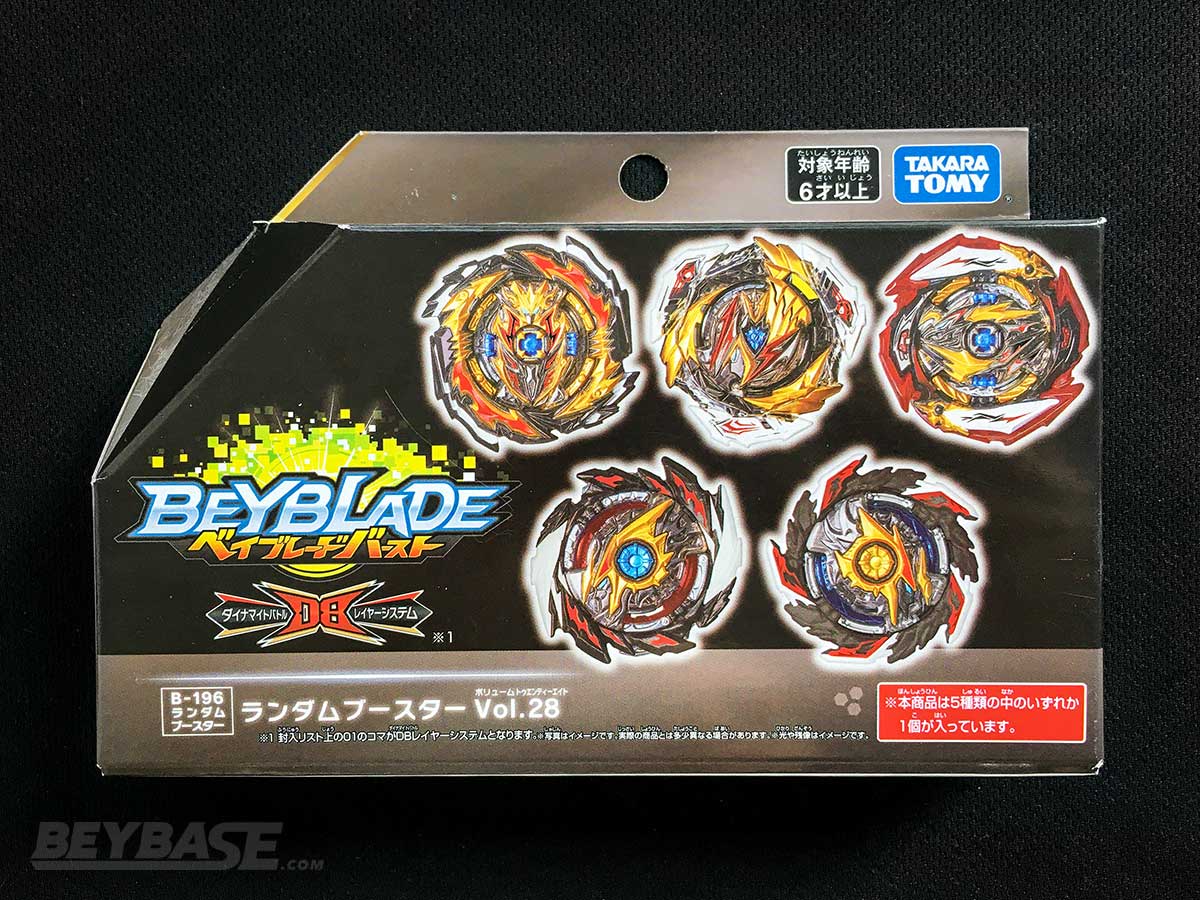
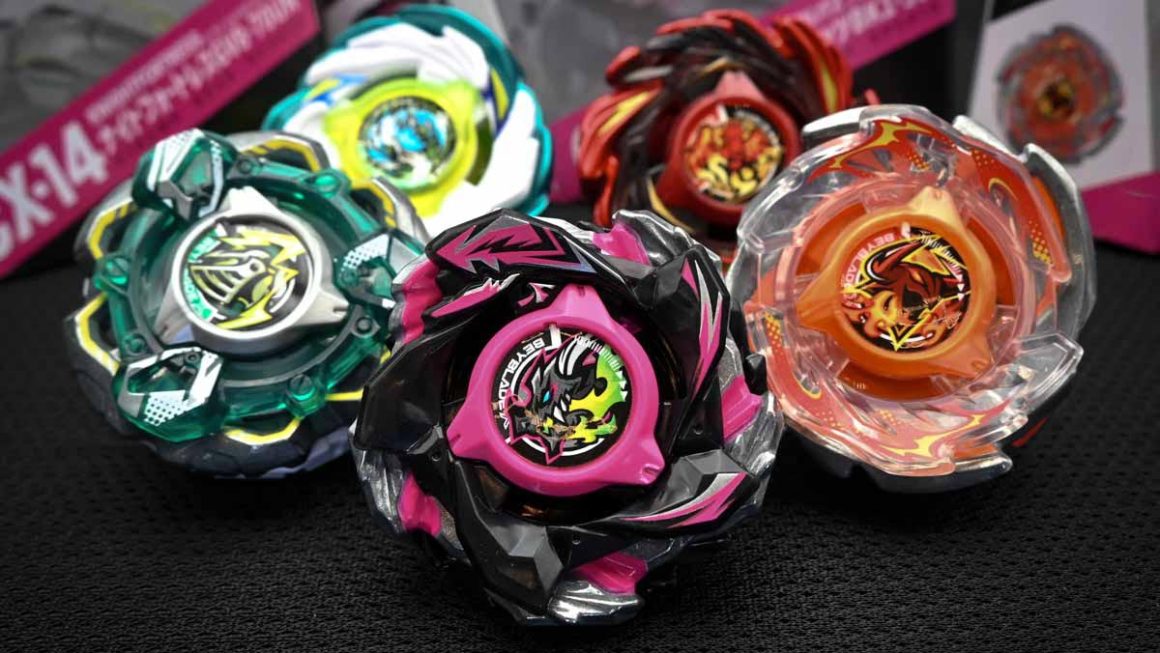
- Product Contents (1 of 5 Randomly Inserted):
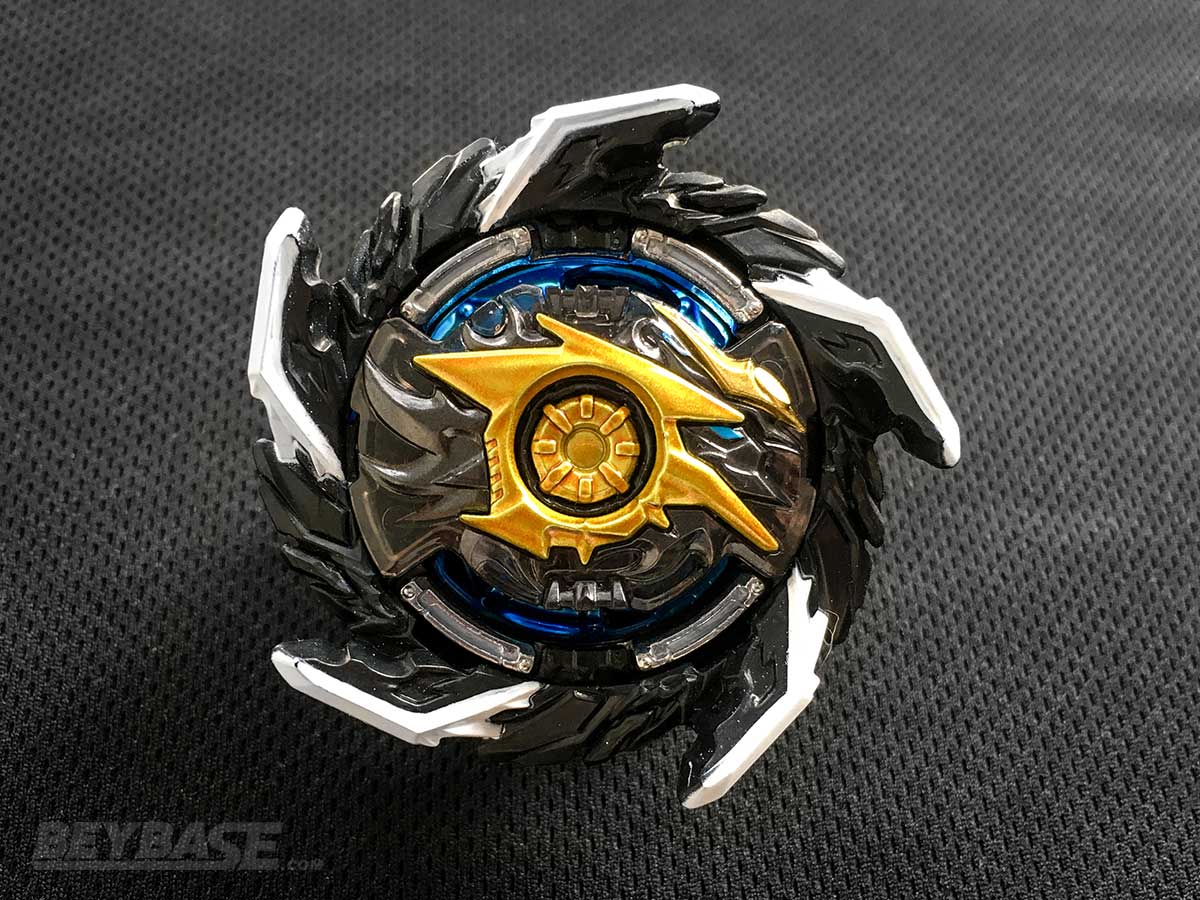
- B-196 01: Ultimate Valkyrie Legacy Variable’-9
- B-196 02: Tempest Achilles Xceed’+Z 1B (with Infinite Shield)
- B-196 03: Infinite Dragon Zone’+X 1A (with Infinite Sword)
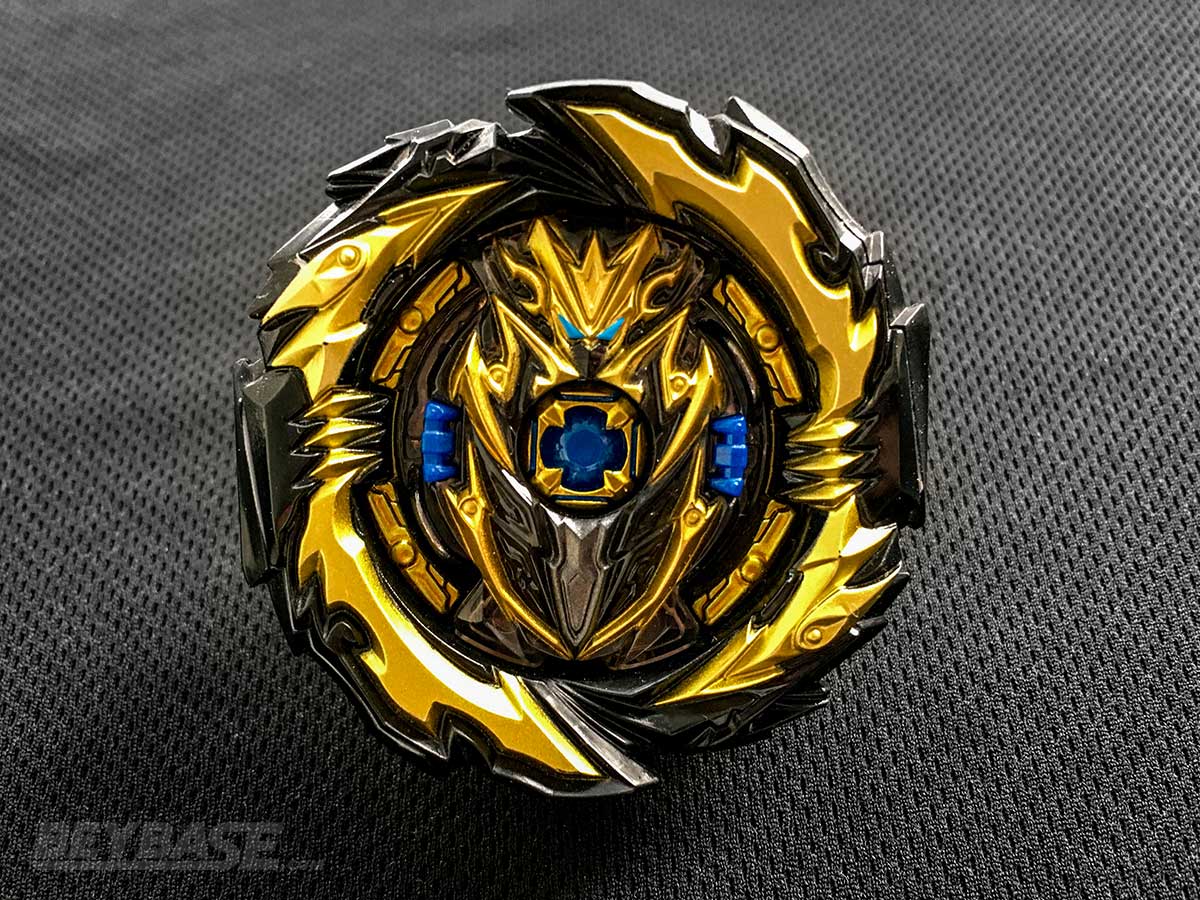
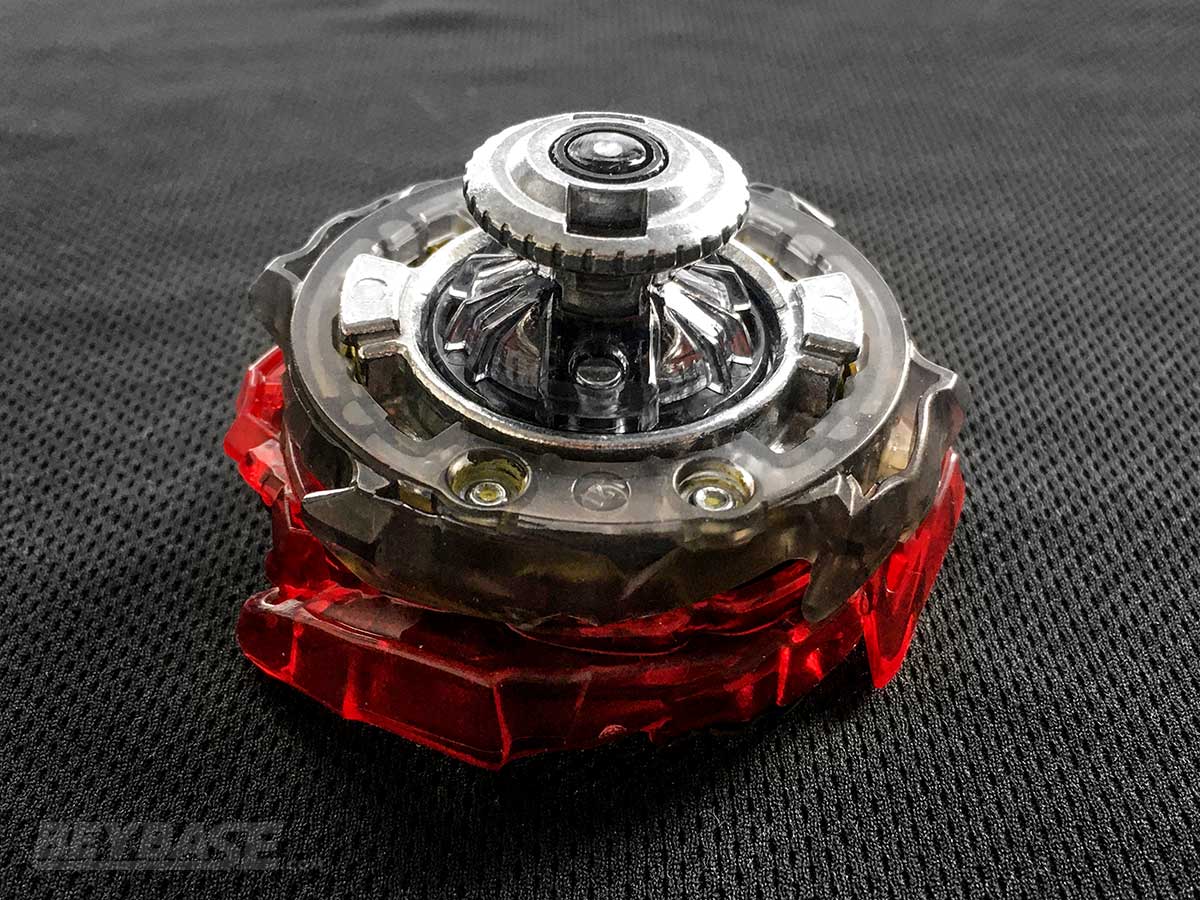
- B-196 04: Super Hyperion Giga Metal Dimension 4A
- B-196 05: King Helios Karma High Charge Dash 1S
- System: Dynamite Battle Layer System, Sparking Layer System
- Series: Beyblade Burst Dynamite Battle
Additional Notes:
- All tests conducted in the Burst BeyStadium Standard Type.
- This article was written in collaboration with WBO user Dan. Thank you, Dan. Editing, photos, and formatting by Blader Kei. Testing by Dan.
- Finally, if you buy something through some of the links on this post, you won’t pay any extra, but I’ll get a small commission. This helps me keep things running. Thanks for your support!
Where to Buy B-196 Beyblade Burst Random Booster Vol. 28
Heads up: If you buy something through some of the links on this post, you won’t pay any extra, but I’ll get a small commission. This helps me keep things running. Thanks for your support!
1. Access hard to obtain parts
While Ultimate Valkyrie Legacy Variable-9 is by no means difficult to obtain, every other component in this booster was originally released in some form of set or as a rare prize.
Here is the breakdown of notable parts per pull:
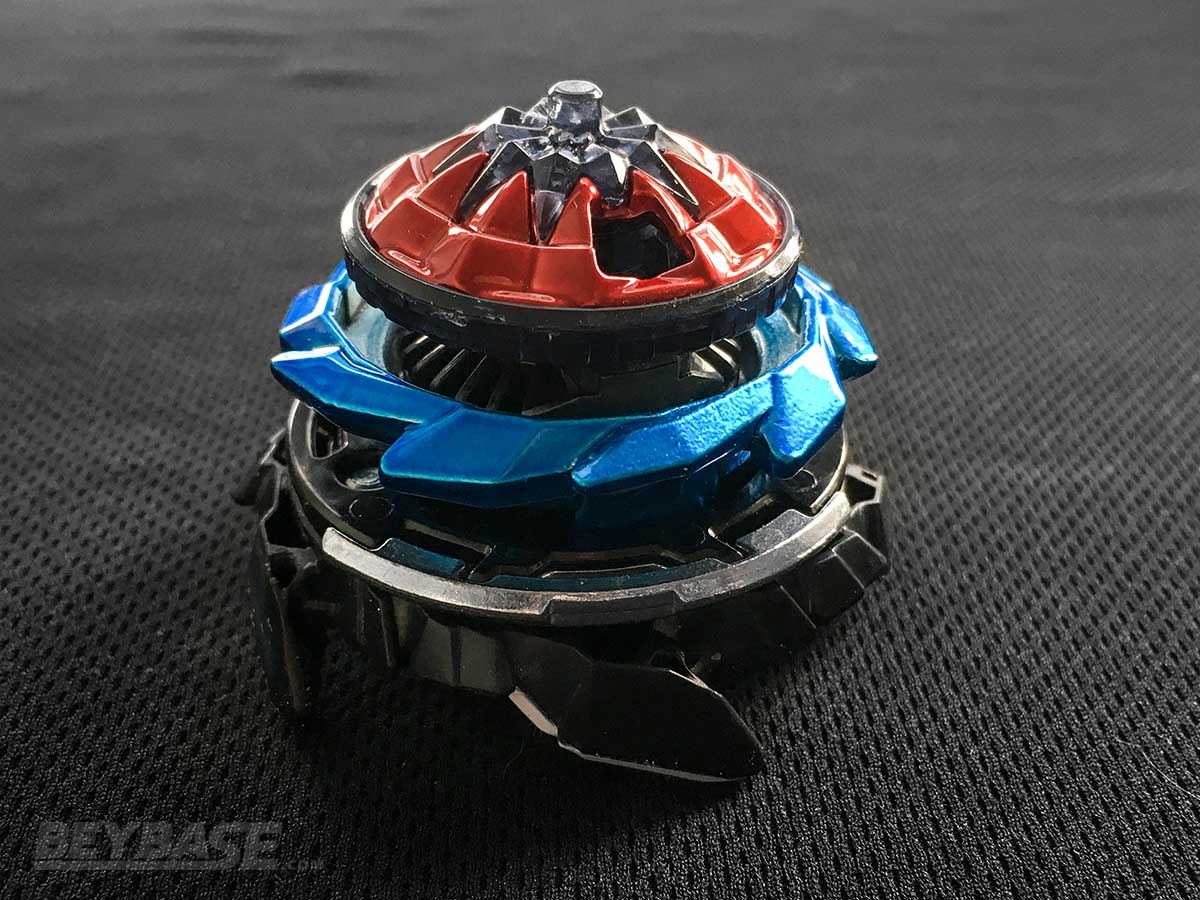
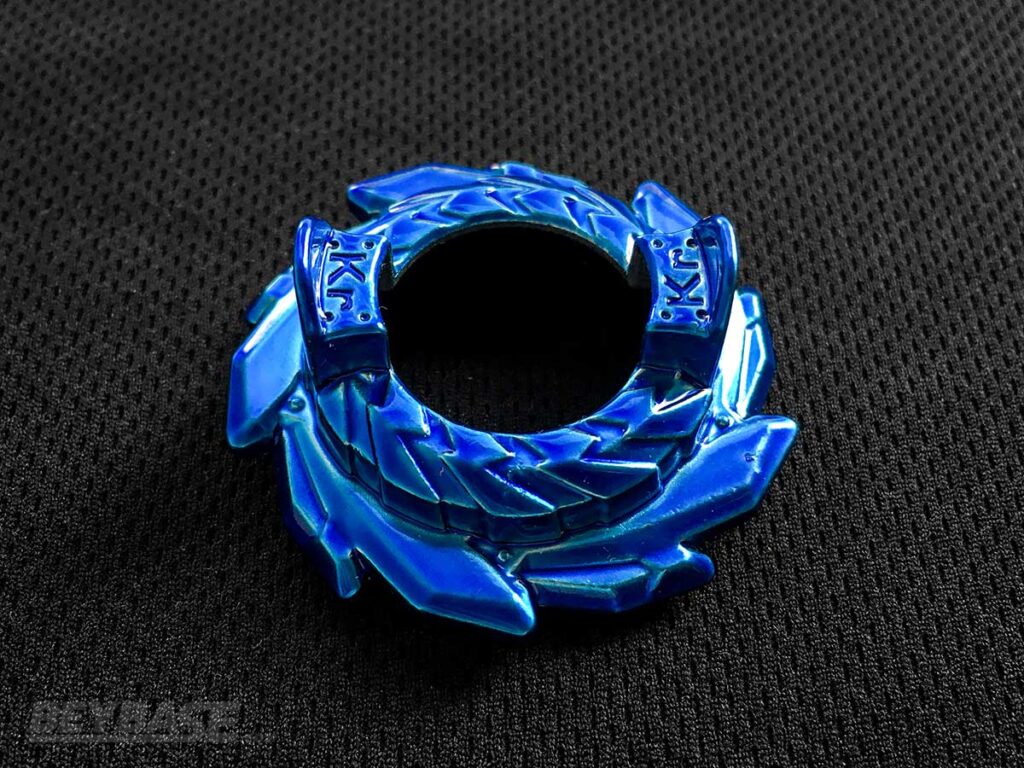
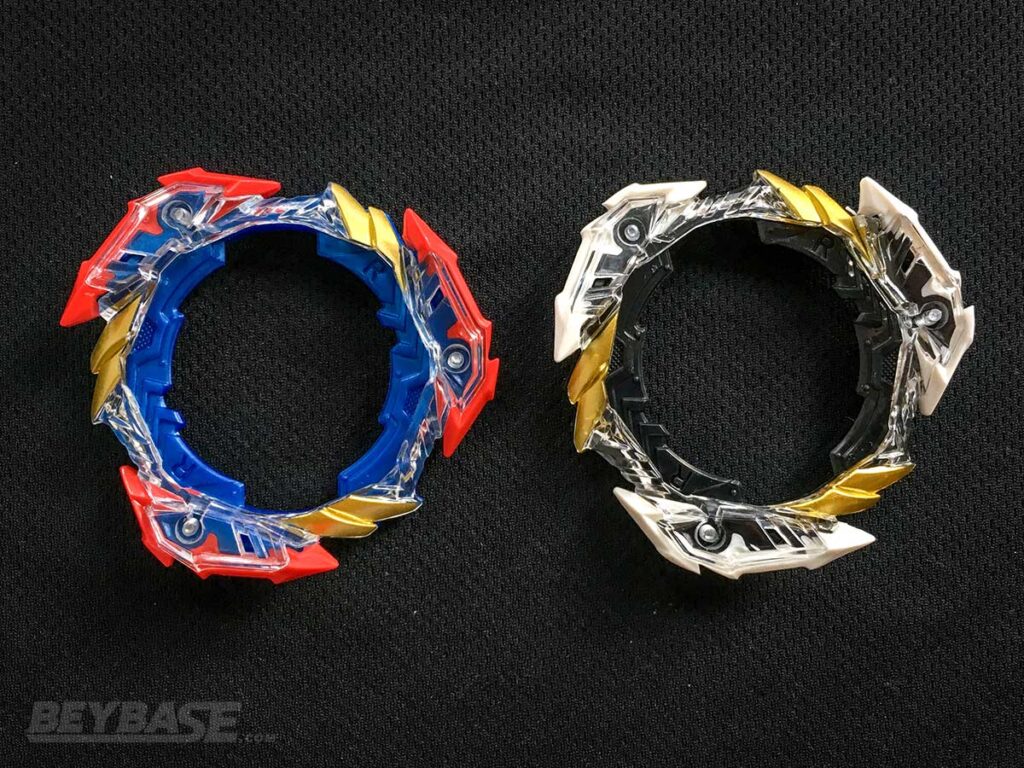
Tempest Achilles Xceed’+Z 1B (Including Infinite Shield Accessory)
Tempest Ring
The Tempest Ring was only previously released in the B-171 Beyblade Burst Sparking Triple Booster Set, and while it is actually the cheapest of the Rings listed here to buy, it is still a hefty 4180 yen.
As we previously talked about in our 2020 tournament report questioning if the Tempest Ring was too powerful, Tempest was a top tier Beyblade Burst Sparking Stamina Ring, that even to this day can sometimes hold its own against DB Stamina combos.
Xceed’ Driver
The Xceed’ Driver was only previously released in the B-174 Limit Break DX Set and Random Booster 25 with Dragoon V2 Wheel Xceed’. In the latter’s case, this was without any attachment, and being a Random Booster price-point made it slightly easier to purchase (the Limit Break DX set is upwards of 7480yen).
This is the third release of the Driver, and second ever release of the Driver with an accompanying attachment.
+Z Attachment
The +Z Attachment is a huge inclusion. It was only ever available with the B-174 Limit Break DX Set, and it allows for Xceed’ and Zone’ to have a free-spinning wider base that increases their opposite-spin performance astronomically.
It is an crucial part, that up until Random Booster 28, was far too difficult to purchase for a reasonable price.
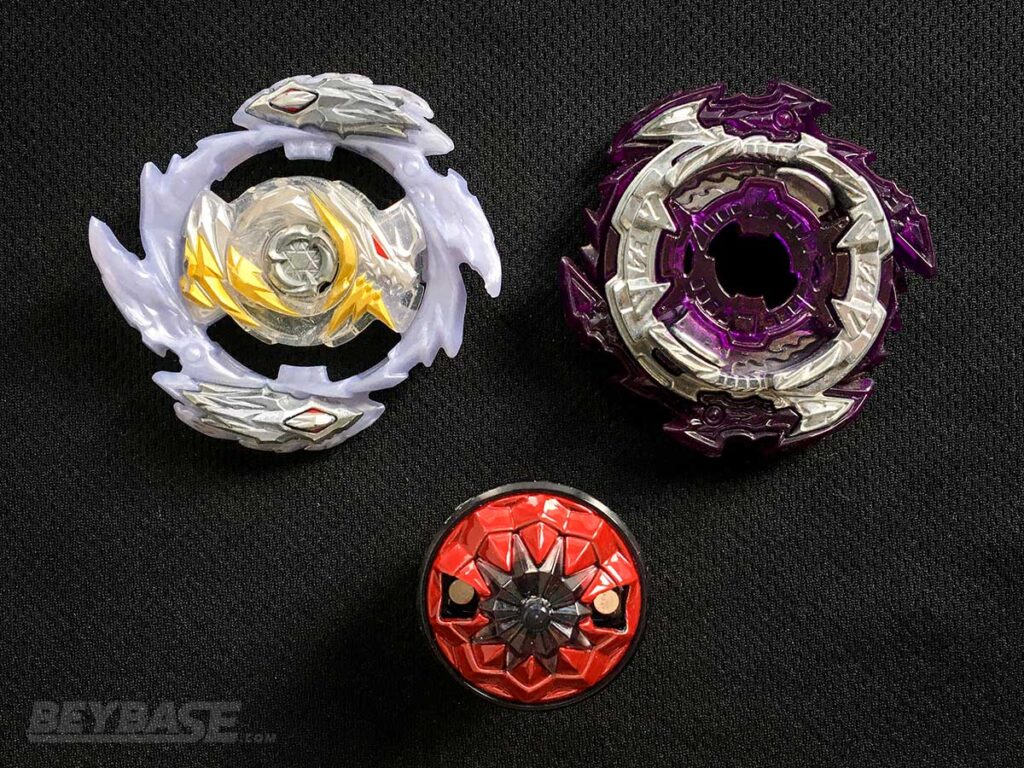
Infinite Shield Accessory
The Infinite Shield Accessory has only ever been released, prior to now, in B-181 Random Booster Vol. 25. The shield accessory was quite useful in the Sparking era to provide the Infinite Ring with a bit more of a defensive playstyle by rounding its edges.
You can read more about it in our article where 5 Top Ranked Beyblade Players Select Their Favourite Beyblade Burst Combos from the Sparking era.
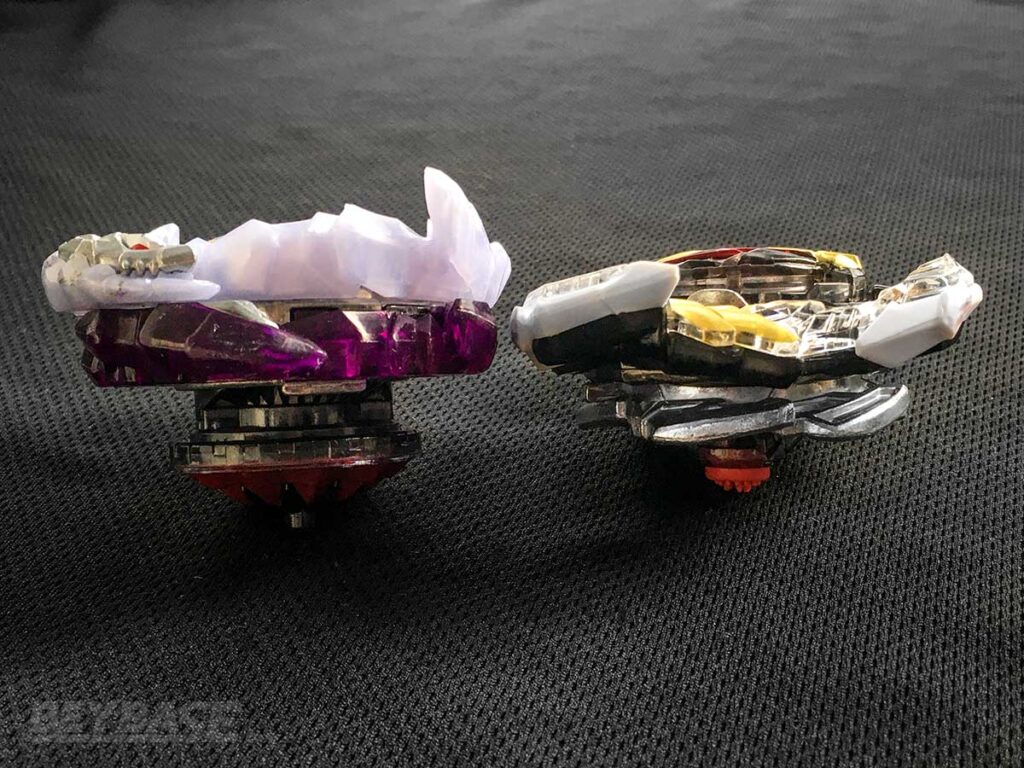
Infinite Dragon Zone’+X 1B (Including Infinite Sword Accessory)
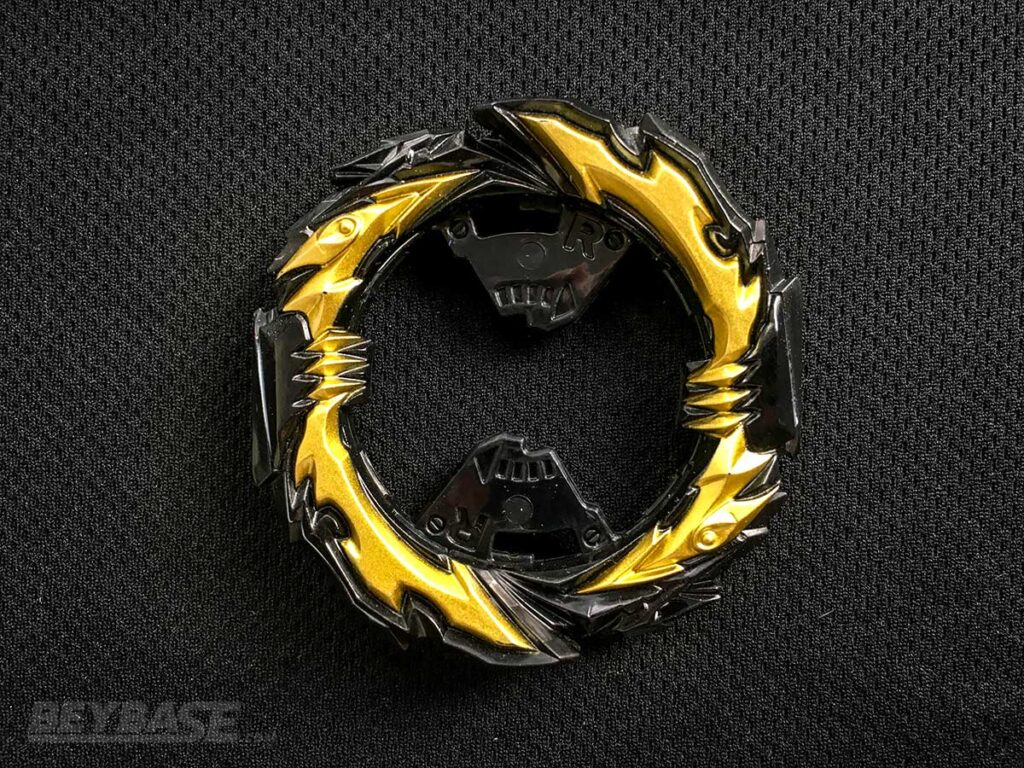
Infinite Ring
The Infinite Ring was a fairly underrated Ring for its time. Part of the reason for this is because it was not very easy to obtain, having only been released in B-173 Random Booster Vol. 22 and later B-181 Random Booster Vol. 25.
Its gimmick is the ability to include special external accessories to impact its performance.
Zone’ Driver
The Zone’ Driver is another huge inclusion, though having been just released in the previous Random Booster did make the scarcity issue a bit less of a problem.
Unlike the attachments. Just like the Xceed’ Driver, it was only available in the very expensive B-174 Limit Break DX Set, and then again in Random Booster Vol. 27.
Zone’ has been an incredible stamina Driver since release, and has found a use on far too many Beyblade Burst combos to ignore. If you do not have this Driver, you are doing yourself a disservice.
Infinite Sword Accessory
The Infinite Sword Accessory is in the same boat as the Infinite Shield accessory, having rarely been released, but actually does serve a very interesting use for the Infinite Ring.
This accessory lends itself to more aggressive play by sharpening contact points, and while it wasn’t enough to put it over Rage Ring in its heyday, it is definitely underrated in the Sparking meta.
You can read more about it in our article listing the player-selected competitive Burst combos of the Beyblade Burst Sparking era.
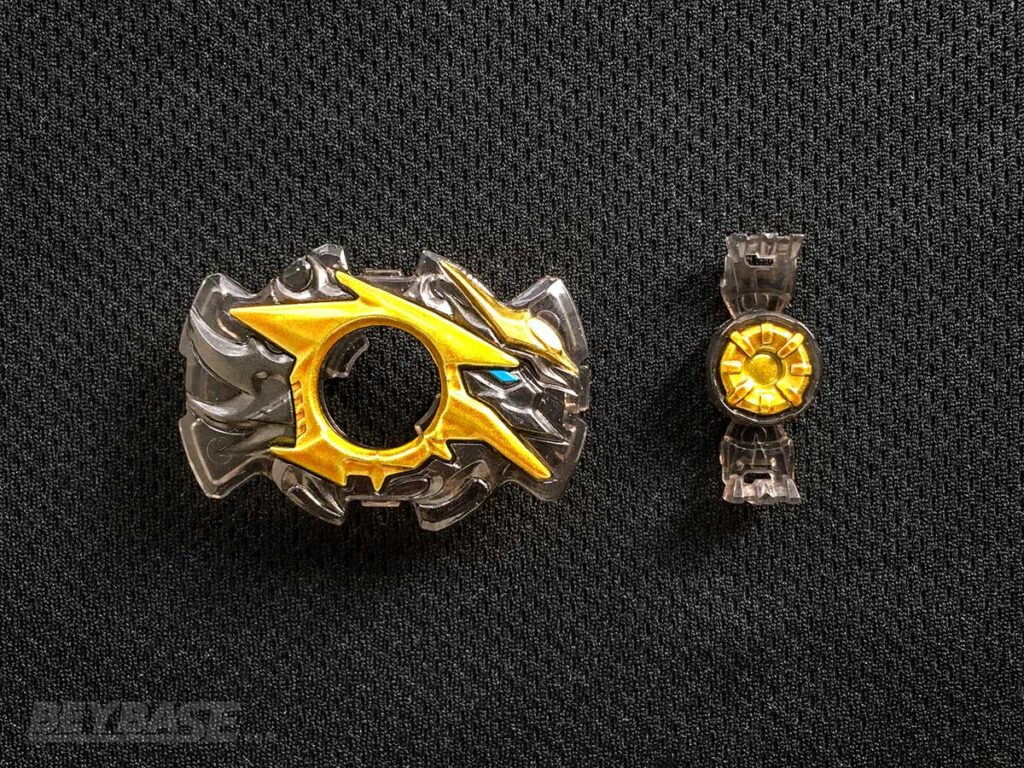
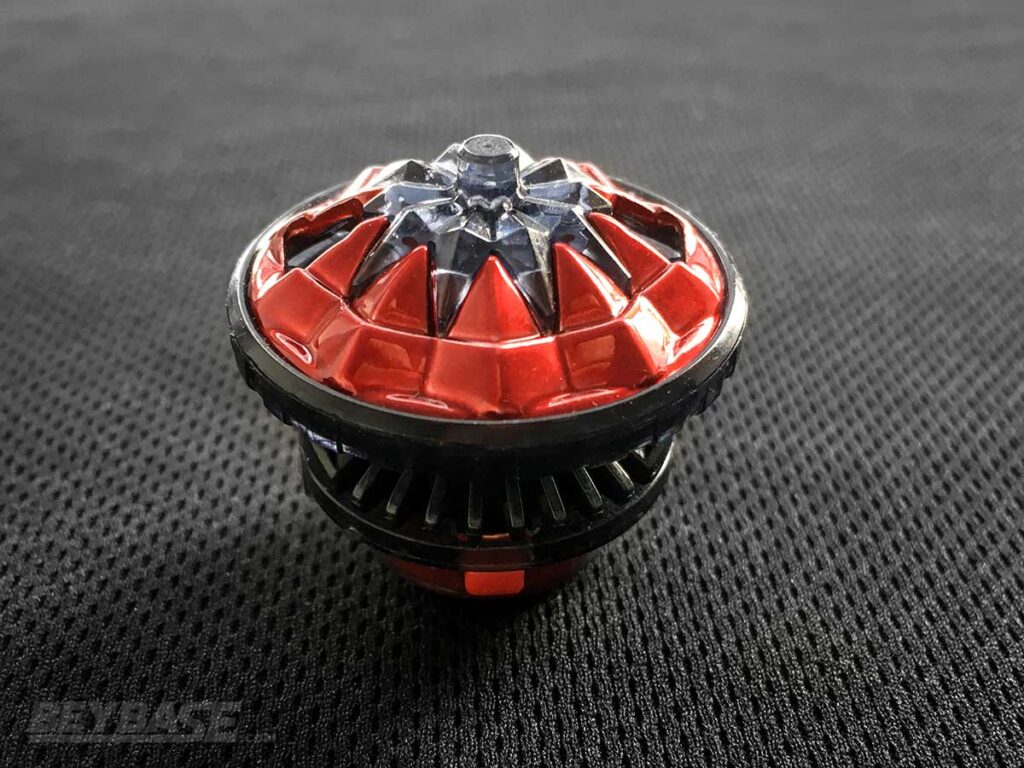
King Helios Karma High Charge’ 1S
Helios 2 Sparking Chip
The Helios 2 Sparking Chip is a top tier left-spin Sparking Chip that provides you with access to a particularly heavy base Chip with the capability to employ a Metal Chip Core. Because of its hefty weight and steady distribution, Helios 2 quickly became the definitive left-spin Sparking Chip.
Despite how good it is, the chip was previously only released once, towards the end of the Sparking era, with the B-176 Limit Break DX Set.
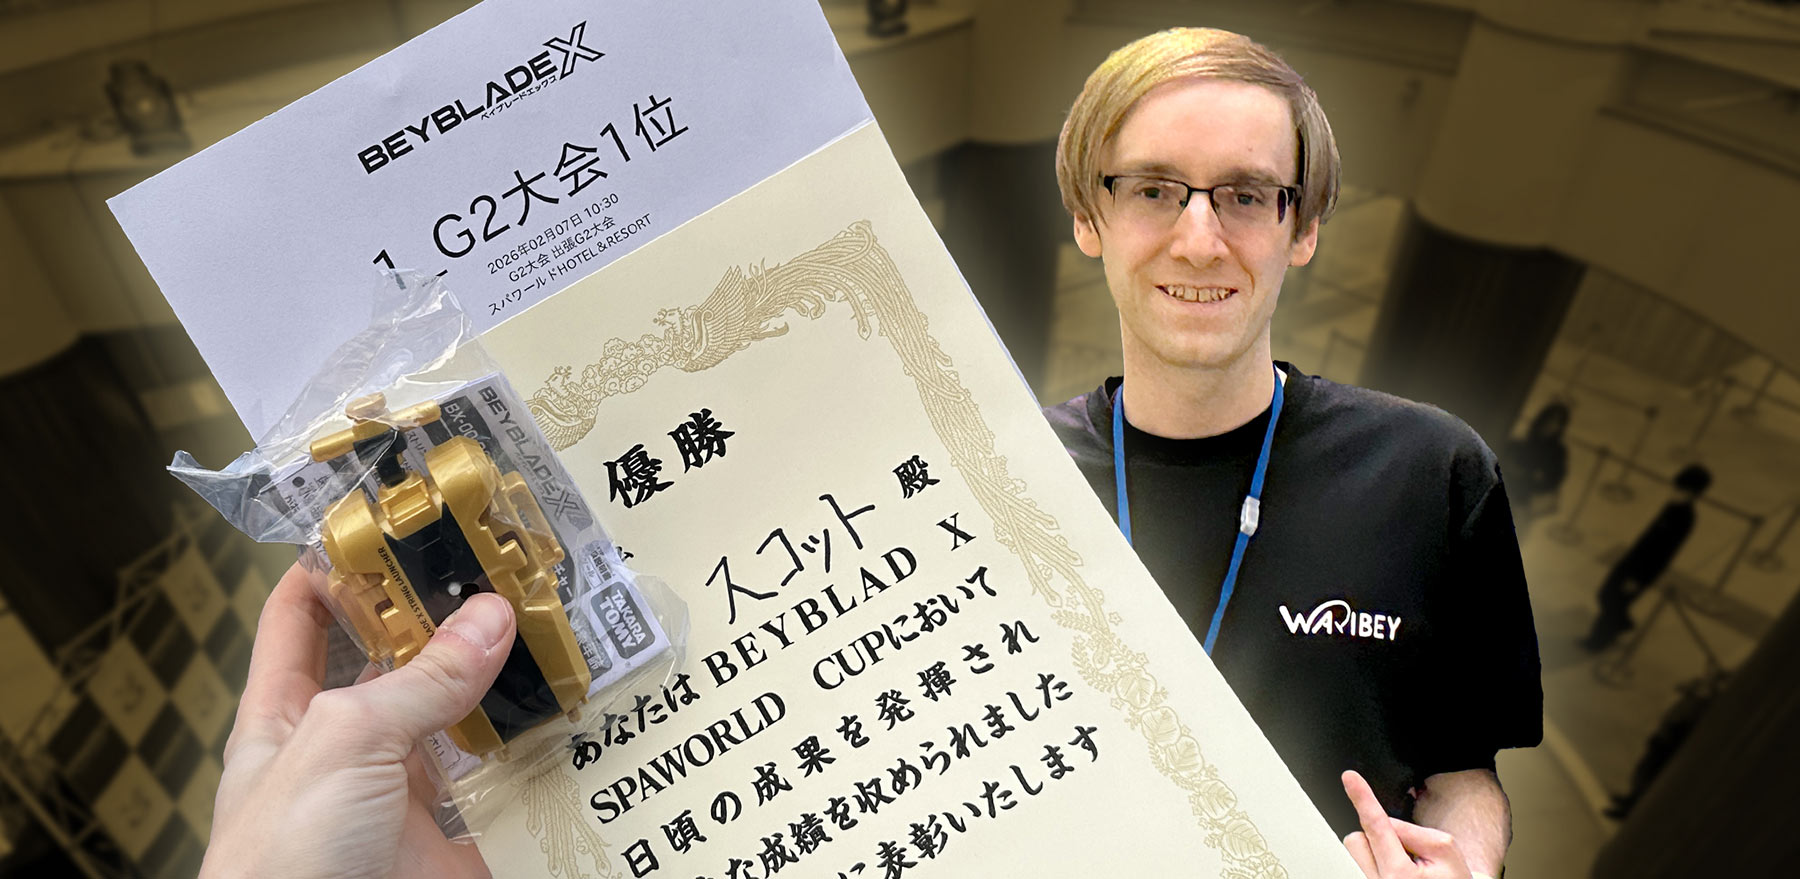
Champions aren’t born overnight. In my latest article, I break down how my pursuit of knowledge, adaptability, and reproducibility compounded into victory at a 256-player G2 tournament.
Sponsored: Order the newest Beyblades at malloftoys.com!
Heads up: If you buy something through Mall of Toys, you won’t pay any extra, but I’ll get a small commission. This helps me keep things running. Thanks for your support!
2. Few, but strong Dynamite Battle inclusions
While most of B-196 Random Booster Vol. 28 is dedicated to the rare and exclusive releases of the Sparking era, what Dynamite Battle parts that do make their way into the box tend to be highly useful.
Ultimate Blade
The Ultimate Blade, while not quite the powerhouse that is the Guilty Blade, plays an important role as the current best right-spin Attack Blade for Beyblade Burst Dynamite Battle combos to date. While it has less overall Smash Attack than its direct competitor, Savior Blade, it makes up for it with consistency.
Every attack enthusiast should include an Ultimate Blade combo in their arsenal, without a doubt.
Valkyrie 2 DB Core
The Valkyrie 2 DB Core went more or less under the radar since it didn’t seem to completely overshadow other existing right DB Cores in Stamina matches.
Despite this, the Valkyrie 2 DB Core is a highly competent right spin core for Attack customs that also conveniently saves space in multiple Beyblade match types (3on3, 5G, P3C1, WBO Deck) by allowing the highly important Belial 2 DB Core to have some flexibility in your setup.
Valkyrie 2 DB Core is a great option for right-spin attack types. Particularly for the Ultimate Blade, and to a slightly lesser extent Savior Blade.
Giga Disk & Karma Disk (Painted)
In previous releases, “painted” disks have often had interesting and unique properties, such as being heavier or providing a tighter, more burst resistant fit on certain Layers, like the Judgement Layer Base.
In this case, though, we found that both the painted DB disks lack any form of unique qualities over their non-painted versions.
The Giga Disk is a staple option for just about any type of DB combo, finding a home and excelling no matter where you put it. In general, it does lose out to Over Disk in terms of weight, but its shape allows for certain Drivers to excel – such as Bearing Dash or High Xtend Plus Dash.
The Karma Disk is not nearly as much of a staple as it does lack a little weight, but it does find use as a filler disk for Attack types since you can’t really go wrong with it. Rubber drivers tend to be on the shorter side, and Karma Disk poses no threat of scraping.
3. Beyblade Burst Sparking Meta-Important Parts In One Box
This was alluded to previously when we glossed over the parts that were exclusive to sets or random boosters, but of the Beyblade Burst Sparking pars available to us in this single RB, many have some highly competitive value to them.
The standout parts in this box released in the Sparking era are the following:
Tempest Ring
The Tempest Ring is the definitive right-spin Stamina Ring of the Sparking era.
Arguments could be made for World Ring in right, but Tempest has unique properties to it and a great matchup spread. One combo that comes to mind is MCC Tempest Solomon Wheel Xtend+ 1S, which we named the #3 best Beyblade Burst combo of 2021.
Tempest Ring was notoriously easy to knock-out when up against an Attack type, given its winged shape, but in terms of pure endurance little could win out against it. If you care about the Sparking era, it only makes sense to get this relatively exclusive Ring to bolster your collection.
Helios 2 Chip
As previously mentioned, the Helios 2 Sparking Chip’s importance cannot be understated. A very heavy and well-balanced Chip that gave left-spinning Sparking beyblades all they need and more. It works well on anything from the World Ring to the Rage Ring.
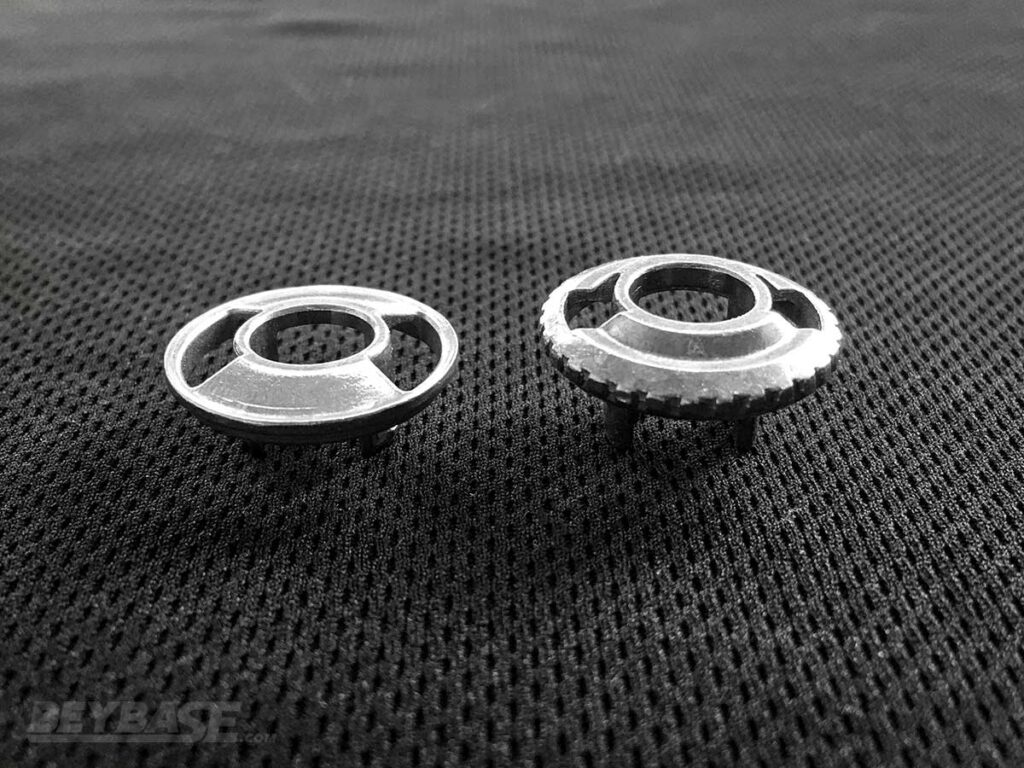
Metal Chip Core
While not particularly rare, the Metal Chip Core provides most Sparking era chips with an additional gram-and-a-half of weight directly in the center. For most combos, you can’t go wrong with it, especially if you have fear of being knocked around easily.
In a multiple Beyblade match type you can only use one MCC, but it isn’t unusual for Bladers to have multiples of these in rotation, especially for testing purposes.
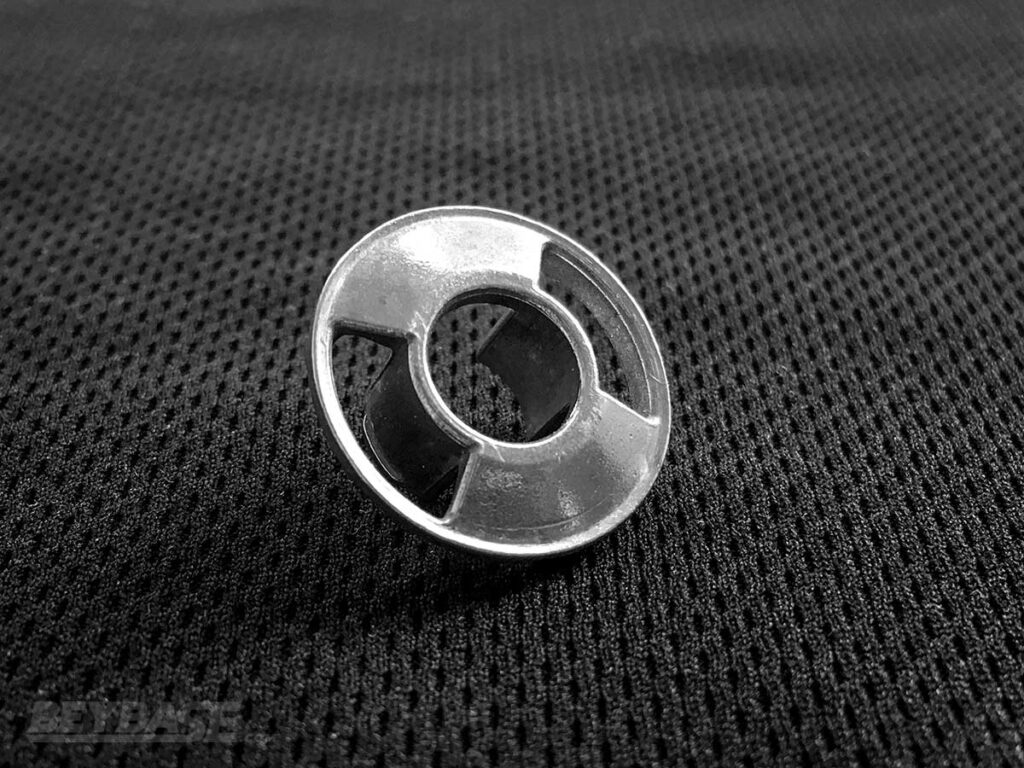
1S Chassis
The 1S Chassis is synonymous with pure Stamina in the Sparking era. Rather than using a chunky double Chassis, you could get away with the 1S’ great outward weight distribution and exceptional balance to give your combos extra life.
All Stamina enthusiasts should have a 1S at their disposal when constructing a Stamina-oriented deck.
Zone’ Driver
The Zone’ Driver is a driver that is still giving to this day, living well past the Sparking era and into DB and beyond. Whatever can be said has already been said ad nauseam, it is a versatile and incredibly powerful Driver, especially with the Z attachment.
+X and +Z Attachments
While the +X attachment’s luster has faded, being mostly a complete downgrade from +Z attachment, it can still find some use with Xceed’ as a niche alternative attack based Driver in a multiple Beyblade match type.
Had Xceed’ itself been a bit more viable, or future Drivers feature attachment compatibility, it is conceivable the +X attachment could find more use.
The +Z attachment is certainly the prize here, with very limited releases and bringing the Zone’ Driver to new heights. If you care for the Zone’ Driver, which you should regardless of Burst era or type preference, the +Z attachment is a borderline prerequisite for use.
Sponsored: Order the newest Beyblades at malloftoys.com!
Heads up: If you buy something through Mall of Toys, you won’t pay any extra, but I’ll get a small commission. This helps me keep things running. Thanks for your support!
Noteworthy Mentions
While the above list is quite good at giving you an overall understanding of why B-196 Random Booster Vol. 28 is a well constructed and valuable pickup, it doesn’t get into some of the finer details.
That is what the following section is for, small differences we noticed among parts found in this Random Booster that appear to be more than just individual variance.
Slightly Heavier Metal Chip Cores
Earlier we harped on the importance of MCCs in competitive combo building with Sparking era components, but what we neglected to mention is that not all MCCs are made equal. While they usually hover near the 1.5g mark, this isn’t always the case.
The MCCs found in RB28 seem to be consistently heavier than the 1.5g standard. Here are the weights:
- Red MCC: 1.36g
- Red MCC: 1.51g
- Red MCC: 1.45g
- Blue MCC: 1.40g
- Blue MCC: 1.49g
- RB28 MCC: 1.60g
- RB28 MCC: 1.61g
- RB28 MCC: 1.60g
Softer Ultimate Blade Rubber
It should be noted that the Rubber coating the wings of the Ultimate Blade found in this random booster are noticeably softer than the ones found in the original release of Ultimate Valkyrie in B-193.
While the weight stays the same, this has a very slight impact on Ultimate Blade’s attack ability. It isn’t something that completely invalidates it as a right-spin attack choice, but this should be taken into account. For example:
Ultimate Blade (B-193, Harder) Testing
Ultimate (B-193, Harder) Perseus Nx+S (4 Stars) Xtreme’-9 vs. Vanish Bahamut Over (1 Star) Bearing-0
- UπR.Nx.X’-9: 13 wins (12 KO, 1 OS)
- VBH.Ov.Br-0: 7 wins (6 OS, 1 BF)
- B-193 Ultimate Win Percentage: 65%
Ultimate (B-193, Harder) Perseus Nx+S (4 Stars) Xtreme’-9 vs. Devil (F Gear) Belial 2 Over (2 Stars) Bearing’-0
- UπR.Nx.X’-9: 11 wins (10 KOs, 1 BF)
- DBl2.Ov.Br’-0 wins: 8 wins (6 OS, 2 KO)
- B-193 Ultimate Win Percentage: 55%
- 1 Draw (Double BF)
Ultimate Blade (B-196, Softer) Testing
Ultimate (B-196, Softer) Perseus Nx+S (4 Stars) Xtreme’-9 vs. Vanish Bahamut Over (1 Star) Bearing-0
- UπR.Nx.X’-9: 11 wins (11 KO)
- VBH.Ov.Br-0: 9 wins (9 OS)
- B-196 Ultimate Win Percentage: 55%
Ultimate (B-196, Softer) Perseus Nx+S (4 Stars) Xtreme’-9 vs. Devil (F Gear) Belial 2 Over (2 Stars) Bearing’-0
- UπR.Nx.X’-9: 10 wins (9 KOs, 1 BF)
- DBl2.Ov.Br’-0 wins: 10 wins (9 OS, 1 KO)
- B-196 Ultimate Win Percentage: 50%
The difference between the two is minute, though you can definitely tell that the rubber does absorb hits more on the B-196 Random Booster Vol. 28 version of Ultimate Blade. While this is interesting, it doesn’t exactly increase chances to achieve a knock-out victory.
Unfortunately, when testing with Zone’+Z, the softer rubber did not lead to a better ability to clinch victory in opposite-spin battles.
In fact, there seemed to be zero difference in equalizing spin, and only a net negative in terms of knock-out power on Zone’+Z. While it isn’t recommended to begin with, Zone’+Z should likely only be paired with the harder rubber Ultimate Blade if anything.
The High Charge Dash Driver with Rage 3A
Easily the most interesting discovery made thus far with parts found in this Random Booster is that the High Charge Dash Driver, a Driver derived from a long ignored part in the west, may not be without use.
In the Beyblade Burst Dynamite Battle era its uses are limited, though this may change when the tip is significantly worn down. But if we take this back a generation, things get interesting. (Re-)Enter Rage 3A.
The Rage Ring has fallen completely out of favor since the Guilty Blade’s release, as it lacks the required weight to make use of its contact points in the modern Burst era, where things tend to be significantly heavier as well as higher up.
The High Charge Dash Driver can slightly alleviate these two issues as it is tall and very heavy. Compare the following weights:
- Rage Diabolos High Charge’ 3A: 78.93g
- Guilty Bahamut Over Metal Xtreme-2: 79.37g
With a bit more weight and a change of height, the aggressively designed 3A Chassis can make direct contact with most DB beys which can lead to spectacular knockouts.
On top of this, the High Charge Dash Driver has some non-negligible levels of Life-After-Death it may be able to fall back on following scenarios where there are big hits but no knock-outs.
That said, to be clear; this combo is highly risky and not perfectly reliable. But it shows that there is more than meets the eye with High Charge Dash.
Compare the following test results:
Rage Diabolos Xtreme’ 3A vs. Vanish Bahamut Over Bearing’-0
- RDb.X’ 3A: 5 wins (5 KO)
- VBH.Ov.Br’-0: 5 wins (3 OS)
- Xtreme’ 3A win percentage: 50%
Obviously this is nothing new, Rage tends to achieve parity with the most basic of Vanish combos on a good day, if that.
Rage Diabolos High Charge’ (Unawakened) 3A vs. Vanish Bahamut Over Bearing’-0
- RDb.HCh’: 4 wins (2 KO, 2 OS)
- VBH.Ov.Br’-0: 5 wins (2 KO, 3 OS)
- 1 Draw
- High Charge’ 3A win percentage: 40%
While this isn’t something that boggles the mind, considering the fact that this Driver doesn’t tend to be taken seriously by western bladers, having a comparable win rate with two potential methods of victory over a DB combo using a majority Sparking foundation is remarkable.
Perhaps with awakening these results can improve, as the potential for drawing may go down and High Charge Dash can take advantage of meaty 3A hits to steal victory from Vanish on Bearing’ at the last second.
High Charge Dash has deceptively competent Life-After-Death under the right circumstances, and while it isn’t enough to win in an opposite-spin battle on this setup, the possibility exists for it to excel on the right combo.
This, combined with its capacity to–albeit inconsistently–viciously knockout even top-tier Dynamite Battle combos makes it a fun combo to experiment with and surely something that would be surprising to any opponents you use it against.
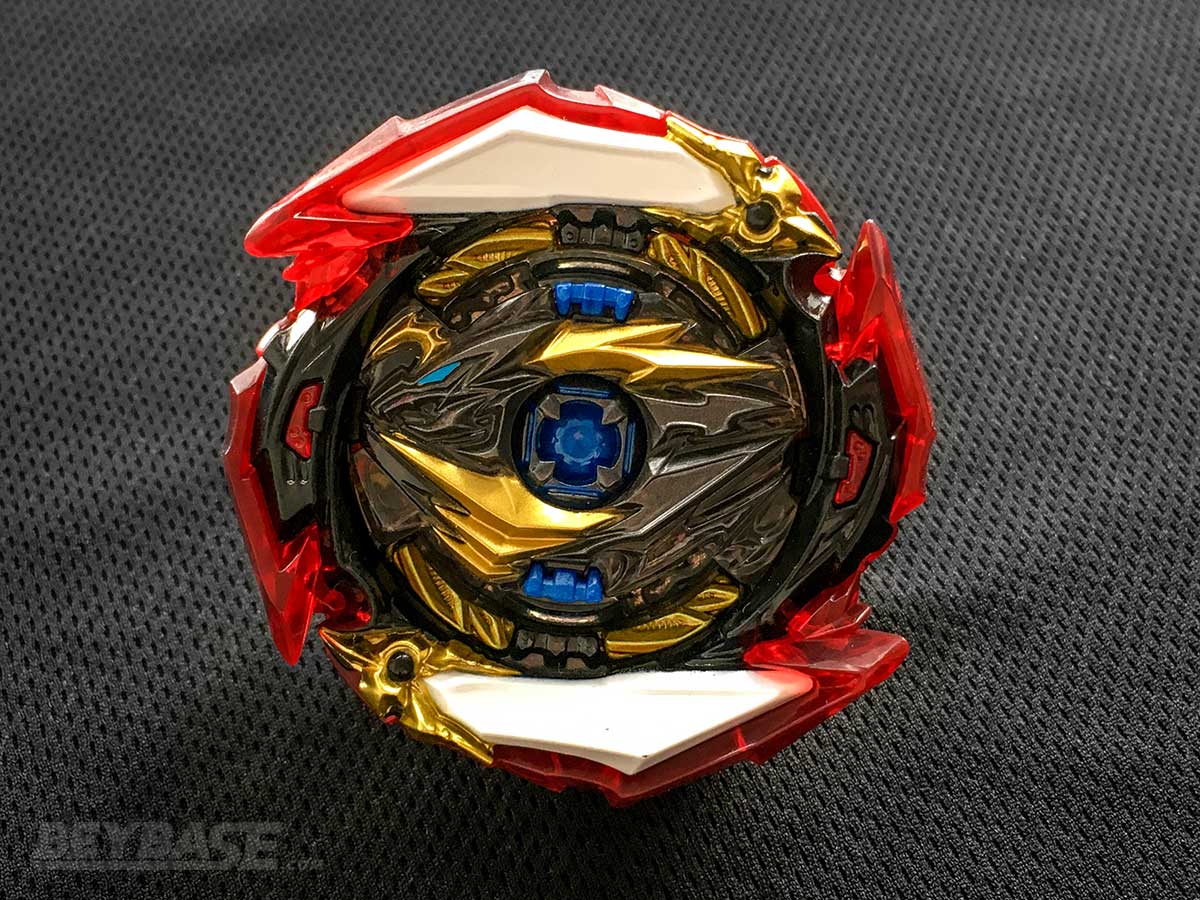
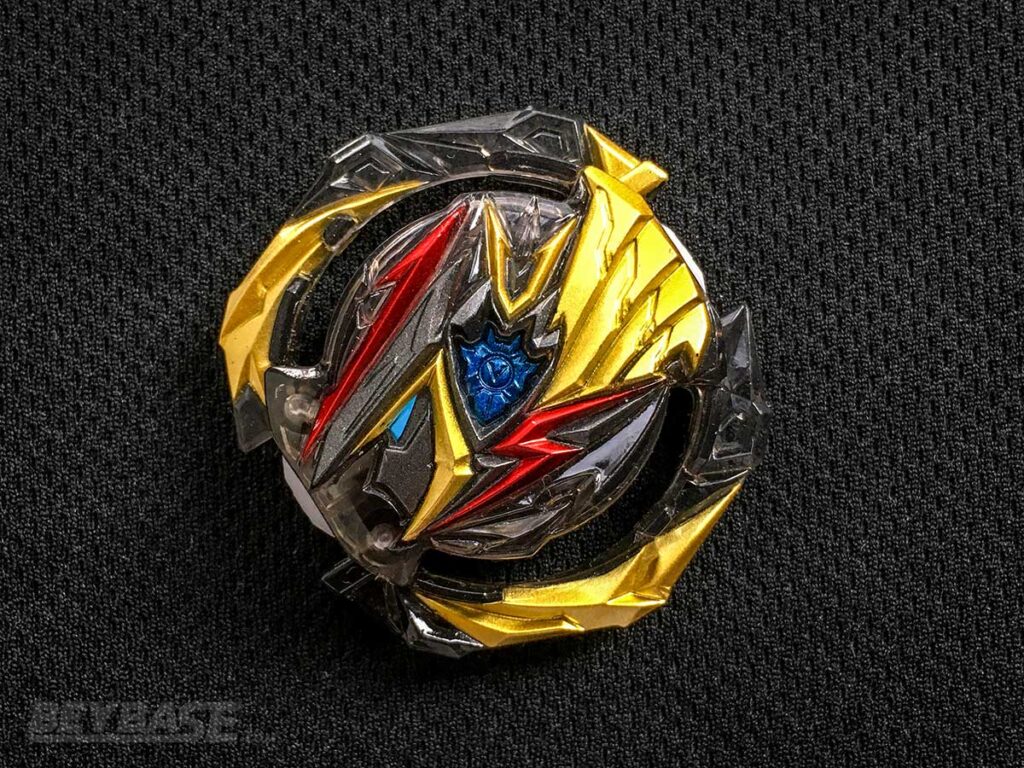
Gold Ultimate Valkyrie Legacy Variable’-9
Finally, for all of you Beyblade collectors out there, there is a 1/72 chance prize you can search for when opening up a fresh Random Booster 28 … a golden Ultimate Valkyrie Legacy Variable’-9!
Check it out in Takara-Tomy’s official video review of B-196 Random Booster Vol. 28.
Where to Buy B-196 Beyblade Burst Random Booster Vol. 28
Heads up: If you buy something through some of the links on this post, you won’t pay any extra, but I’ll get a small commission. This helps me keep things running. Thanks for your support!
What is your favourite Beyblade in Random Booster Vol. 28? And why? Comment below!
All in all, there is little for fans of Beyblade to be disappointed with in this smartly-designed random booster; similar to the lean release schedule since the beginning of Beyblade Burst Dynamite Battle, B-196 Random Booster Vol.28 continues to illustrate that sometimes less is more. Every Beyblade in this booster has something to love in it, for both competitive players and collectors.
Whether it’s for performance reasons or aesthetic reasons, let us know in the comments below which Beyblade from B-196 Random Booster Vol. 28 is your favourite!
And have you noticed any other differences in performance with the parts in this random booster that we may have missed? Let us know below if you have.
Or become a BeyBase HQ member to get early article access and behind-the-scenes updates. Thank you!
7 thoughts on “The Top 3 Reasons to Buy B-196 Beyblade Burst Random Booster Vol. 28”
Comments are closed.
Related Posts
Beyblade X Custom Line (CX) Buyer’s Guide: Expert Players Review the Best Products for All Skill Levels and Budgets
Beyblade X Buyer’s Guide: Discover the Best Products, Strongest Combos, and How to Play
Kei,
Thanks for the in depth analysis on the new RB! It’s always a helpful reference point(especially if I want to buy a guaranteed bey: thinking of getting that H Charge’).
Speaking of which, I know charge was already known for having a lack of balance to it. Does the extra height H Ch’ has make it hard to control in the stadium?
That aside, I thought I would just put in one small thing I found in this RB. While I don’t know about the previous RB it came out in, the new Zone’(at least for me) had a slightly different mold to it. Before, the Zn’ on Helios was prone to ridge stalling and self KOing due to the spinning plate being so close to the ti’s contact point. However, this mold has not only a looser spinning plate, but the plate is actually pushed higher on the driver, making the combination it is put on MUCH less prone to self knockouts and pilling less stamina loss. From what I’ve tested, the is virtually no change in LAD performance but same spin stamina potential increases dramatically. It went from not standing a chance to bearing and H Xt+’ to rivaling them.
Of course, I’m just one of many people testing, but if you or someone else finds similar results, it would be cool to know.
Doesn’t seem like you own the gold ultimate yet, but I’ve heard that it has even softer rubber than the black one.
Also High charge’ feels a lot like charge metal spm in the fact that its too tall.
Great review, Kei. I think I might picking up the set as I try to modernize my deck. (I have a guilty Longinus and I’m waiting for my astral spriggan customize set.) I was just wondering if you could do a “2022 dB top 5 bey combos” list please so that I can know what I should pick up. Love the articles, I’ve only been reading for 3 1/2 months and my insight on the competitive world of Beyblade burst has erupted.
Kei,
Thanks again for a great analysis on the RB. It’s always helpful for when I want to decide on buying specific ones in the set.
I just wanted to point out one observation of mine that I was wondering if you or anyone else could check as well. I don’t know about the previous Zn’ in the last RB, but the Zn’ that came in this one has a slight difference than the one I got with my Helios Volcano. The spinning plate on it is a LOT looser, and the sharp tip of the driver sticks out more than the original counterpart. I’ve tested its application, and found that the new version’s stamina(with the Z attachment) started to rival the stamina of bearing and High Xtend+’, with so far not seeing any draw back to its opp spin LAD potential. I just thought I should put this out there. Anyone that may have these parts, let me know what you think.
Hey Kei!! Awesome article, I knew this RB would be a really solid one upon review and I’m glad it’s holding up, seemingly. I had a question regarding Attack types! What drivers would you recommend for attack types overall, outside of X’ and Qc’ ? I understand Attack is a niche typing right now, but any ideas are good ideas!
I would use Xceed + Z (Only on bahamut and belial 2 db cores) and xceed’+Z on anything else.
Nice article! I have a question that I’ve been thinking about for a bit. What drivers would be good to counter attack types and not get ko’ed?