Affiliate Disclosure: If you buy something through some of the links on this post, you won’t pay any extra, but we’ll get a small commission. This helps us keep things running. Thanks for your support!
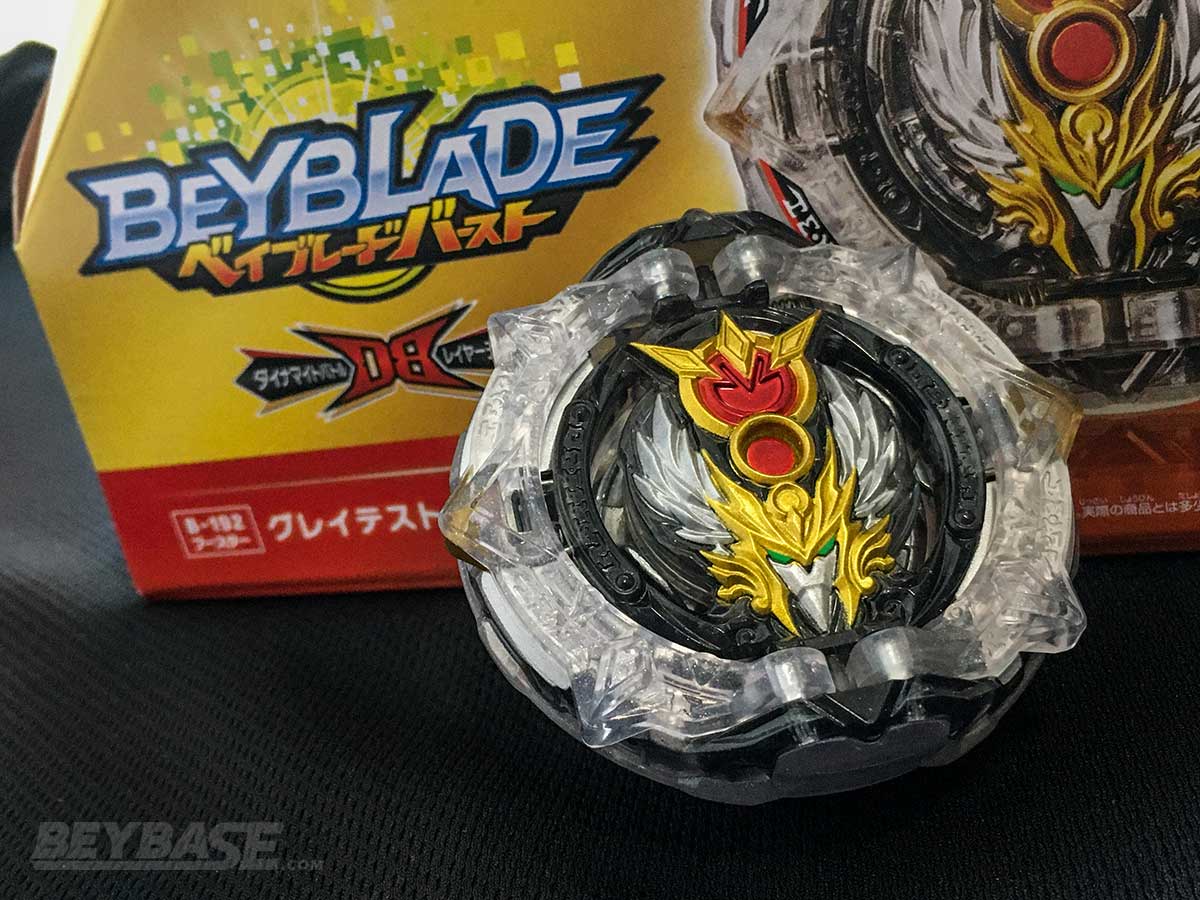
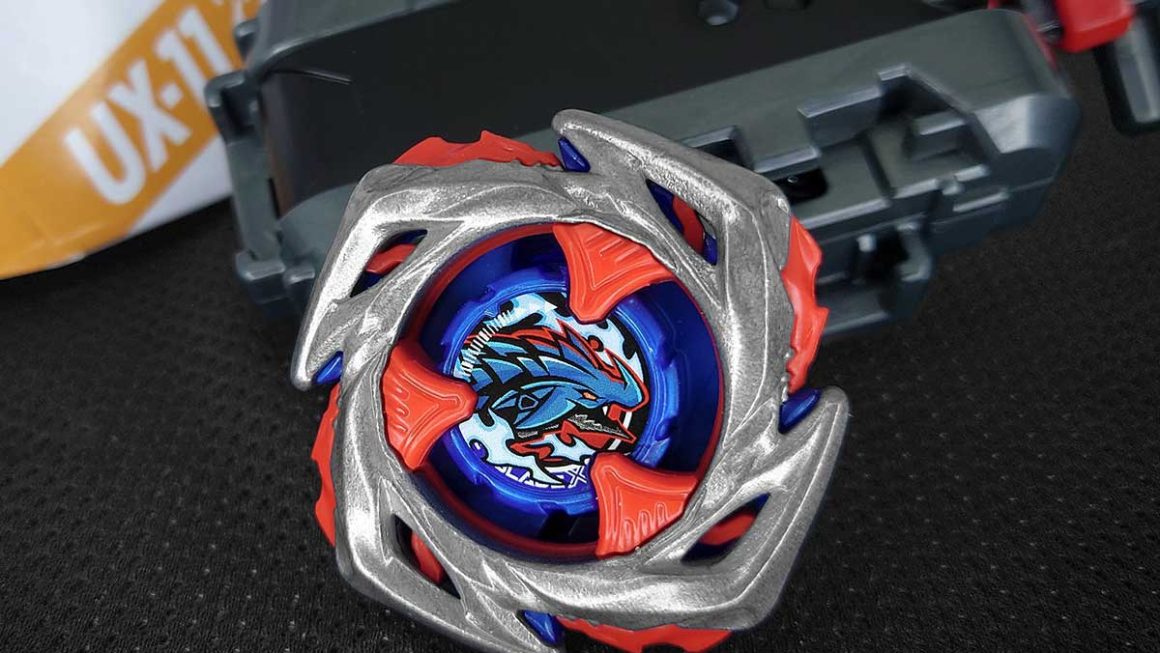
B-192 Greatest Raphael Over High Xtend Plus Dash is the second Beyblade Burst Dynamite Battle release that features a combined component gimmick – this time it is the Layer instead of the Driver found in B-191’s Dangerous Belial.
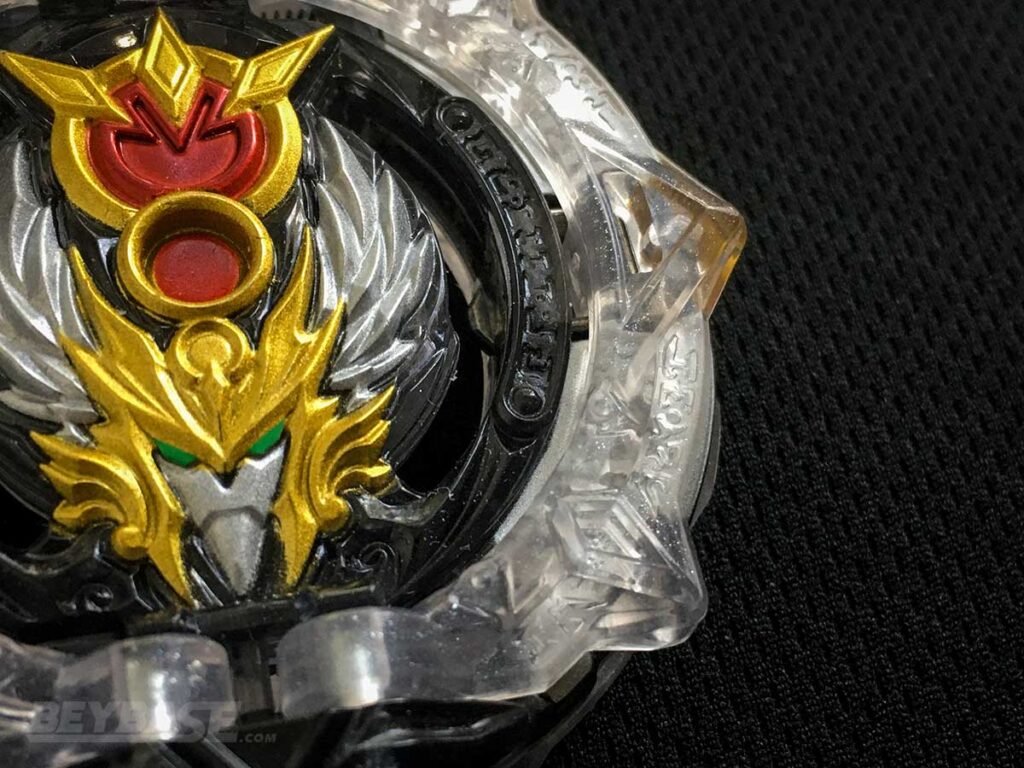
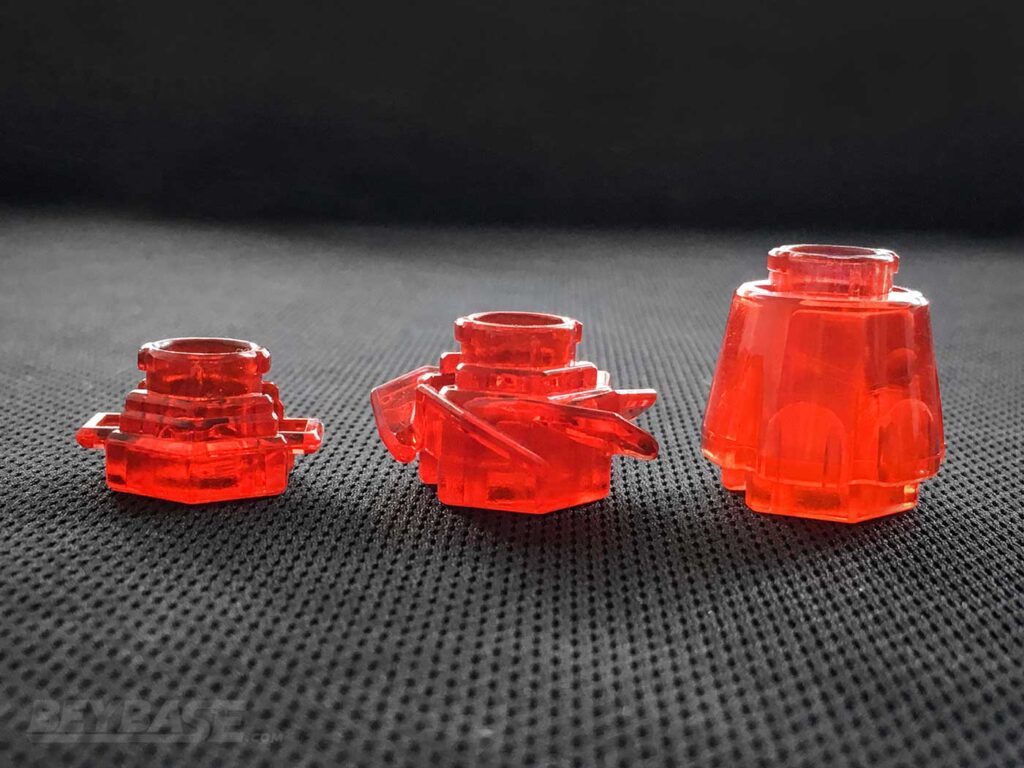
Greatest Raphael aims to shake up the DB composition, with a completely solid Layer that has integrated the DB Core, Blade and Armor together to form a unibody.
The release also brings the Over Disk in a more affordable package, outside of the B-188 Astral Spriggan Customize Set. Finally, Greatest Raphael brings to us a complete reimagining of an old favourite: the High Xtend+’ Driver, bringing Xtend+ into the DB era.
In this review we will be evaluating how good the Greatest Raphael Layer and High Xtend+’ Driver are for competitive Beyblade tournaments.
Additional Notes: All tests were conducted in the Burst Beystadium Standard Type.
This article was written in collaboration with WBO user Dan. Thank you, Dan! Greatest Raphael Layer section by Dan. Editing, photos, formatting, and High Xtend+’ Driver section by me (Blader Kei).
Finally, if you buy something through some of the links on this post, you won’t pay any extra, but I’ll get a small commission. This helps me keep things running. Thanks for your support!
Product Details
- Brand: TAKARA-TOMY
- Product Code: B-192
- Product Contents:
- Greatest Raphael Over High Xtend+’
- System: Dynamite Battle Layer System
- Series: Beyblade Burst Dynamite Battle
Part Weights
- Greatest Raphael Layer: 30.60g
- Over Disk (2 Star): 33.40g
- High Xtend+’ Driver: 9.06g
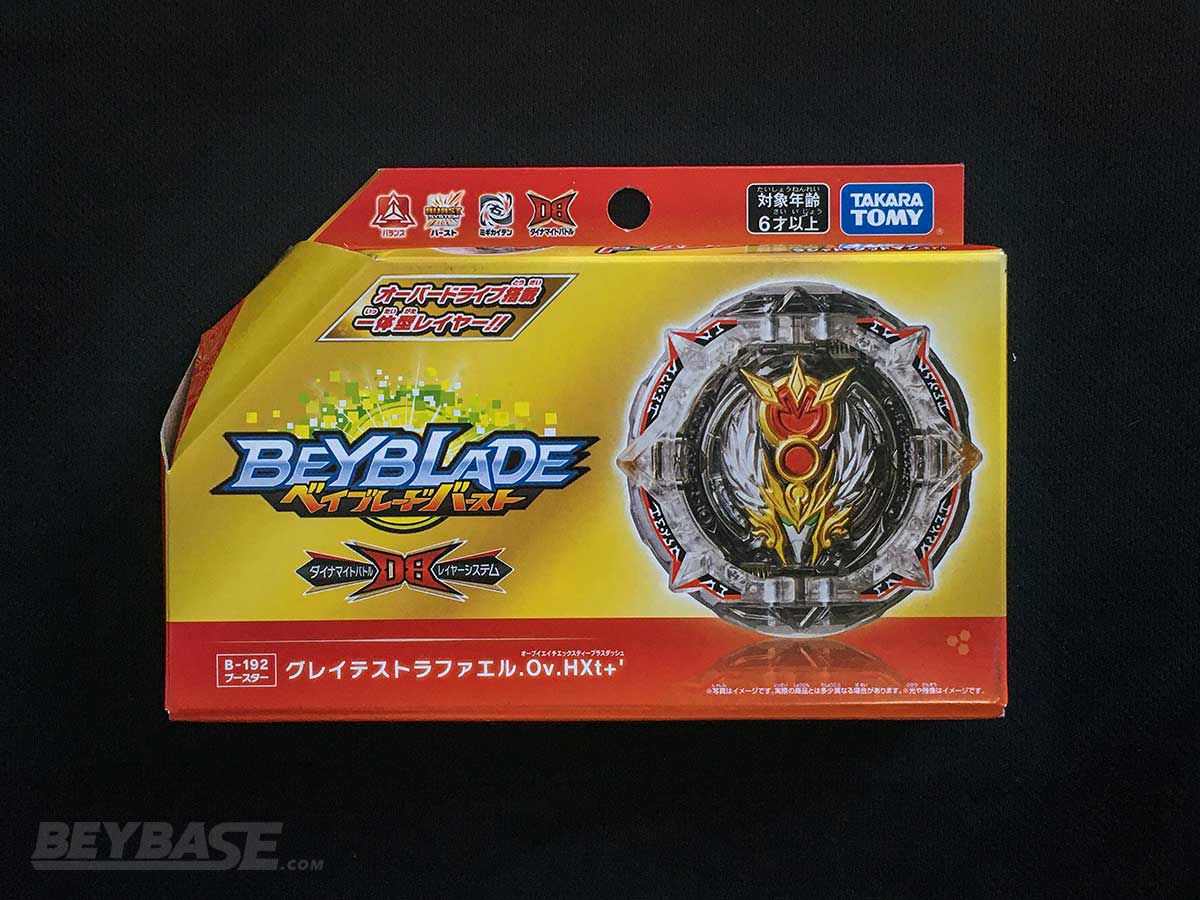
Where to Buy B-192 Greatest Raphael Over High Xtend+’
Heads up: If you buy something through some of the links on this post, you won’t pay any extra, but I’ll get a small commission. This helps me keep things running. Thanks for your support!
Greatest Raphael Layer Review
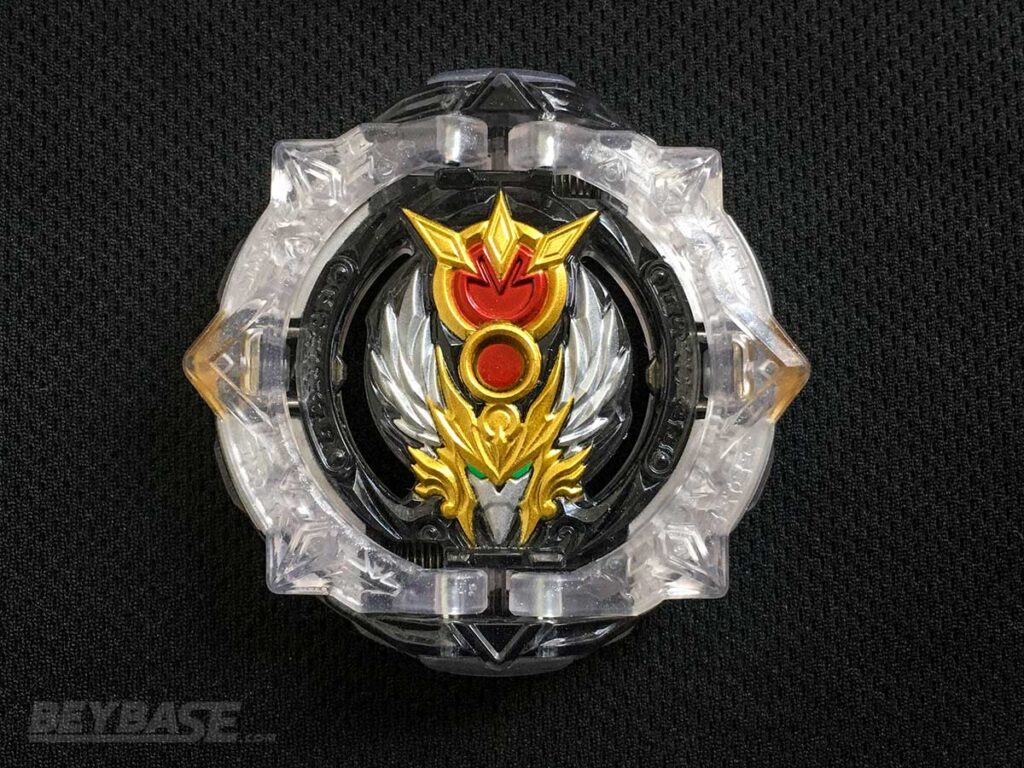
As previously mentioned, the Greatest Raphael Layer combines the typical top-half of DB components together. This means that Greatest Raphael cannot be modified in any legal way; there is no way to change DB Cores, or customize it. It is actually the first single piece Layer with no additional customization pieces available for it since B-129 Cho-Z Achilles 00 Dimension which was released in 2018!
At just over 30g, the Greatest Raphael Layer is missing out on a couple extra grams (roughly 3-4g) compared to DB Beyblades that feature all components individually.
DB Abilities
Beyond that, the likely reason that the Layer was made into a single piece was to makee room to accommodate the complex two gimmicks (or “DB Abilities”) that it features. They exist under the “Overdrive System Greatest Lord” moniker.
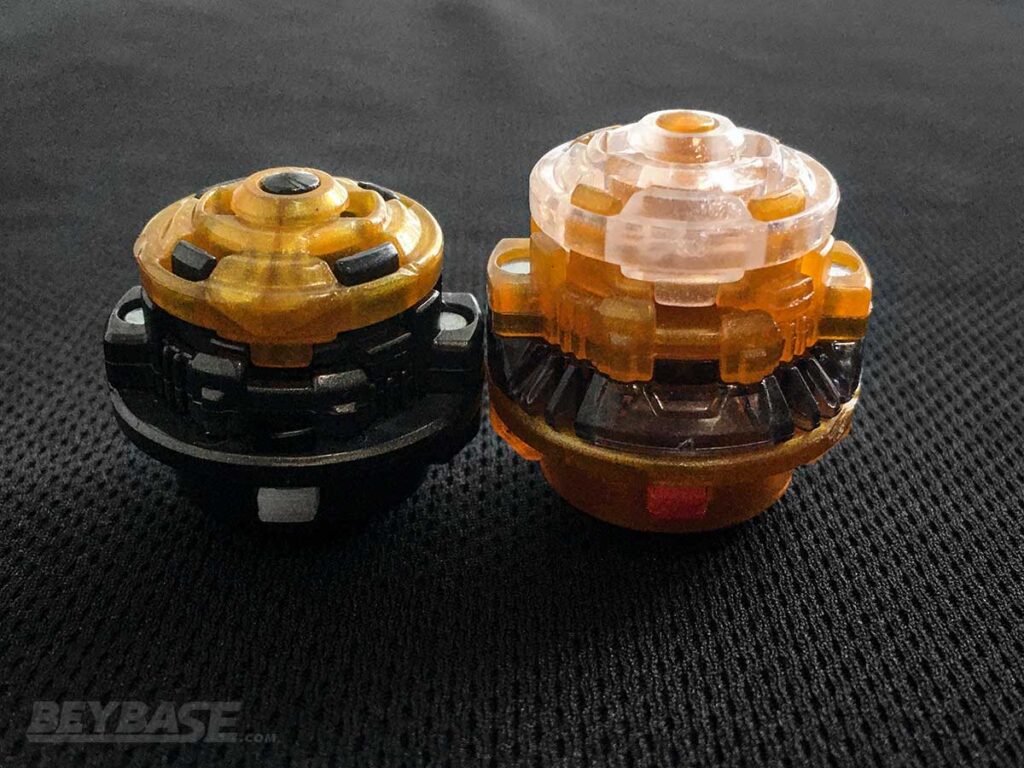
Greatest Armor
The first is one is the “Greatest Armor”. The two wings of the armor on either side slowly creep up and out of the way as the Layer’s RPM dwindles.
This means that at low RPM, the wings will elevate themselves up and into the center of the Layer, leaving a circular plastic surface with few notches making most of the contact from that point forward. This is known as “Defense Mode”.

In practice, much of the contact made with Greatest Raphael at the end of the battle will be fairly low-recoil. With that said, there are a few instances where the spring mechanism that elevates the wings can get in the way, hindering Raphael’s performance and prematurely stopping its rotations at the end of battle.
When the wings are still locked in place, they each have a set of 3 triangular protrusions that can generate a decent amount of recoil, similar to, but not as significant as Astral Blade’s. This is known as “Attack Mode”.
It should be noted that regardless of what “mode” Greatest Raphael Layer is in, it will also always be in DB’s “High Mode”, evidenced by the large gap between the layer and the DB Disk.
Because of how rounded and smooth this Layer is, and the doubling-down on those aspects when at low RPM, Greatest Raphael is best suited for Stamina combos instead of aggressive Attack-oriented ones where it simply won’t be able to shine.
Metal Burst Lock
The second gimmick of the Greatest Raphael Layer is Beyblade Burst’s first-ever metal burst lock gimmick! It’s located on the interior of each side of the Layer.
Unlike previous burst lock gimmicks however, it isn’t activated by a strong launch. Rather, the metal notches on the interior of the Layer slowly retract back towards the centre of the Layer as the Beyblade slows down.
This makes it harder to burst at the end of battles.
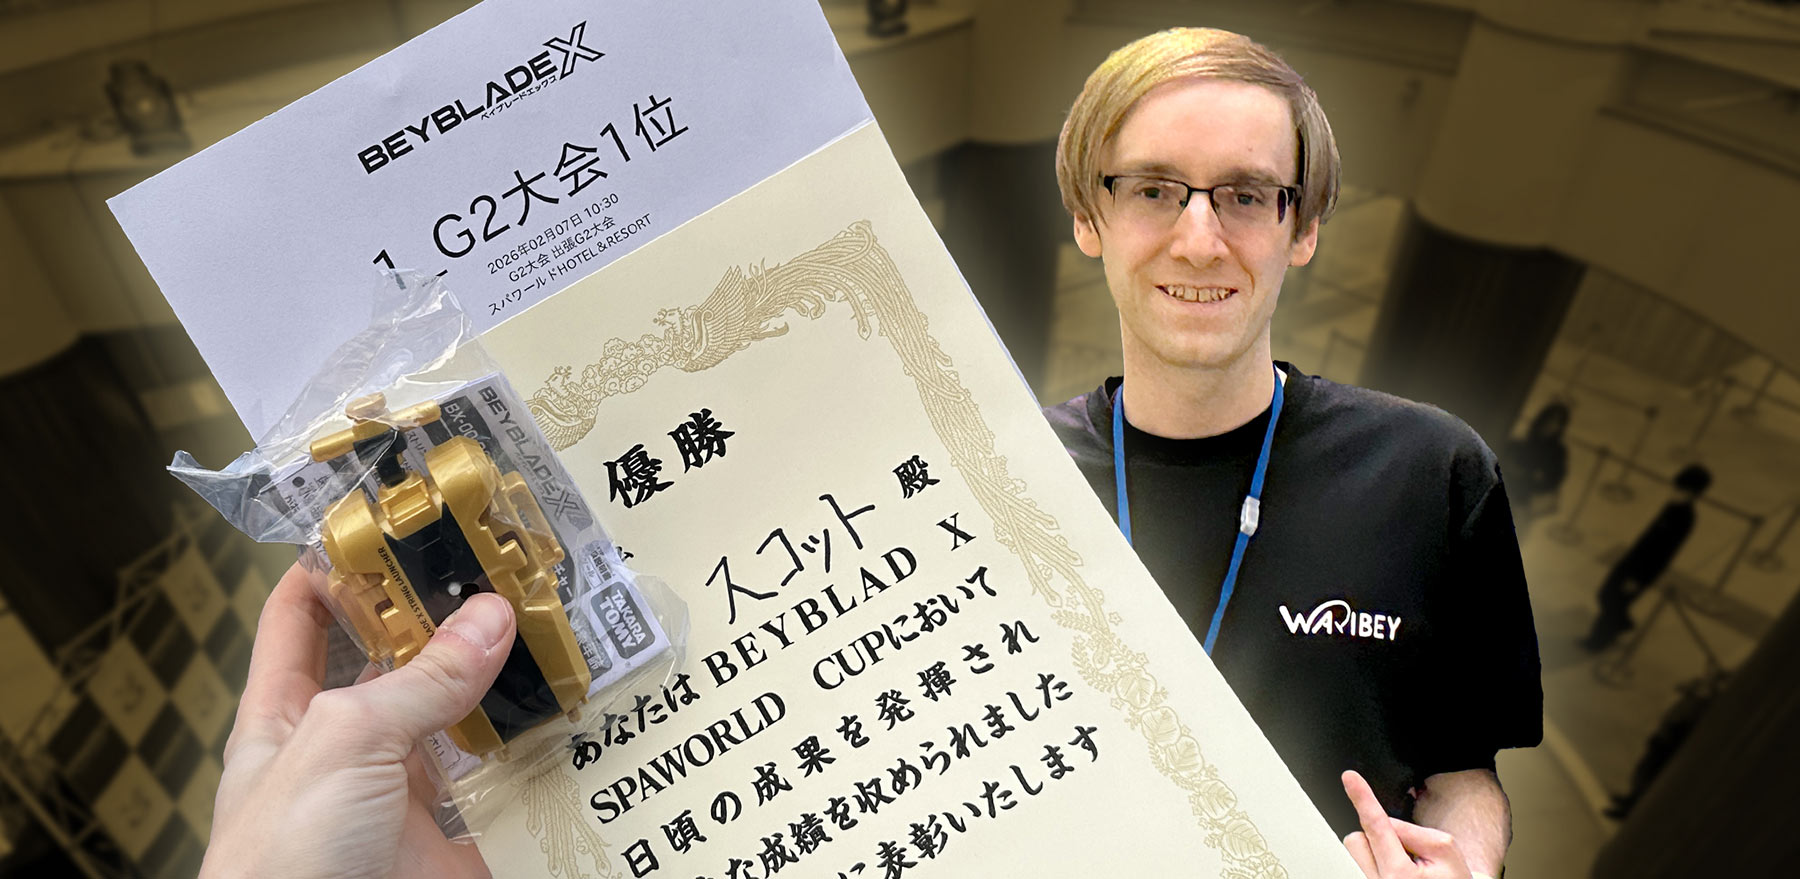
Champions aren’t born overnight. In my latest article, I break down how my pursuit of knowledge, adaptability, and reproducibility compounded into victory at a 256-player G2 tournament.
Sponsored: Order the newest Beyblades at malloftoys.com!
Heads up: If you buy something through Mall of Toys, you won’t pay any extra, but I’ll get a small commission. This helps me keep things running. Thanks for your support!
How good is the Greatest Raphael Layer for Stamina-type Beyblades?
Greatest Raphael & Bearing’
First up we tested Greatest Raphael Layer’s ability on the Bearing Dash Driver, in a pseudo mirror-match against prominent competitive combos of this era.
Bearing’, and by extension Bearing, is a very effective Stamina Driver that tends to do well in both spin directions against either spin direction, making it a safe and common choice among competitive Bladers.
It is only natural we start here to determine where Greatest Raphael fits in the ever-evolving Stamina metagame. All of these tests have 2 Blader’s piloting each combo and launching at “Shoot”.

Greatest Raphael Over (2 Star) Bearing’ vs. Vanish Bahamut Over (1 Star) Bearing-0
- GRP.Ov.Br’: 3 Wins (3 OS)
- VBH.Ov.Br-0: 0 Wins
- Greatest Raphael Win Percentage: 100%
- 7 Draws
Normally when matches are very draw-heavy we tend to escalate the rounds done by 10, to a total of 20. In this case, it was very clear that for once, Vanish was simply not able to do better than draw with the Greatest Raphael Layer.
The two, majority of the time, are in stalemate, save for the times where Raphael manages to squeak out a win by a fraction or full rotation.
Greatest Raphael Over (2 Stars) Bearing’ vs. Astral Bahamut Over (1 Star) Bearing-0
- GRP.Ov.Br’: 6 wins (6 OS)
- ABH.Ov.Br-0: 2 wins (1 KO, 1 BF)
- Greatest Raphael Win Percentage: 75%
- 2 Draws
In this case Greatest Raphael doesn’t seem quite as dominating as it does against Vanish Blade, but this is actually because we chose to continue launching both combos at high speed to limit test Greatest Raphael.
In general, Astral in left-spin cannot keep up with Greatest Raphael in terms of pure Stamina. When launched at full strength, though, a few cracks start to show: Greatest Raphael’s recoil can be taken advantage of, resulting in a knock-out or even a late-game burst finish (in part thanks to Bearing Dash’s normal spring).
In one case, the draw was a result of one of Raphael’s elevated wings getting caught on Astral Blade, meaning Astral cut Raphael’s spin short. Instead of winning by a hair, The Greatest Raphael Layer’s gimmick prevented it from taking an extra win.
Under ideal circumstances for Raphael, without limit testing, this win rate would be higher, but this result can be considered the matchup floor.
Since Greatest Raphael’s Layer is a unibody, it lacks the ability to switch into a very burst resistant DB Core like Belial 2. On a Driver such as Bearing Dash, this means that burst finishes aren’t out of the realm of possibility for Astral in some scenarios.
This also means that the use of Bearing on Greatest Raphael is highly discouraged.
As promising as it is to have favourable opposite-spin matchups, it has become quite apparent that DB Blades often don’t excel in both spin-direction matchups at the same time unless they are called “Dynamite Blade” or “Vanish Blade”. For this reason we went straight into a same-spin matchup set to see if the Greatest Raphael Layer can buck the trend.
Greatest Raphael Over (2 Star) Bearing’ vs. Devil (F-Gear) Belial 2 Over (1 Star) Bearing-3
- GRP.Ov.Br’: 0 wins
- DBl2.Ov.Br-3: 10 wins (10 OS)
- Greatest Raphael Win Percentage: 0%
This matchup result is disappointing, but not entirely unexpected. When at eye-level with pretty much any other same-spin combo, Devil/Dynamite Blade with F-Gear dominates. Greatest Raphael Layer stood no chance at all of claiming victory even a single time. It appears as if the trend continues.
Greatest Raphael Over (2 Star) Bearing’ vs. Astral Belial 2 Over (1 Star) Bearing-0
- GRP.Ov.Br’: 0 wins
- ABl2.Ov.Br-0: 10 wins (9 OS, 1 KO)
- Greatest Raphael Win Percentage: 0%
In this matchup it becomes clear that Astral Blade has the Greatest Raphael Layer beat in terms of same-spin performance. Astral Blade is able to knock Greatest Raphael Layer around and completely deplete its spin.
In Attack Mode Greatest Raphael Layer has some noticeable recoil that it isn’t really able to handle well, so by the time it reaches Defense Mode it is in a very weakened state and cannot recuperate any momentum from its same-spin opponent.
To highlight just how prominent this issue can be, we took Prominence Blade and put it up against Greatest Raphael. Previously we noted just how weak Prominence was in same-spin matchups, while excelling at opposite-spin matches. Similar to Raphael, it can be said they share the same niche.
Here is how that matchup went:
Greatest Raphael Over (2 Star) Bearing’ vs. Prominence (Heavy) Belial 2 Over (1 Star) Bearing-0
- GRP.Ov.Br’: 0 wins
- PBl2.Ov.Br-0: 10 wins (5 OS, 1 KO, 1 BF)
- Greatest Raphael Win Percentage: 0%
Probably the most embarrassing showing here. Prominence, not known for its same-spin prowess, was able to achieve every possible win condition in the game, on top of not dropping a single round.
Prominence has just enough recoil in same-spin to generate errant knockouts and burst finishes on Greatest Raphael on Bearing Dash, while also reliably out-spinning it.
With this, we had a pretty clear cut understanding of how the Greatest Raphael does in as close to a vacuum as you can get. So, the question becomes, is the Bearing Dash Driver the best choice for Raphael? Not quite.
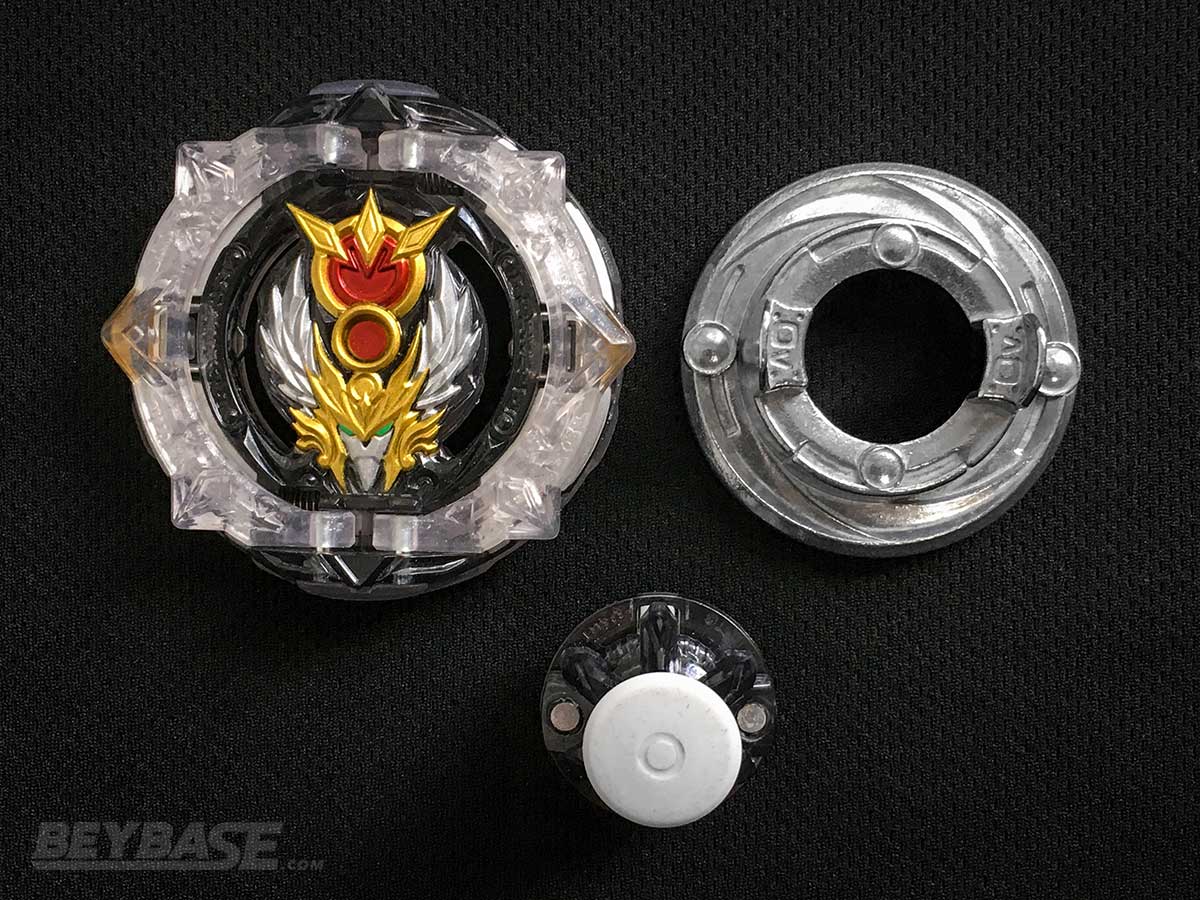
Greatest Raphael & High Xtend+’
Because of its rather smooth underside, it struck us that perhaps Greatest Raphael would prefer to be taller than the opponent, so we opted for testing it stock with High Xtend+ Dash Driver as well as the Mobius Driver.
With a new look, taller height, and a stronger spring, perhaps it would be enough to mitigate some of Greatest Raphael’s most glaring problems?
Greatest Raphael Over (2 Star) High Xtend+’ vs. Vanish Bahamut Over (1 Star) Bearing’-0
- GRP.Ov.HXt+’: 4 wins (4 OS)
- VBH.Ov.Br’-0: 4 wins (4 OS)
- Greatest Raphael Win Percentage: 50%
- 12 Draws
While this looks like a loss in performance compared to the double Bearing setup, it actually helped provide some insight as to how Greatest Raphael should be piloted when on a taller Driver.
Early on in the testing it, after Vanish had scored 3 of its 4 wins, it seemed that the Greatest Raphael Layer would do noticeably better when launched at an intermediate-to-weak strength, allowing for less time in Attack Mode and making its wings elevate into Defense Mode earlier on.
When launched in this way, Vanish was nearly overwhelmed, only drawing and having 4 of the 5 non-draw post-technique matches going to Greatest Raphael. Having Defense Mode come out earlier meant the underside was completely exposed with no interference from the wings, making it much more difficult for Vanish to hold its own.
Greatest Raphael Over (2 Star) High Xtend+’ vs. Astral Bahamut Over (1 Star) Bearing’-0
- GRP.Ov.HXt+’: 4 wins (4 OS)
- ABH.Ov.Br’-0: 1 win (1 OS)
- Greatest Raphael Win Percentage: 75%
- 5 Draws
Here, limit testing again, it became clear that when making contact from above, Greatest Raphael Layer was noticeably better equipped to deal with its own recoil in opposite-spin.
Apart from one errant OS, the Greatest Raphael Layer was able to secure victory with frequency when it wasn’t drawing.
With that in mind, did the change in Driver also mean a change in Greatest Raphael Layer’s efficacy in same-spin?
Greatest Raphael Over (2 Star) High Xtend+’ vs. Devil (F-Gear) Belial 2 Over (1 Star) Bearing’-3
- GRP.Ov.HXt+’: 1 win (1 OS)
- DBl2.Ov.Br’-3: 9 wins (9 OS)
- Greatest Raphael Win Percentage: 10%
Technically this is a change, but not a meaningful one. The only thing we could observe is that under the absolute perfect conditions, Greatest Raphael could destabilize the Bearing Dash Driver from above.
If launched on a tilt, or knocked around just-right, Bearing Dash would tilt on its side and be stuck there through consistent contact with Greatest Raphael until it eventually scraped early.
This was not a common scenario at all, but perhaps it is something that could be exploited in the future with different Drivers or conditions.
Greatest Raphael Over (2 Star) High Xtend+’ vs. Astral Belial 2 Over (1 Star) Bearing’-0
- GRP.Ov.HXt+’: 13 wins (13 OS)
- ABl2.Ov.Br’-0: 7 wins (7 OS)
- Greatest Raphael Win Percentage: 65%
As mentioned in the previous Astral Blade test, the Greatest Raphael Layer seems to deal with its recoil better when it is taller than its opponent. This resulted in a much more favourable same-spin matchup against Astral Blade.
In general, at this height Greatest Raphael could simply dish and take more than Astral Blade could, resulting in matches that ended with Astral stopping slightly earlier because it was beaten into submission.
Sponsored: Order the newest Beyblades at malloftoys.com!
Heads up: If you buy something through Mall of Toys, you won’t pay any extra, but I’ll get a small commission. This helps me keep things running. Thanks for your support!
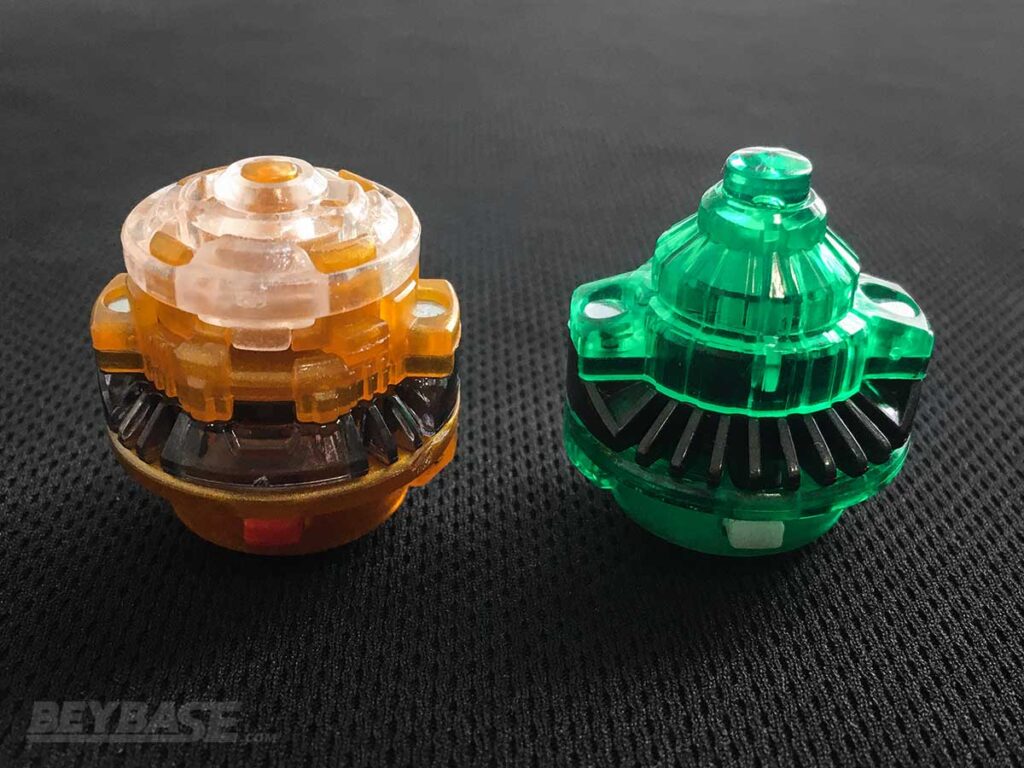
Greatest Raphael & Mobius
As interesting as it is to have a stock combo appear to be better than its customized “meta” counterpart, High Xtend+ Dash Driver isn’t the only tall Stamina Driver. Mobius Driver is about a millimetre taller, and while it is aggressive, it does have high endurance given you aren’t unlucky with a poor “loose” Mobius Driver. That is where we took Greatest Raphael Layer to next.
Greatest Raphael Over (2 Star) Mobius vs. Vanish Bahamut Over (1 Star) Bearing’-0
- GRP.Ov.Mb: 10 wins (10 OS)
- VBH.Ov.Br’-0: 0 wins
- Greatest Raphael Win Percentage: 100%
This is definitely where things got interesting. Previously Vanish Blade would be able to draw with Greatest Raphael at the very least, and certainly not lose quite so badly as this. In this case, Vanish couldn’t come close to a draw even once.
Here we launched in an intermediate strength for earlier Defense Mode and parallel to the slope of the stadium to avoid self-knockout and aggressively combat Vanish. It worked to great effect.
Greatest Raphael Over (2 Star) Mobius vs. Astral Bahamut (1 Star) Bearing’-0
- GRP.Ov.Mb: 10 wins (10 OS)
- ABH.Ov.Br’-0: 0 wins
- Greatest Raphael Win Percentage: 100%
Not too much has changed here compared to the Greatest Raphael Layer’s performance on High Xtend+ Dash, instead things have become even more consistent for it. Astral Blade simply couldn’t keep up and it shows.
Greatest Raphael Over (2 Star) Mobius vs. Devil (F-Gear) Belial 2 Over (1 Star) Bearing’-3
- GRP.Ov.Mb: 2 wins (2 OS)
- DBl2.Ov.Br’-3: 8 wins (8 OS)
- Greatest Raphael Win Percentage: 20%
Unfortunately as promising as Mobius Driver is on the Greatest Raphael Layer, it still can’t seem to compete with the Devil/Dynamite Blade in same-spin matches.
In 2 cases, similar to what was alluded to previously, Raphael was able to destabilize Bearing Dash from above and score victory, but this is not nearly consistent enough and usually is a result of luck or improper launch technique from your opponent.
This is not something that should be counted on, and this win rate is actually higher than what the average would be because of some luck.
Greatest Raphael Over (2 Star) Mobius vs. Astral Belial 2 (1 Star) Bearing’-0
- GRP.Ov.Mb: 0 wins
- ABl2.Ov.Br’-0: 10 wins (10 OS)
- Greatest Raphael Win Percentage: 0%
In this matchup Mobius Driver is objectively worse than High Xtend+ Dash Driver, which is able to reliably outspin Astral in same-spin matchups. A large part of this is because of Mobius Driver’s innate patterning, it does not tightly come back to the center after consecutive hits in the same way the High Xtend+ Driver does.
These minute interactions make it so that cumulative extra hits allow for High Xtend+ Driver to whittle away Astral Blade slightly more and secure victory where Mobius Driver cannot. Mobius Driver consistently loses by a hair here.
The final test for the Greatest Raphael, and a very important determiner of just how good it is in opposite-spin matchups, is how it does against the Drift Driver. Here we have pitted it against the two primary left-spinning Blades that utilize Drift to its full extent: Vanish Blade and Astral Blade.
Greatest Raphael Over (2 Star) Mobius vs. Vanish Bahamut Over (1 Star) Drift-0
- GRP.Ov.Mb: 3 wins (3 OS)
- VBH.Ov.Dr-0: 4 wins (4 OS)
- Greatest Raphael Win Percentage: 43%
- 13 Draws
Greatest Raphael Over (2 Star) Mobius vs. Astral Bahamut Over (1 Star) Drift – 0
- GRP.Ov.Mb: 7 wins (7 OS)
- ABH.Ov.Dr-0: 0 wins
- Greatest Raphael Win Percentage: 100%
- 13 Draws
In this set of tests it really shows just how effective the Greatest Raphael Layer can be. Of utmost importance is launch strength.
Being able to finely balance enough strength to activate the gimmick and enter Defense Mode earlier on, without launching so hard as to allow the opponent to siphon spin, is highly important.
In the Vanish Blade on Drift Driver tests, many many rounds were very hard to call, and it wouldn’t be surprising that depending on the judge, a couple more rounds would have gone to Greatest Raphael. In the end though, it is a very tight matchup with a slight favour to Vanish.
The opposite is true for Astral. When launched correctly as mentioned above, Astral Blade simply doesn’t have what it takes to secure anything more than a draw. Part of the reason could be the height difference that results in hits on Astral Blade that depletes its spin at the last second more frequently than Vanish.
Overall, though, while the Greatest Raphael Layer leaves a whole lot to be desired in same spin matches, it certainly makes up for it with its ability to trounce the opposite spin matchups with reliability, even going toe-to-toe with the most difficult Drift Driver combo yet.
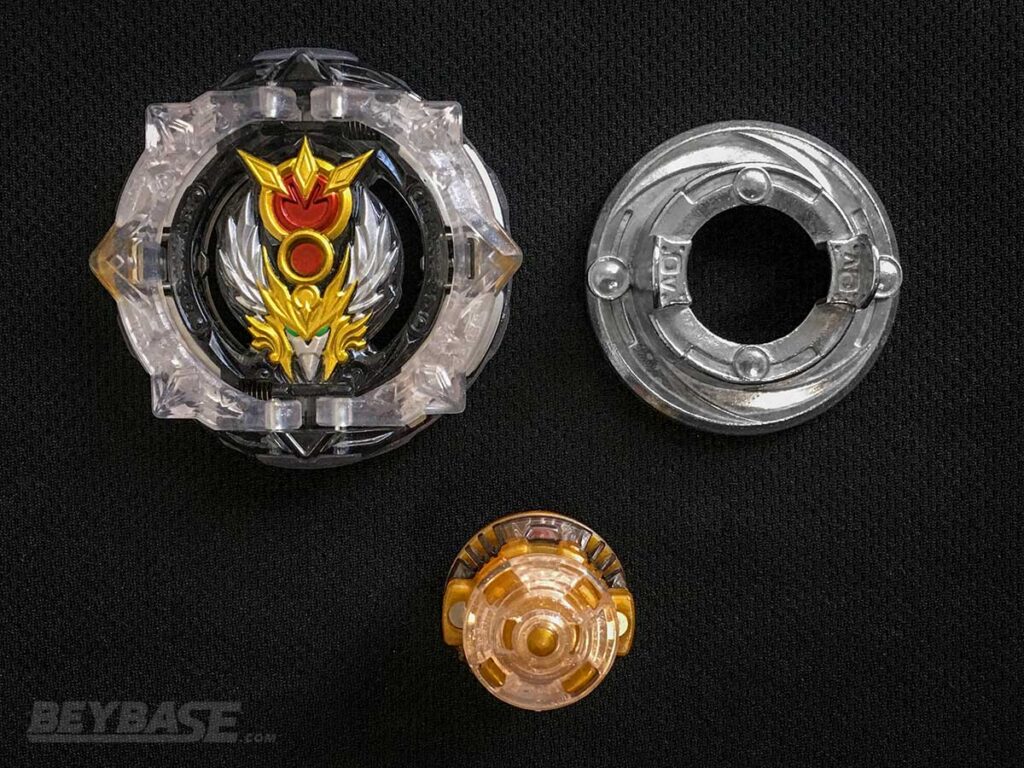
Best Greatest Raphael Combo: Greatest Raphael Over Mobius
How to build GRP.Ov.Mb
-
Greatest Raphael Layer & Over Disk:
-
Mobius Driver (1 of the following):
- B-169 Variant Lucifer Mobius 2D
- B-00 Metal Fight Beyblade 2020 Explosion Set – Hell Kerbecs 0Lift Mobius
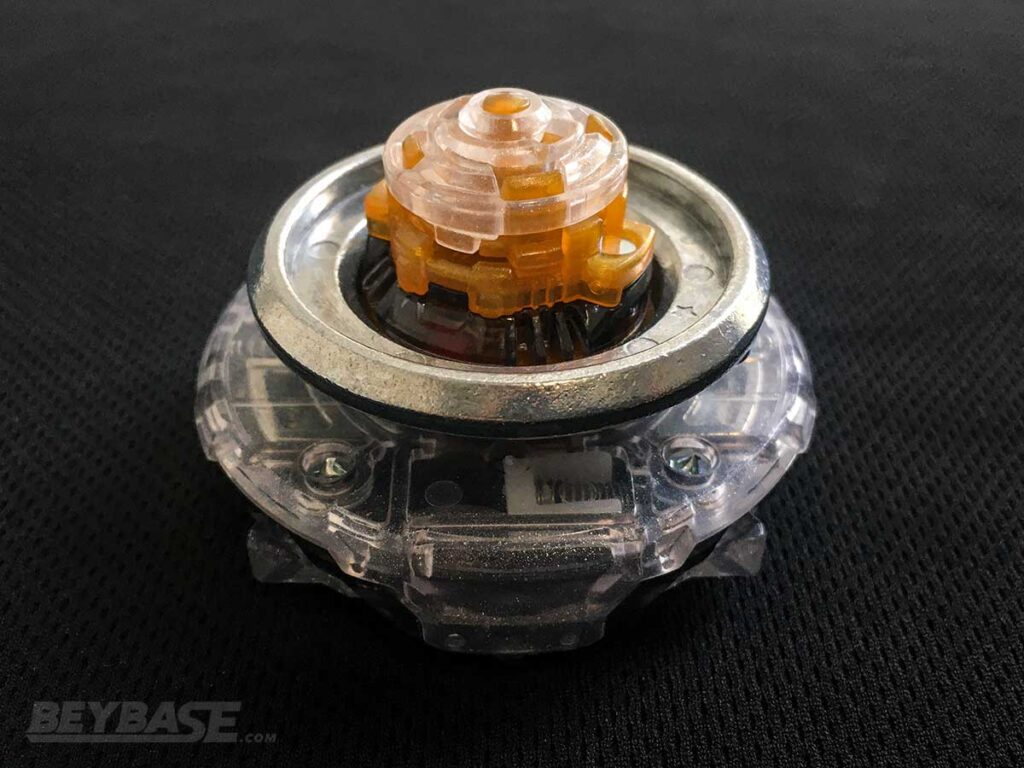
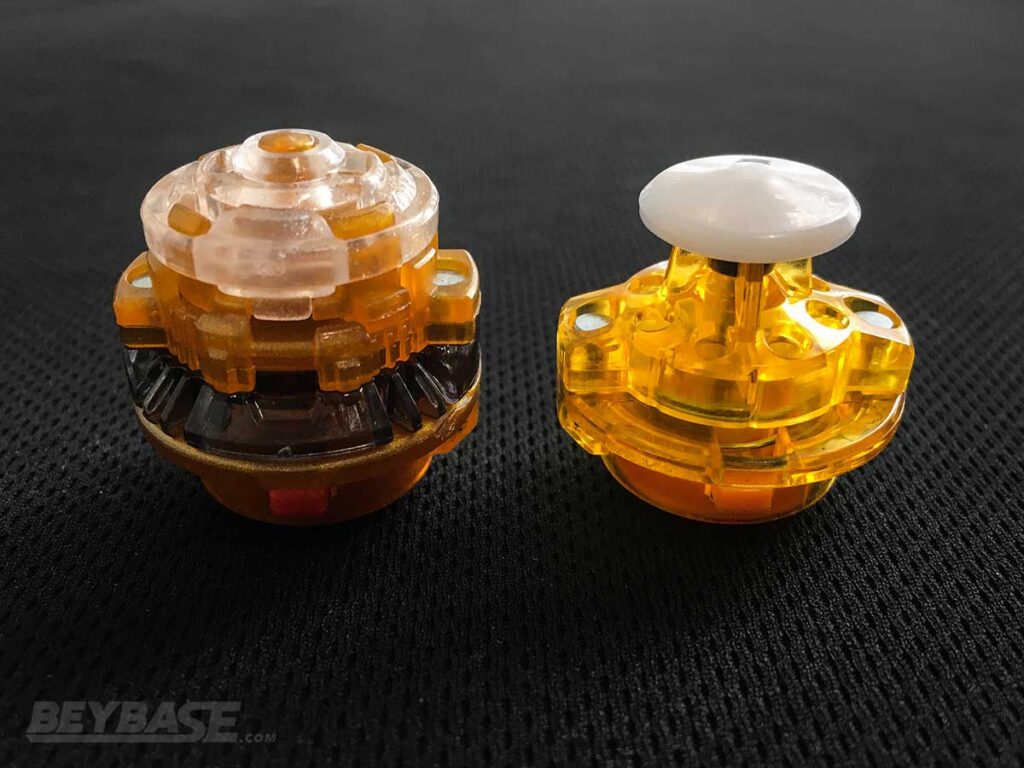
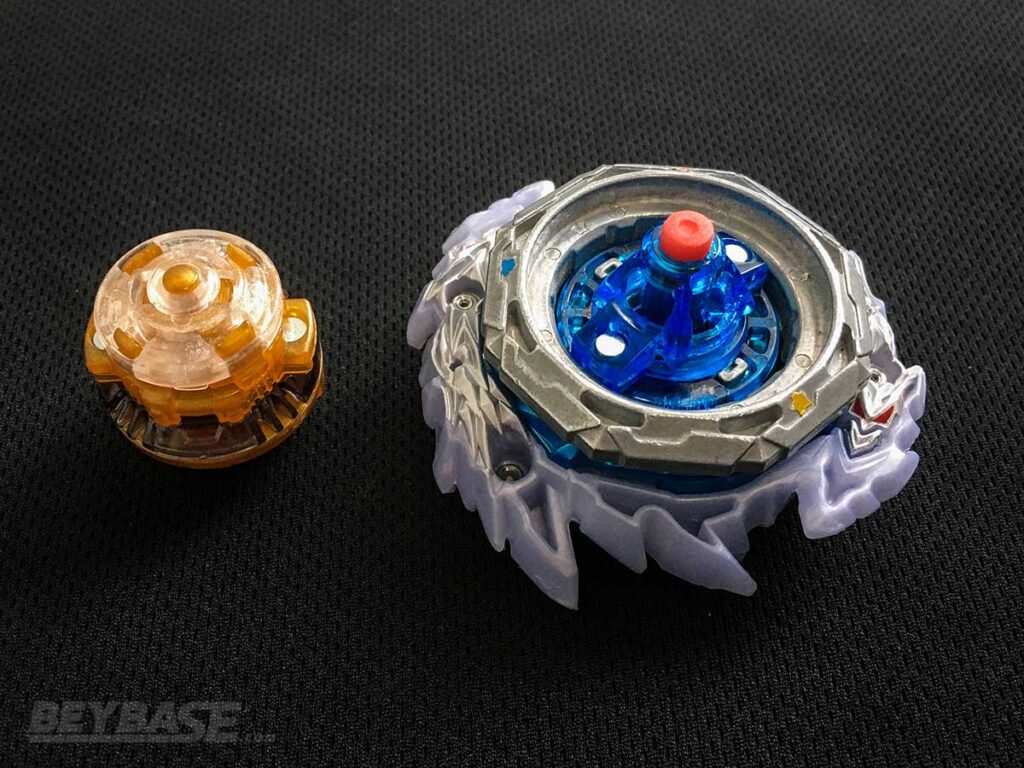
High Xtend+’ Driver Review
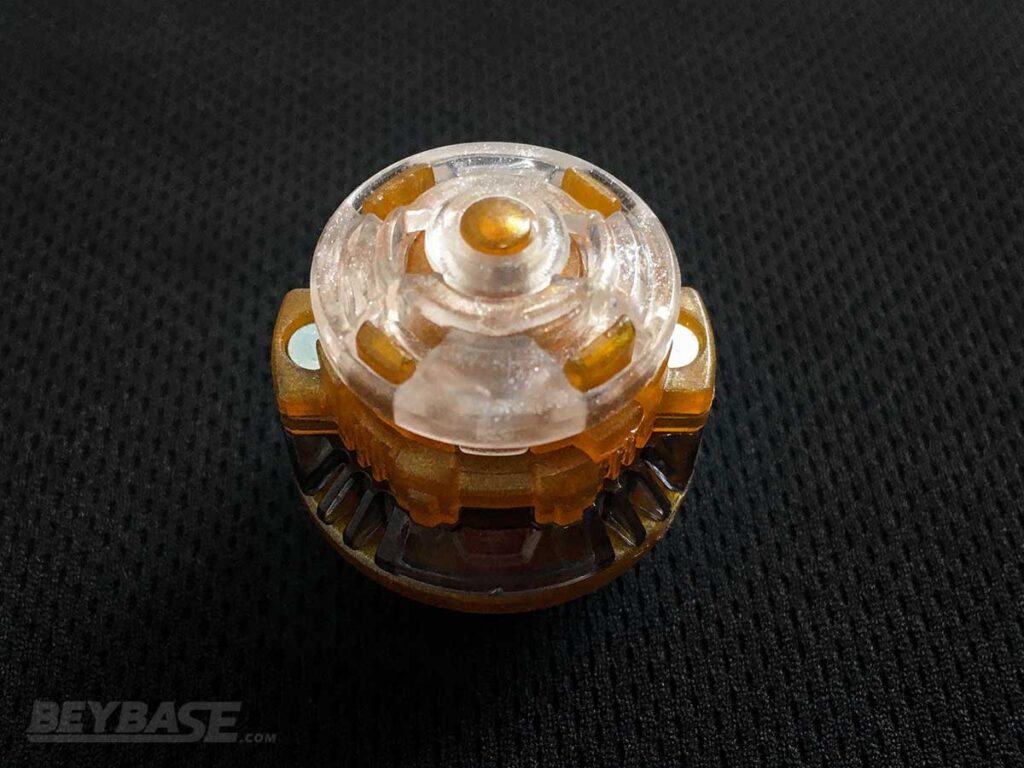
The High Xtend Plus Dash Driver is a new, taller version of the Xtend Plus Driver and features the exact same design and modes as it.
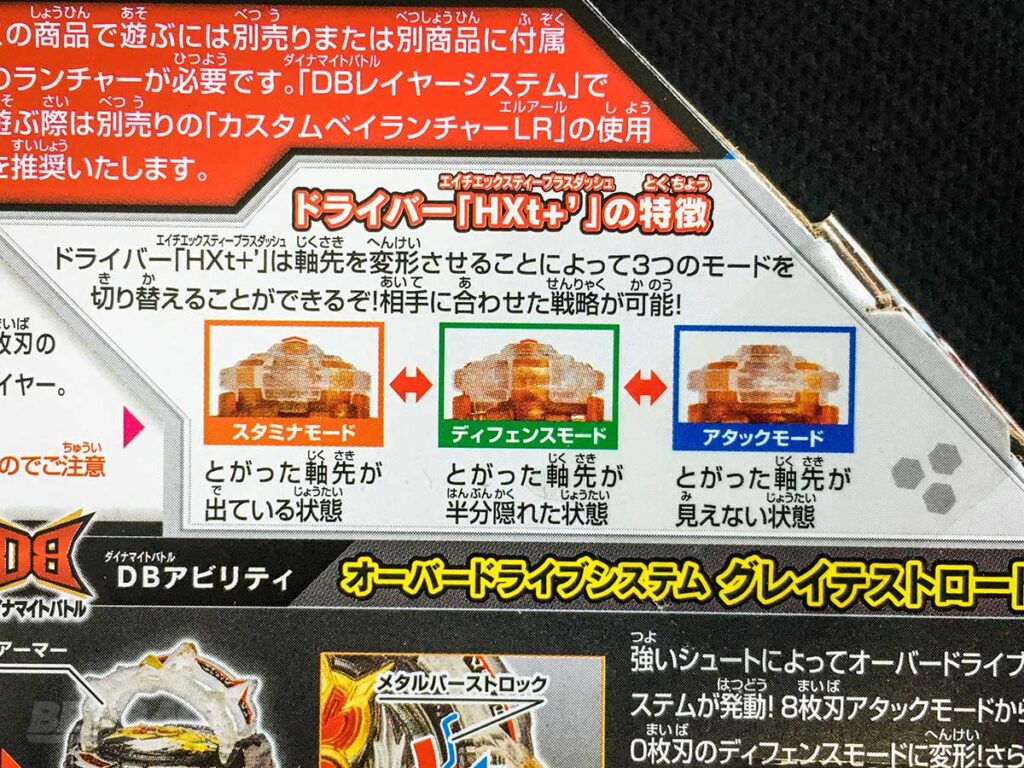
High Xtend+’ Modes
The bottom detachable Driver Chip can be rotated and lowered/raised to expose or hide its sharp tip:
- When the sharp tip is fully exposed, it is in Stamina Mode.
- When the sharp tip is partially covered by the Driver Chip, it is in Defense Mode.
- When the sharp tip is fully concealed by the Driver Chip’s circular hole flat tip and is at its tallest height, it is in Attack Mode.
What Led to the Release of the High Xtend+’ Driver?
Before we dive deep into testing the new High Xtend Plus Dash Driver, I’d like to start by providing some context for its release by:
- Talking about the significance of the original Xtend Plus Driver.
- Talking about when and perhaps why “High Drivers” were introduced.
- Analyzing the current state of the Beyblade Burst stamina metagame.
The Rise & Fall of The Original Xtend+ Driver

After dominating the Beyblade Burst stamina metagame for several years once it was released in 2018 with the B-123 Long BeyLauncher Set, the original Xtend Plus Driver met an abrupt end as the Driver of choice for most competitive players upon the launch of Beyblade Burst Dynamite Battle in 2020.
The reason was simple: despite its incredible same- and opposite-spin stamina, it was too short when paired with the new low-sitting DB Layers and Disks in their–much more popular–Low Mode. And the High Mode of DB Layers didn’t do it any favours in most cases because it forced a gap between the Layer and Disk.
The result was that usage of Xtend+ plummeted in competitive play. It was completely taken over by Drivers like Bearing, which experienced a miraculous resurgence after seeing a diminished role competitively during the previous season, Beyblade Burst Sparking.
The Introduction of “High” Drivers & High Xtend+’

During the Metal Fight Beyblade era, height was a strategic element built inherently into the design of the system for that series with the “Track” pieces that came in various different heights.
Beyblade Burst for years didn’t play with this variable, likely because they were concerned about ensuring the Burst Finish mechanic (which was most effective when there was Layer on Layer contact) would work.
As the series has progressed, focus on the Burst Finish has been reduced, and likely because of Takara-Tomy’s plans to introduce Low/High Modes in Beyblade Burst Dynamite Battle, they started releasing “High” Drivers during Beyblade Burst Sparking, beginning with the High Jaggy Dash Driver and High Blow Dash Driver in B-173 Random Booster Vol. 22.
These two Drivers along with all subsequent “High” Drivers made little to no impact on the metagame, leaving many wondering what their purpose was.
However, Takara-Tomy was obviously staggering the launch of these Drivers by purposely choosing to start with new “High” versions of old Drivers which were already outclassed.
The release of the High Xtend Plus Dash Driver marks the first instance of a “High” Driver where its original counterpart was recently competitive.
The Homogenization of Stamina Type Drivers
One of the difficult areas of the metagame right now is stamina because there are many Drivers with very similar “Life After Death” (opposite spin performance) and not enough clarity around which Drivers have the best same-spin stamina.
Takara-Tomy has been continually been releasing top tier parts in this area over the past several years, but despite some observable differences between each of them, the trait which is normally seen in competitive settings–opposite-spin performance–has largely felt the same across many of them. This has resulted in a bit of a homogenization effect on the stamina metagame.
There are exceptions such as the Mobius Driver–which seems to have the best LAD (when awakened) but not great same-spin stamina–but everything else is kind of a blur, especially when you look at something like the Bearing Driver and Bearing Dash Driver which probably has the best overall combination of these two qualities (granted, it might feel this way more for me because the Mobius Driver hasn’t seen a lot of usage where I play in Toronto until recently).
Before it fell off competitively in 2020, the original Xtend Plus Driver felt like it was in a good place from a gameplay balance perspective because it had slightly worse LAD than parts like the Drift Driver, but clearly had better same-spin stamina.
The blurring of lines between stamina Drivers continued a bit as we were entering the new era where Takara-Tomy was rewriting competitive standards to ensure that everything in the competitive scene would have decent opposite-spin performance, but nevertheless, there was still some clarity between what was best for opposite-spin matchups and what was best for same-spin matchups.
You still sort of had to make a choice as to what you wanted for your stamina combo; there was no ‘safe’ choice, which is what Bearing and Bearing’ feel like right now.
How good is the High Xtend+’ Driver for Stamina-type Beyblades?
With this in mind, the following tests aim to determine not only how good the High Xtend+’ Driver is for stamina-type Beyblades in a general sense, but also if its introduction can bring back some balance to the metagame where there is more definition between the different types of Stamina Drivers.
Testing Notes
- First Beyblade launched alternated every five rounds.
- Bearing’ Driver used in all tests is semi-worn.
- Rise Driver used in all tests semi-worn.
- Mobius Driver used in all tests semi-worn.
- Dynamite Battle Layers used in Low Mode unless otherwise specified.
- High Xtend+’ and Xtend+ used in Stamina Mode unless otherwise specified.
Testing the Stamina of the High Xtend+’ Driver Against Same-Spin Beyblades
High Xtend+’ vs. Xtend+
This was the obvious place to start. How does HXt+’ directly compare to Xt+?
Dynamite (F Gear) Ragnaruk Giga High Xtend+’-6 vs. Dynamite (F Gear) Ragnaruk Giga Xtend+-6
- D(F)RG.Gg.HXt+’-6: 8 wins (8 OS)
- D(F)RG.Gg.Xt+-6: 2 wins (2 OS)
- High Xtend+’ Win Percentage: 80%
High Xtend+’ was the clear winner here.
Even using the smaller Giga Disk to minimize scraping, the Xtend+ Driver was too short and couldn’t stand up as long as High Xtend+’, demonstrating why usage of Xtend+ fell off a cliff when Beyblade Burst DB began.
Dynamite (F Gear) Belial 2 Over Xtend+-6 vs. Tempest Solomon (Metal Chip Core) Wheel Xtend+ 1S
- D(F)BL2.Ov.HXt+-6: 8 wins (8 OS)
- MCC TΣ.Wh.Xt+ 1S: 2 wins (2 OS)
- High Xtend+’ Win Percentage: 80%
Again, High Xtend+’ was the clear winner.
This result is one I expected, but I wanted to verify how HXt+’ would perform against the type of combination that made the original Xt+ so incredibly powerful; one that wasn’t hindered by the lower height of DB Layers. Still, it was no contest. Xt+ only barely won when launched second.
HXt+’ obliterated Xt+ even against MCC TΣ.Wh.Xt+ 1S, the number three combo on my Top 5 Best Beyblade Burst Combos of 2021 list based on Beyblade Burst Sparking from earlier this year.
High Xtend+’ vs. Bearing’
Next up is was this key matchup between High Xtend+’ and the Bearing Dash Driver, which has been absolutely dominant as of late.
Benchmark: Dynamite (F Gear) Ragnaruk Giga Xtend+-6 vs. Dynamite (F Gear) Ragnaruk Giga Bearing’-6
- D(F)RG.Gg.Xt+-6: 1 wins (1 OS)
- D(F)RG.Gg.Br’-6: 9 wins (8 OS, 1 KO)
- Xtend+ Win Percentage: 10%
This benchmark test again demonstrated the problems with the original Xtend+ Driver on DB Layers. It was just too short and scraped the stadium floor way too early.
Dynamite (F Gear) Ragnaruk Giga High Xtend+’-6 vs. Dynamite (F Gear) Ragnaruk Giga Bearing’-6
- D(F)RG.Gg.HXt+’-6: 6 wins (6 OS)
- D(F)RG.Gg.Br’-6: 4 wins (4 OS)
- High Xtend+’ Win Percentage: 60%
This one was pretty close and would probably have benefited from having two testers present.
HXt+’ had the edge as you can see, but I wouldn’t confidently state this to be fact yet. I’d love to hear if any of you have conducted similar tests!
One thing I am wondering is whether a semi-worn Br’ (like the one I used) or a brand new one would perform differently. I believe that a semi-worn Br’ might not fall over as easily, but perhaps the same-spin stamina might be slightly worse, which could be the difference in a matchup like this.
However, assuming these results are in the ball park of what you can expect for a match between these two Drivers, it means that the overall usefulness of HXt+’ is going to depend on how it performs against other Drivers in the same-spin direction as well as how it performs against opposite-spin direction opponents.
Nevertheless, it’s a very good sign that it can go toe-to-toe with one of the top Drivers in the metagame right now in the same-spin direction.
The next few sets of tests are against various other Drivers with good same-spin stamina. If HXt+’ can defeat Br’, it was almost a foregone conclusion that it would also beat these following Drivers. But let’s find out for sure:

High Xtend+’ vs. Never
Dynamite (F Gear) Ragnaruk Giga High Xtend+’-6 vs. Dynamite (F Gear) Ragnaruk Giga Never-6
- D(F)RG.Gg.HXt+’-6: 4 wins (4 OS)
- D(F)RG.Gg.Nv-6: 1 wins (1 OS)
- High Xtend+’ Win Percentage: 80%
Similar to Xtend+ on DB Layers, the Never Driver suffered here because of its inherent low height.
High Xtend+’ vs. Atomic
Dynamite (F Gear) Ragnaruk Giga High Xtend+’-6 vs. Dynamite (F Gear) Ragnaruk Giga Atomic-6
- D(F)RG.Gg.HXt+’-6: 5 wins (4 OS, 1 KO)
- D(F)RG.Gg.At-6: 0 wins
- High Xtend+’ Win Percentage: 100%
The Atomic Driver used to be one that could be used to counter same-spin stamina combos using Xtend+ due to it’s extremely wide ball-shaped tip, but it just couldn’t do it against HXt+’ … we might need a “High Atomic” Driver in order to make that happen.
In several rounds it looked like HXt+’ would lose, but it always managed to squeak out a few more rotations at the very end.
High Xtend+’ vs. Metal Universe
Dynamite (F Gear) Ragnaruk Giga High Xtend+’-6 vs. Dynamite (F Gear) Ragnaruk Giga Metal Universe-6
- D(F)RG.Gg.HXt+’-6: 4 wins (3 OS, 1 KO)
- D(F)RG.Gg.MUn-6: 1 wins (1 OS)
- High Xtend+’ Win Percentage: 80%
High Xtend+’ vs. High Survive
Dynamite (F Gear) Ragnaruk Giga High Xtend+’-6 vs. Dynamite (F Gear) Ragnaruk Giga High Survive-6
- D(F)RG.Gg.HXt+’-6: 7 wins (7 OS)
- D(F)RG.Gg.HS-6: 3 wins (2 OS, 1 KO)
- High Xtend+’ Win Percentage: 70%
High Survive only won when launched second and just doesn’t have the LAD to win, but if you are stronger than your opponent and have a stronger launcher than them … it’s not impossible! I wouldn’t count on it, though.
High Xtend+’ vs. Rise
Dynamite (F Gear) Ragnaruk Giga High Xtend+’-6 vs. Dynamite (F Gear) Ragnaruk Giga Rise-6
- D(F)RG.Gg.HXt+’-6: 4 wins (4 OS)
- D(F)RG.Gg.Rs-6: 1 wins (1 KO)
- High Xtend+’ Win Percentage: 80%
No chance here for Rise to outspin, and the KO strategy (since my Rise Driver is awakened) was not reliable at all.
High Xtend+’ vs. Wave’

Dynamite (F Gear) Ragnaruk Giga High Xtend+’-6 vs. Dynamite (F Gear) Ragnaruk Giga Wave’-6
- D(F)RG.Gg.HXt+’-6: 6 wins (6 OS)
- D(F)RG.Gg.Wv’-6: 4 wins (4 OS)
- High Xtend+’ Win Percentage: 60%
Another really close test. And an interesting one too because Wave’ isn’t a “High Driver”, but was designed to be taller than other Drivers, so it’s on par with HXt+’.
The Wave Driver and Wave Dash Driver have always felt underrated to me, but I’m not sure Wave’ is quite good enough to be worth considering in a competitive situation.
This matchup is reliant heavily on launch strength and given that Wv’ could still only produce a 40% win rate here, it’s difficult to envision using it in a tournament.
If Wv’ win rate was closer to 70%, you’d have a much more interesting dilemma as a competitive player because you would then have to choose between a measurable boost in same-spin stamina versus using other Drivers that have better Life After Death … and really, this is sort of what’s missing from the metagame right now. There are so many stamina Drivers that feel too similar.
In this case, Wv’ is very similar in same-spin stamina, but because it doesn’t have the LAD to back it up, it becomes virtually useless.
Testing the Stamina of the High Xtend+’ Driver Against Opposite-Spin Beyblades
High Xtend+’ vs. Bearing’
The opposite-spin matchup between HXt+’ and Br’ is just as important as the same-spin one. Let’s find out how they compare, first with a benchmark test:
Benchmark: Dynamite (F Gear) Ragnaruk Giga Xtend+-6 vs. Vanish Longinus Over Bearing’-6
- D(F)RG.Gg.Xt+-6: 0 wins
- VLN.Ov.Br’-6: 5 wins (5 OS)
- Xtend+ Win Percentage: 0%
Simple, undeniable further proof demonstrating that Xtend+ is outclassed in the Beyblade Burst Dynamite Battle era.
Dynamite (F Gear) Ragnaruk Over High Xtend+’-6 vs. Vanish Longinus Over Bearing’-6
- D(F)RG.Ov.HXt+’-6: 5 wins (5 OS)
- VLN.OV.Br’-6: 5 wins (6 OS)
- High Xtend+’ Win Percentage: 50%
- 4 Draws
As expected, this matchup was dead even. A brand new sharp Br’ might perform slightly differently, but I did not have one available to compare.
One interesting thing to note however is that most of the wins by HXt+’ were by a larger margin than the ones Br’ won.
Dynamite (F Gear) Ragnaruk Over High Xtend+’-6 vs. Vanish Longinus Over Bearing’-6
- D(F)RG.Ov.HXt+’-6: 5 wins (5 OS)
- VLN.Ov.Br’-6: 5 wins (5 OS)
- High Xtend+’ Win Percentage: 50%
- D(F)RG-6 in High Mode
With D(F)RG-6 in High Mode for this test, the wins by HXt+’ continued to be by a large margin. The win percentage ended up being the same, but a key difference here is the lack of any draws.
To me this indicates that in High Mode, this combination was slightly more volatile. When it won, it won big, but when it lost … it lost. There was no in between, which is what the draws in the previous set represented.
Depending on the context and ruleset being used, the lack of “draw power” may or may not be beneficial to you if you run into a similar matchup at a tournament.
Dynamite (F Gear) Ragnaruk Over High Xtend+’-6 vs. Vanish Longinus Over Bearing’-6
- D(F)RG.Ov.HXt+’-6: 2 wins (2 OS)
- VLN.Ov.Br’-6: 3 wins (3 OS)
- High Xtend+’ Win Percentage: 40%
- 5 Draws
- D(F)RG-6 in High Mode
- HXt+’ in Defense Mode
The draws made a return here. It’s interesting that Defense Mode is what produced them.
Dynamite (F Gear) Ragnaruk Over High Xtend+’-6 vs. Vanish Longinus Over Bearing’-6
- D(F)RG.Ov.HXt+’-6: 2 wins (2 OS)
- VLN.Ov.Br’-6: 4 wins (4 OS)
- High Xtend+’ Win Percentage: 33%
- 2 Draws
- D(F)RG-6 in High Mode
- HXt+’ in Attack Mode
This was the worst result of the day for this matchup. HXt+’ often looked like it could stay upright, but then it just died at the end.
Dynamite (F Gear) Ragnaruk Over High Xtend+’-6 vs. Vanish Longinus Over Bearing’-6
- D(F)RG.Ov.HXt+’-6: 4 wins (4 OS)
- VLN.Ov.Br’-6: 6 wins (6 OS)
- High Xtend+’ Win Percentage: 40%
- 5 Draws
- HXt+’ in Attack Mode
These results were very similar to the first set that used Low Mode on Dynamite Blade and Stamina Mode on HXt+’.
Overall, I find it difficult to discern between using Low Mode on Dynamite and choosing to use Stamina or Defense Mode on HXt+’. I’d say that Stamina Mode is the better of the two simply because it has better same-spin stamina and I’m not sure there is any discernible advantage to using Attack Mode for LAD purposes here … but perhaps one could be observed with more in-depth testing.
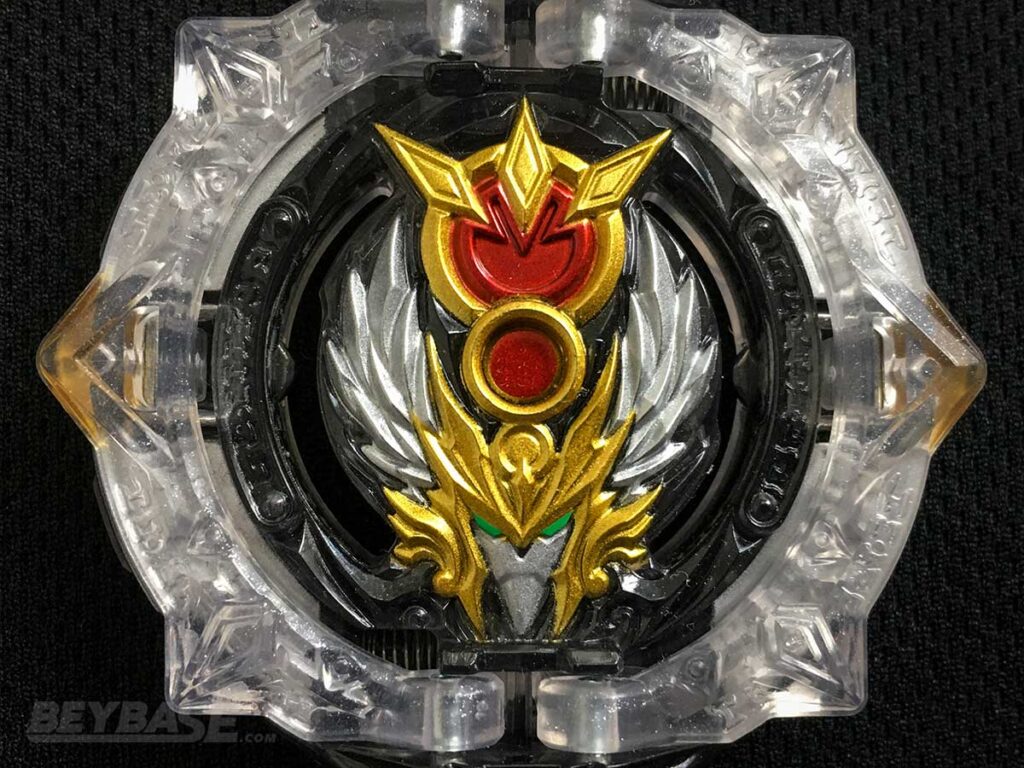
Next up, I decided to have some fun and give Perfect Phoenix a try. I wanted to see if using Perfect Phoenix with a DB Disk and HXt+’ would do well:
Perfect Phoenix (Level Chip) Over High Xtend+’ vs. Vanish Longinus Over Bearing’-6
- LC pP.Ov.HXt+’: 5 wins (5 OS)
- VLN.Ov.Br’-6: 0 wins
- High Xtend+’ Win Percentage: 100%
This was probably the most surprising result of the day for me. As we saw above, the Dynamite Blade with HXt+’ was overall dead even with VLN.Ov.Br’-6 … but somehow LC pP.Ov.HXt+’ managed a 100% win rate here.
It might be due to the sort of raised cone shape of Perfect Phoenix in combination with the contact being made with the perfectly circular Over Disk that stopped Vanish from winning entirely.
At this point, I was curious to understand whether the phenomenon observed in the first set of test results could be reproduced by the similarly shaped Prominence Blade against VLN.Ov.Br’-6. I was correct!:
Prominence Belial Over High Xtend+’-0 vs. Vanish Longinus Over Bearing’-6
- PBL.Ov.HXt+’: 9 wins (9 OS)
- VLN.Ov.Dr-6: 1 wins (1 OS)
- High Xtend+’ Win Percentage: 90%
- 3 Draws
High Xtend+’ vs. Mobius
In our recent Prominence Phoenix review, we demonstrated success with Prominence Belial Over Mobius-10 versus Vanish Longinus Tapered Bearing-0. So, I wanted to pit similar combos up against each other for this review using High Xtend+’ instead of Bearing:
Vanish Longinus Over High Xtend+’-6 vs. Prominence Belial Tapered Mobius-0
- VLN.Ov.HXt+’-6: 3 wins (3 OS)
- PBL.Tp.Mb-0: 7 wins (7 OS)
- High Xtend+’ Win Percentage: 30%
- 2 Draws
- Prominence in Heavy Mode
Mobius again asserted its dominance, showing that High Xtend+’ cannot match the top of the top tier when it comes to LAD.
These results also may have been more lopsided had the Mobius combo been more balanced from the beginning; Vanish got all of its wins before the orientation of PBL.Tp.Mb-0’s Disk and Driver were adjusted half way through.
High Xtend+’ vs. Drift
Next up was the other king of LAD, the Drift Driver:

Perfect Phoenix (Level Chip) Over High Xtend+’ vs. Vanish Longinus Over Drift-6
- LC pP.Ov.HXt+’: 0 wins
- VLN.Ov.Dr-6: 5 wins (5 OS)
- High Xtend+’ Win Percentage: 0%
- 7 Draws
Prominence Belial Over High Xtend+’-0 vs. Roar Bahamut Over Drift-2
- PBL.Ov.HXt+’: 1 win (1 OS)
- RBH.Ov.Dr-2: 9 wins (9 OS)
- High Xtend+’ Win Percentage: 10%
- 1 Draw
Perfect Phoenix, which performed surprisingly well in earlier tests versus Bearing’ was quickly brought back down to earth when put up against VLN.Ov.Dr-6. Despite the seven draws, it couldn’t manage a single round win.
And again, the Prominence Blade performed similarly in a similar matchup.
Vanish Longinus Over High Xtend+’-6 vs. Dynamite (F Gear) Ragnaruk Over Drift-6
- VLN.Ov.HXt+’-6: 1 wins (1 OS)
- D(F)RG.Ov.Dr-6: 4 wins (4 OS)
- High Xtend+’ Win Percentage: 20%
- 4 Draws
In these tests I really noticed how much HXt+’ wobbles in comparison to the Drift Driver. I tried Attack Mode informally for a few rounds after this and it seemed to make no difference.
Next, this benchmark test between Br’ and Dr gives some interesting context to the above test result:
Benchmark: Vanish Longinus Over Bearing’-6 vs. Dynamite (F Gear) Ragnaruk Over Drift-6
- VLN.Ov.Br’-6: 0 wins
- D(F)RG.Ov.Dr-6: 5 wins (5 OS)
- Bearing’ Win Percentage: 0%
- 12 Draws
The HXt+’ versus Dr test results above ended with four draws in order to reach five total wins for both sides combined. But here we have a whopping 12 to reach the same number of conclusive rounds!
Granted, I believe that a worn or semi-worn Br’ like the one used here will put up more of a fight, but nevertheless the Drift Driver seems to be the clear winner between the two when all is said and done.
That being said, in a tournament you may be faced with rules surrounding how to deal with consecutive draws. In the WBO for instance, after three consecutive draws by outspin, the match continues to another Beyblade.
You can therefore use Bearing’ confidently knowing that even if you run into Drift, there is a decent chance you can use its “draw power” to eliminate the combination from contention without having to beat it. During this set, three or more consecutive draws occurred three separate times.
This way, you get the benefit of the same-spin stamina of Bearing’ without having to worry much about losing to opposite-spin … High Xtend+’ on the other hand, doesn’t have the same luxury because it doesn’t have the ability to produce draws as well as Bearing’ does.
Benchmark: Prominence Belial Tapered Mobius-0 vs. Roar Bahamut Over Drift-2
- PBL.Tp.Mb: 8 wins (8 OS)
- RBH.Ov.Dr-2: 12 wins (12 OS)
- Mobius Win Percentage: 40%
- 4 Draws
Finally, this benchmark demonstrates that it is likely the Mobius Driver and Drift Driver which sit atop the LAD tier list. Bearing’ seems to be a close second, and I am tempted to say that overall, High Xtend+’ is very slightly below Bearing’ (a semi-worn one, at least).
High Xtend+’ vs. Rise

Vanish Longinus Over High Xtend+’-6 vs. Dynamite (F Gear) Ragnaruk Over Rise-6
- VLN.Ov.HXt+’-6: 5 wins (5 OS)
- D(F).Ov.Rs-6: 5 wins (5 OS)
- High Xtend+’ Win Percentage: 50%
- 6 Draws
This was par for the course at this point. Awakened Rise continued to demonstrate its longevity and versatility.
How good is the High Xtend+’ Driver Against Attack-type Beyblades?
Finally, the remaining area of concern to evaluate is: how good is the High Xtend+’ Driver against attack-type Beyblades?
The original Xtend+ Driver often felt as if it had poorer KO defense when compared to the Bearing Driver.
High Xtend+’ vs. Metal Xtreme
Dynamite (F Gear) Belial 2 Over High Xtend+’-6 vs. Guilty Bahamut Giga Metal Xtreme-2
- DBL2.Ov.HXt+’-6: 5 wins (4 OS, 1 KO)
- GBH.Gg.MX-2: 5 wins (5 KO)
- High Xtend+’ Win Percentage: 50%
Vanish Longinus Over High Xtend+’-6 vs. Guilty Bahamut Giga Metal Xtreme-2
- VLN.Ov.HXt+’-6: 3 wins (2 KO, 1 OS)
- GBH.Gg.MX-2: 7 wins (5 KO, 2 OS)
- High Xtend+’ Win Percentage: 30%
Benchmark: Dynamite (F Gear) Belial 2 Over Bearing’-6 vs. Guilty Bahamut Giga Metal Xtreme-2
- D(F)BL2.Ov.Br’-6: 6 wins
- GBH.Gg.MX-2: 4 wins
- Bearing’ Win Percentage: 60%
When evaluating these results, it is important to remember that in a real tournament environment, the win percentage for Guilty would likely be lower. I basically needed a perfect, quick, huge hit to knock out Dynamite. And that was with me having the added benefit of shooting Guilty second and having a ‘target’ to hit.
All of that being said, I’m admittedly not a huge fan of the Metal Xtreme Driver due to the rubber material used; in my experience it doesn’t hold a pattern or hit as hard as the Xtreme Dash Driver. So, I gave it a try as well:
High Xtend+’ vs. Xtreme’
Dynamite (F Gear) Belial 2 Over High Xtend+’-6 vs. Guilty Longinus Giga Xtreme’-2
- DBL2.Ov.HXt+r’-6: 4 wins (4 OS)
- GLV.Gg.X’-2: 1 wins (1 KO)
- High Xtend+’ Win Percentage: 80%
- Used Sparking BeyLauncher L for Guilty
Dynamite (F Gear) Belial 2 Over High Xtend+’-6 vs. Guilty Longinus Giga Xtreme’-2
- DBL2.Ov.HXt+r’-6: 1 wins (1 OS)
- GLV.Gg.X’-2: 5 wins (4 KO)
- High Xtend+’ Win Percentage: 20%
- Used Full Custom BeyLauncher LR for Guilty
Benchmark: Dynamite (F Gear) Belial 2 Over Bearing’-6 vs. Guilty Longinus Giga Xtreme’-2
- DBL2.Ov.Br’-6: 1 wins (1 OS)
- GLV.Gg.X’-2: 4 wins (4 KO)
- Bearing’ Win Percentage: 20%
- Used Sparking BeyLauncher L for Guilty
There were a couple interesting things that happened here. The first set was pretty surprising to me as I had conducted the benchmark first and handily defeated Bearing’.
However, when I switched over to the more powerful Full Custom BeyLauncher LR for the second set, GLN.Gg.X’-2 destroyed High Xtend+’ … you might be able to argue that because I was able to achieve an 80% win percentage with Guilty versus Bearing’ with the Sparking BeyLauncher L and only 20% in the same matchup versus High Xtend+’ that HXt+’ is better defensively, but I think the sample size is just too small to make that assertion.
This just shows how difficult it is to evaluate the inherent characteristics of a specific part; they are always influenced by everything else in play from the other parts to even the launchers being used.
In any case, my final impression is that I don’t believe there is any significant difference defensively between HXt+’ and Br’, depending on the context.
Sponsored: Order the newest Beyblades at malloftoys.com!
Heads up: If you buy something through Mall of Toys, you won’t pay any extra, but I’ll get a small commission. This helps me keep things running. Thanks for your support!
The Verdict: How Good is the High Xtend+’ Driver?
High Xtend Plus Dash is a top-tier Driver that all competitive players should own.
It is the first legitimately competitive “High” Driver that Takara-Tomy has released to date and it perfectly solves all of the height issues that plagued the original Xtend+ Driver upon the launch of Beyblade Burst Dynamite Battle.
It is arguably the best same-spin stamina Driver in the standard format Beyblade Burst metagame to date and–like many other recent Drivers–it has solid opposite-spin performance to round out its capabilities.
However, from a critical part design and gameplay balance perspective, High Xtend+’ fails to impress and will likely fail to institute any measurable positive change in the metagame as a whole.
At the end of the day, it is effectively another part in a long line of many with simultaneously strong same- and opposite-spin stamina. To simplify things, High Xtend+’ feels like a very slightly worse copy of Bearing’.
Although, to be fair: it was encouraging to see it lose convincingly to the Drift Driver in opposite-spin. But it seems clear to me that overall, the homogenization of stamina types in Beyblade Burst will be continuing.
This might be more acceptable if attack types were stronger (here’s hoping the Ultimate Valkyrie Layer helps!), but because they don’t feel quite as strong as they should be, it’s a difficult pill to swallow right now.
For players like myself who dive deep into the details, the differences I’ve observed in High Xtend+’ versus other similar Drivers are enough to keep me interested theoretically speaking, but I’m not sure these differences will be particularly obvious in tournament play where you might get a handful or dozen of rounds out of it during a tournament.
Matches are typically only 3 to 5 rounds, after all. We don’t play events requiring 10-20 rounds of conclusive results to determine the winner of a match at a tournament.
Because of how similar HXt’ is to so many other Drivers at first (and second, and third) glance, it makes it even easier for players to construct decks in formats like WBO Deck Format, 3on3 Format, Pick 3, Choose 1 Format, or 5G Format that are maxed out in these categories across all or most of their combinations.
But this is the new standard. Right now, if we evaluate the stamina metagame based on these new standards, it feels as if High Xtend+’ Driver and Bearing Dash Driver sit on the same-spin stamina end of the spectrum, while the Drift Driver and Mobius Driver are the cream of the crop for opposite-spin stamina.
Perhaps now more than ever, it is the minutiae of Beyblade Burst parts, combination crafting, deck building, player skill, knowledge of your opponents, and deep understanding of matchup spreads that will determine who is victorious in the standard format.
If you want to compete at the highest level, you need to own and understand the High Xtend+’ Driver.
The breadth of high performing, competitive Drivers like High Xtend+’ that are available to players continues to grow, making player skill, knowledge of your opponents, and deep understanding of matchup spreads the key components that can help you separate yourself from the competition.
What do you think of Greatest Raphael Over High Xtend+’? Comment below!
If you’re thinking of picking up the B-192 Greatest Raphael Over High Xtend Plus Dash and have any questions, feel free to ask below and I’ll do my best to answer.
And if you’ve already picked it up, I’d love to hear about your thoughts and testing experiences!
Or become a BeyBase HQ member to get early article access and behind-the-scenes updates. Thank you!
22 thoughts on “How Good is B-192 Greatest Raphael Over High Xtend+’? (Beyblade Review)”
Comments are closed.
Related Posts
Beyblade X Custom Line (CX) Buyer’s Guide: Expert Players Review the Best Products for All Skill Levels and Budgets
Beyblade X Buyer’s Guide: Discover the Best Products, Strongest Combos, and How to Play
Kei could I ask where you get your bey cases? and Greatest Raphael looks pretty good over is a good disk for everything overall the layer is great for opposite spin I wonder if it will be good on rise. I hope I’m able to get it for Christmas and if I do ill get to do some testing of my own. But the main thing I wanna ask is do you think high extend+’ will be worth to use even without the oppisite spin stamina?
Hi David. Do you mean the aluminum one I use in tournaments? That was from SRA Cases, although it seems like they’ve stopped selling them now … there should be other retailers that sell those types of cases, though.
If HXt+’ didn’t have the opposite-spin ability that it does, it certainly wouldn’t be as useful given that Bearing’ can do both. It would be closer to being comparable to Wave’ in that case; something which has good same-spin stamina, but not opposite spin.
I thought taller beyblades had worse lad, might just be a mistake.
Not necessarily! It all depends on the context. What is the shape of the tip and other parts, what is the height of the opposing Beyblade …
Great Article Kei! This one really gave me an understanding of how important the same spin meta is, and now I’m thinking of picking up the mobius driver. Personally from what I’ve seen about greatest Raphael I don’t think it’s worth the get for me. I’ve already got the over disc, though 2 wouldn’t hurt for mirror match testing. Greatest Raphael really just seems like Prominence Phoenix but even worse in same spin, sure it’s got more equalization but I think that’s because it’s stuck in high mode and I don’t think the slight boost in equalization when given taller drivers is worth it. High Xtend+’ has got really good same spin against basically any driver you put it up against, and a bit less LAD then something like bearing’ with decent defensive powers. I guess high Xtend+’ would be a good driver to have, but with mall of toys having it at 23$+ and others having it for even more, I don’t think that price is worth it especially because I just got my bearing’ from the DB special starter set a couple days ago. But that’s just my opinion.
I do have to ask though, how do you decide which beys and tournaments to do reviews or reports on? I know you can’t do every single beyblade review or every single tournament report, but how do you decide? Like for example in sparking you could’ve done Hollow Deathscyther instead of Jet Wyvern for a beyblade review. Or instead of The Bey Fraq Qt (apologies if I got the name wrong) tournament you could have done a different tournament when it happened. There’s nothing wrong with your choices of beys or tournaments or anything, I’m just wondering how you choose which ones to do it on. Anyways, great work Kei! I really liked how you went all in for in-depth testing on this!
Thank you, TheRogueBlader! I wouldn’t say Greatest Raphael is a ‘must’ buy, but it’s a strong one nevertheless. Having that second Over Disk is useful, and the High Xtend+’ Driver is top tier. That said, unless you want to be an ultra-competitive player, I would say it’s fair to assert that you don’t ‘need’ it to continue to compete at a high enough level.
I would also agree about the Prominence Blade versus Greatest Raphael Layer. If given the choice, I would probably go with Prominence in every scenario. That said, not everyone is going to have had the chance to buy the set it came with, so Greatest Raphael could be an alternative for players on a budget.
For reviews, I’ve been focusing on doing the latest releases lately. So the next one will be Ultimate Valkyrie. If Beyblade Burst ends, I might then change my strategy and do reviews of other older Beyblades or shift my focus to different types of articles. With regards to something like Jet Wyvern vs. Hollow Deathscyther, I also considered how easily obtainable each release was. Hollow Deathscyther was harder to obtain and thus, not as many people would be interested in it. Jet Wyvern was a regular booster, so the number of people interested in it would be higher, I figured.
For tournaments, I don’t really have a system for deciding that. It’s something I decide on a case-by-case basis based on how much time I have as well as what a particular tournament represents and if there is anything particularly interesting that I think people would like to read about from it. For example, I did reports for some of our tournaments earlier this summer because they were our first of the year and because we were experimenting with some different rulesets. I wanted to communicate my experience using those rules to help contribute to the decision whether they should be used or not in the future.
Was waiting for this! Tks, comprehensive as always. Using Perfect Phoenix was indeed interesting esp given it used to be good on Xt’ pre-DB. Yes would be nice to see how a new Br’ would fare for same spin.
I am curious how HXt’ same spin would go vs Orbit Metal which I think is higher than Atomic. Or even vs slightly worn Hybrid.
For opposite spin, I’m also curious how the Dangerous ring would go on HXT+’ for opposite spin. And for that matter other wide-ish layers that can start to scrape earlier such as Tact, Burn, Wizard & Flare (these 2 would also benefit from the dash spring) and also whether the Paradox disk with protrutions facing downwards would scrape even less with HXt+’. Probably the above would perform similar to if they were on Br’, but having read ur results, they would probably still do better in opposite spin on Drift.
Thank you for reading!
Hm, I’m not too confident in Orbit Metal. I always found Atomic to be better, so that would lead me to presume Om wouldn’t do well. Hybrid however, might have a chance. I’ve always wanted to like Hybrid, but could never really stand how easy it was to knock out.
I think particularly if a “Burst GT” Format comes to fruition, those questions about Tact, Flare, etc will become more important. The Paradox Disk question in particular is interesting to me.
From what I’ve seen in videos The bey does perform well, minus some quality control with it’s Xtend+ chip, so it’s currently on my “Buy” list, though one thing I noticed was, you forgot the Cho-Z Awakening layers when mentioning Greatest Raphael being the first Non-customizable one piece layer we had in a while
Thanks! Somehow I forgot about those Layers. Fixed the article now.
What are your thoughts on the Zone’+z driver now that the high extend+’ driver is released and do you still think it is useful competitively?
It’s useful, but more specialized. It doesn’t have the same-spin stamina to compete with the likes of Bearing’ or High Xtend+’, but it does have slightly better defensive ability. However, especially because both of the aforementioned Drivers are now Dash Drivers, the use case scenarios for Zn’+Z have shrunk even further, I think.
I was thinking if Greatest Raphael will improve its performance if the gimmick doesn’t activate by taping the wings or removing it’s gimmick to act as a normal bey. Even if it’s an illegal method, I wanted to see the results if it changes anything on the layer. As per usual, great article as always Kei!
Thanks, Noctua! And haha, yeah that would be totally illegal … I think a lot of the time gimmicks are actually a detriment to performance. Maybe that is a good thing in some cases, though. To prevent certain parts from being overpowered.
i have greatest raphael already,and so far in my testings, i am beyond impressed. It can beat some of the strongest DB stock combos, Roar Bahamut Giga Moment-10, and Astral on Stamina Quattro. (in opposite spin)this is prob largely due to high xtend+’.
The flaw with Greatest Raphael is the overdrive gimmick. Sometimes against Guilty or any aggressive attack types one of the wings get pushed back, causing it to be unbalanced and lose a lot of stamina.
Tbh, i also wasn’t the most hype about high xtend+’ driver, but it has changed now. i am shocked that in ur testings, perfect phoenix was still relevant. Anyways,great article and run-down as always Kei! sorry if this was long haha
Thanks for reading, John! Yeah, as I mentioned in reply to one of the other comments … gimmicks often are a detriment to performance. Greatest Raphael’s is a perfect example of this haha.
As for Perfect Phoenix, I’d be wary of actually using it in a tournament if I came up against something like Guilty, but it certainly is impressive that it can still compete in stamina matches.
So far for me this is the best stock DB combo so far but it takes some skill because you have to launch it in a specific way. Furthermore, I never realize that the Metal Xtreme is different, does this mean that the gray Xtreme’ is still the preffered Xtreme? Useful information for an attack type dude like me.
It really depends on personal preference. There are slightly differences in most versions of Xtreme, so the best way to find out which one works best for you is to try them all. I talk about my personal preferences in this post here: https://www.instagram.com/p/CXCj8BoNLgF/
I’m wondering how does greatest raphael do with a wheel disk?
I didn’t try it, but … it is very likely outclassed at least for same-spin stamina by DB Disks like Giga and Over.
Excellent article!! Having already picked up Greatest Raphael, I’ve been looking heavily into combos that can really make use of each of the parts. I had two questions:
A) Whats your full opinion on the Wave and Wave’ drivers, outside if you saying they’re underrated? I personable enjoy the driver and would love a better opinion on when/where they can be used. As of now, I have it on my Greatest Raphael as I like the look, don’t own Wave’ or Mobius, and am using HXt+’ on another bey.
B) Do you have any combo recommendations for the HXt+’ driver? As of now, I’m using it heavily on World Lucifer II 2B, but I know that combo isn’t the best usage of such a versatile driver.
Thanks in advance!!
I wore the + part on my high xtend +’ to the point where the driver can move similar to the never driver in defense mode. It has the same original stats along with better attack power, less recoil and better defense plus better life after death. I wore it down by using attack mode in the decagon stadium to speed the process up. It works just fine for me as a substitute for drift, and I think you should try it out!